What is OpenShift?
Enterprise Kubernetes with built-in security, automation, and a complete developer experience.
OpenShift at a Glance
Red Hat OpenShift Container Platform (OCP) is an enterprise Kubernetes distribution. It extends upstream Kubernetes with automated operations, consistent security, and developer tooling. Deploy and manage containerized applications at scale — on-premises, cloud, or edge.
Architecture Overview
Version Alignment — OCP, RHCOS, CRI-O & Kubernetes
Core OpenShift versions are tightly coupled with RHCOS, CRI-O, and Kubernetes. They are tested, qualified, and shipped together as a matched set. The Cluster Version Operator coordinates core platform updates, while layered Operators such as GitOps, Pipelines, ACM, ACS, ODF, and Quay have separate releases and compatibility matrices. RHEL compute nodes also retain a separate operating-system maintenance lifecycle.
RHCOS — Red Hat Enterprise Linux CoreOS
RHCOS is OpenShift's controlled-immutable, container-optimized operating system. It is required for bootstrap and control-plane machines and is the default for compute machines. Supported user-provisioned installations can instead use supported RHEL compute nodes, whose operating-system lifecycle is managed separately.
- Versioned with OCP — RHCOS releases are tied to OpenShift versions; they are tested and qualified together
- Cluster-managed — MCO handles CRI-O configuration, kubelet configuration, authorized container registries, and SSH access configuration
- CRI-O tracks Kubernetes — The CRI-O container runtime version is matched to the Kubernetes version in each OCP release
- Controlled immutability — Host changes are delivered as a tested OS image or declarative machine configuration rather than ad hoc package updates; deployments are transactional and rollback-capable
High-Level Deployment Architecture
OpenShift vs Kubernetes
| Capability | Kubernetes (Upstream) | OpenShift (OCP) |
|---|---|---|
| Operating System | Selected and managed by the cluster operator | RHCOS required for control plane; RHCOS or supported RHEL for eligible compute nodes |
| Installation | Community and vendor-specific tools such as kubeadm | Installer-provisioned, user-provisioned, Assisted, and Agent-based workflows |
| Upgrades | Mechanism and support depend on the chosen distribution | Recommended update graph coordinated by the Cluster Version Operator |
| Networking | CNI implementation selected separately | OVN-Kubernetes is the supported default |
| Ingress | Ingress API; controller selected separately | Ingress Operator, HAProxy router, Kubernetes Ingress, and OpenShift Route |
| Registry | Registry selected separately | Integrated image registry Operator; production storage still requires configuration |
| Security | RBAC and Pod Security Admission primitives | RBAC, SCC, OAuth, and optional install-time FIPS mode |
| Monitoring | Monitoring stack selected separately | Core platform Prometheus and Alertmanager deployed by default |
| CI/CD & GitOps | Tools selected separately | Supported Pipelines (Tekton) and GitOps (Argo CD) Operators; installed separately |
| Operators | Operator frameworks and catalogs are optional | OLM and OperatorHub integration; individual Operators are installed separately |
| Console | Dashboard or vendor UI selected separately | Integrated, RBAC-aware web console with unified perspectives in OCP 4.19+ |
| Support | Varies by Kubernetes distribution and provider | Red Hat subscription support with terms determined by the selected offering |
OpenShift Product Editions
Red Hat offers four self-managed editions that build upon each other. The diagram describes subscription entitlement, not what is automatically deployed: layered capabilities still require their Operators and custom resources to be installed and configured.
Support Tiers
| Feature | Standard | Premium |
|---|---|---|
| Support Hours | 8×5 (business hours) | 24×7 |
| Sev 1/2 Response | Business hours only | Around the clock |
| EUS (Extended Update Support) | Optional add-on | Included |
node-role.kubernetes.io/infra running only platform workloads (router, registry, monitoring) do not count toward subscription. However, on large bare-metal servers it is common to co-locate infra and app workloads on the same worker nodes — in that case the node does count toward subscription since it also runs application containers.
Installation Methods
OpenShift Virtualization
OpenShift Virtualization lets you run traditional virtual machines alongside containers on the same cluster. Based on the KubeVirt project, it wraps QEMU/KVM in Kubernetes-native CRDs.
See the OpenShift Virtualization section for the full KubeVirt architecture, VirtualMachine/DataVolume YAML, live migration mechanics, and MTV migration details.
Nodes & Node Types
Understanding the physical and logical building blocks of an OpenShift cluster.
What is a Node?
A node is a physical or virtual machine that participates in the cluster. Every Linux node runs kubelet, CRI-O, and cluster networking components. RHCOS nodes also run the Machine Config Daemon; supported RHEL compute nodes use a separate operating-system management workflow.
- kubelet — agent ensuring containers run in pods
- CRI-O — lightweight OCI-compliant container runtime
- OVN-Kubernetes — SDN for pod networking
- Machine Config Daemon — applies OS-level configuration on RHCOS nodes
Node Architecture
Node Comparison
| Property | Control Plane | Infrastructure | Worker |
|---|---|---|---|
| Purpose | Cluster brain — runs API Server, etcd, Controller Manager, Scheduler. Manages all cluster state and decisions. | Platform services — runs Ingress Controller (HAProxy), Registry, Prometheus, Alertmanager, Logging. Keeps platform workloads off worker nodes. | Application workloads — runs user pods, deployments, jobs. Where your actual business applications run. |
| OS | RHCOS only | Usually RHCOS; supported RHEL is possible for eligible compute nodes | RHCOS or supported RHEL on eligible user-provisioned compute nodes |
| Schedulable | No (default) | Yes (restricted by taints) | Yes |
| Min Count | 3 (HA) / 1 (SNO) | 2-3 recommended | 2+ (prod) |
| Subscription | Included | Free if only platform workloads | Charged |
Inside Every Node — Component Deep Dive
OpenShift nodes run a common set of Kubernetes and platform services, with some host-management components specific to RHCOS. Understanding what each does is essential for troubleshooting and architecture decisions.
kubelet — The Node Agent
The kubelet is the primary agent on every node. It registers the node with the API server, watches for pod assignments, and ensures containers are running as expected.
- Pod lifecycle management — Creates, starts, stops, and restarts containers via CRI-O
- Image pulling — Pulls container images from registries based on
imagePullPolicy - Volume mounting — Coordinates with CSI drivers to stage and mount persistent volumes
- Health monitoring — Executes liveness, readiness, and startup probes. Restarts containers on liveness failure
- Resource enforcement — Enforces CPU/memory limits via cgroups. Evicts pods when node is under pressure (DiskPressure, MemoryPressure)
- Status reporting — Reports node conditions (Ready, MemoryPressure, DiskPressure, PIDPressure) and resource capacity to API server
- Static pods — On control plane nodes, kubelet manages static pods (etcd, kube-apiserver, kube-controller-manager, kube-scheduler) from
/etc/kubernetes/manifests/
# Check kubelet status on a node oc debug node/<node-name> -- chroot /host systemctl status kubelet # View kubelet logs oc debug node/<node-name> -- chroot /host journalctl -u kubelet --no-pager -n 50 # Check node conditions oc describe node <node-name> | grep -A5 Conditions
CRI-O — Container Runtime
CRI-O is the lightweight, OCI-compliant container runtime used by OpenShift. It implements the Kubernetes Container Runtime Interface (CRI) and completely replaces Docker.
- CRI gRPC interface — kubelet communicates with CRI-O via a Unix socket (
/var/run/crio/crio.sock). CRI-O handlesRunPodSandbox,CreateContainer,StartContainer,StopContainer,RemoveContainer - Image management — Pulls images from registries, stores in local storage. Supports image signing and mirror registries
- Container execution — Uses
runc(orcrun) as the low-level OCI runtime to create Linux containers with namespaces, cgroups, and seccomp - Version tracking — CRI-O version matches the Kubernetes version in each OCP release (e.g., OCP 4.14 = K8s 1.27 = CRI-O 1.27)
- No daemon — Unlike Docker, CRI-O has no long-running background daemon. Each container is a child of CRI-O managed by systemd
- Managed by MCO — CRI-O configuration (registries, runtimes, pids-limit) is delivered via MachineConfig objects. Never edit
/etc/crio/directly
# Check CRI-O status oc debug node/<node-name> -- chroot /host systemctl status crio # List containers on a node via crictl oc debug node/<node-name> -- chroot /host crictl ps # Inspect a container oc debug node/<node-name> -- chroot /host crictl inspect <container-id>
OVN-Kubernetes — Software-Defined Networking
OVN-Kubernetes is the default CNI plugin since OpenShift 4.12. It provides pod networking, service load balancing, and network policy enforcement using Open Virtual Network (OVN) on top of Open vSwitch (OVS).
- Geneve tunnels — Encapsulates pod-to-pod traffic across nodes in Geneve (Generic Network Virtualization Encapsulation) tunnels instead of VXLAN
- Replaces kube-proxy — Service load balancing is done natively in OVN via OVS flows. No iptables rules needed
- Logical topology — Creates logical switches (one per node), logical routers, ports, ACLs (for NetworkPolicy), and load balancers
- NetworkPolicy enforcement — Implemented as OVN ACLs. Stateful firewall applied at the OVS level. Evaluates ingress and egress rules
- EgressIP — Assigns a static source IP to pods in a namespace for outbound traffic. Useful for firewall allow-listing
- Multus — CNI meta-plugin allowing pods to have additional network interfaces (SR-IOV, Macvlan, bridge) alongside the primary OVN interface
CoreDNS — Cluster DNS
CoreDNS is the cluster DNS server providing service discovery. Every pod is configured to use CoreDNS for name resolution.
- Service discovery — Resolves
<service>.<namespace>.svc.cluster.localto the Service ClusterIP - Headless Services — For Services with
clusterIP: None, CoreDNS returns individual pod IPs (A records for StatefulSet pods:pod-0.svc.ns.svc.cluster.local) - External DNS — Forwards queries for non-cluster domains to upstream DNS servers configured on the node
- Managed by DNS Operator — The DNS Operator (openshift-dns-operator namespace) manages CoreDNS pods running as a DaemonSet in the openshift-dns namespace
- Port 53 — Listens on UDP/TCP port 53. When you restrict egress with NetworkPolicy, you must allow port 53 to openshift-dns or DNS resolution breaks
Machine Config Daemon (MCD)
The MCD is the node-level agent of the Machine Config Operator (MCO). It runs on RHCOS nodes and handles supported OS-level configuration delivery. RHEL compute nodes are maintained outside this RHCOS/MCO lifecycle.
- Watches rendered MachineConfig — Each MachineConfigPool (master, worker, infra) has a rendered config. MCD compares current node config with the target
- Delivers configuration — Writes files (e.g., chrony.conf, registries.conf), enables/disables systemd units, sets kernel arguments, manages SSH authorized keys
- Triggers reboot — Most config changes require a node reboot. MCD coordinates: cordon → drain → apply → reboot → uncordon. One node at a time per pool
- Avoid ad hoc SSH changes — Use MachineConfig and supported Operators for persistent RHCOS configuration. Administrators still review changes, monitor rollouts, troubleshoot degraded pools, and maintain recovery access
Node Tuning Operator
The Node Tuning Operator manages node-level performance tuning via Tuned profiles. A tuned DaemonSet pod runs on every node applying sysctl parameters, hugepage allocation, CPU governor settings, and NUMA pinning.
- Default profiles — Ships with profiles for general workloads. Custom profiles for real-time, low-latency, and high-performance computing
- PerformanceProfile CRD — For telco/edge workloads, defines CPU isolation, hugepages, real-time kernel, and NUMA topology
- No reboot needed — Most tuning changes are applied live (unlike MachineConfig changes). Kernel parameters take effect immediately
CSI Node Plugin
Each storage provider runs a CSI Node Plugin as a DaemonSet on every node. It handles the last-mile operations of making storage available to pods.
- NodeStageVolume — Formats the device (if needed) and mounts it to a staging path on the node
- NodePublishVolume — Bind-mounts from the staging path into the pod's mount namespace. The pod sees a regular directory
- Driver registrar — Registers the CSI driver with kubelet so it knows which driver handles which StorageClass
- Multiple drivers — A node can run multiple CSI node plugins simultaneously (e.g., ODF for Ceph + vSphere for VMDKs)
Monitoring & Logging Agents
Every node runs DaemonSet pods for observability:
- node-exporter — Prometheus exporter that collects hardware and OS metrics: CPU usage, memory, disk I/O, filesystem space, network stats. Scraped by platform Prometheus
- Vector (or Fluentd) — Log collector DaemonSet that reads container logs from
/var/log/containers/and journal logs, then forwards to Loki or external log stores - Collector (ACS) — If ACS is installed, CO-RE BPF-based DaemonSet monitors process execution, network connections, and file access on every node for runtime threat detection
Taints, Tolerations & Affinity
How the scheduler decides which node runs each pod — and how you control placement.
Scheduling Decision Flow
Taints & Tolerations
A taint on a node repels pods. A toleration on a pod allows it to schedule on a tainted node. Taints are key=value:effect.
# Add taint to a node oc adm taint nodes worker-1 dedicated=infra:NoSchedule # Pod toleration to match spec: tolerations: - key: "dedicated" operator: "Equal" value: "infra" effect: "NoSchedule" # Remove taint oc adm taint nodes worker-1 dedicated=infra:NoSchedule-
Example: Toleration Matching
Node has taint dedicated=gpu:NoSchedule. Only pods with matching toleration can schedule there.
Node Affinity
# Hard requirement: only schedule in us-east zones spec: affinity: nodeAffinity: requiredDuringSchedulingIgnoredDuringExecution: nodeSelectorTerms: - matchExpressions: - key: topology.kubernetes.io/zone operator: In values: [us-east-1a, us-east-1b]
Infra Node Setup Example
Common design workshop task: dedicate nodes for platform services (router, registry, monitoring) to avoid subscription costs and resource contention.
# 1. Label workers as infra oc label node worker-3 node-role.kubernetes.io/infra="" oc label node worker-4 node-role.kubernetes.io/infra="" # 2. Taint infra nodes (prevent user workloads) oc adm taint nodes worker-3 worker-4 node-role.kubernetes.io/infra=reserved:NoSchedule oc adm taint nodes worker-3 worker-4 node-role.kubernetes.io/infra=reserved:NoExecute # 3. Move Ingress Controller to infra nodes oc patch ingresscontroller/default -n openshift-ingress-operator --type=merge -p \ '{"spec":{"nodePlacement":{"nodeSelector":{"matchLabels":{"node-role.kubernetes.io/infra":""}},"tolerations":[{"key":"node-role.kubernetes.io/infra","value":"reserved","effect":"NoSchedule"},{"key":"node-role.kubernetes.io/infra","value":"reserved","effect":"NoExecute"}]}}}' # 4. Move Monitoring to infra nodes (edit ConfigMap) oc -n openshift-monitoring edit cm cluster-monitoring-config # Add nodeSelector + tolerations under prometheusK8s, alertmanagerMain # 5. Move Registry to infra nodes oc patch configs.imageregistry.operator.openshift.io/cluster --type=merge -p \ '{"spec":{"nodeSelector":{"node-role.kubernetes.io/infra":""},"tolerations":[{"key":"node-role.kubernetes.io/infra","value":"reserved","effect":"NoSchedule"},{"key":"node-role.kubernetes.io/infra","value":"reserved","effect":"NoExecute"}]}}'
Core Resources
The fundamental Kubernetes and OpenShift objects that compose every application deployment.
Container Image Lifecycle
Before a container can run in a Pod, its image must be built and pushed to a registry. Here is how source code becomes a running container.
# Example Dockerfile FROM registry.access.redhat.com/ubi9/python-311:latest COPY . /app RUN pip install -r /app/requirements.txt EXPOSE 8080 CMD ["python", "/app/main.py"] # Build, tag, push podman build -t my-app:v1.0 . podman tag my-app:v1.0 registry.example.com/team/my-app:v1.0 podman push registry.example.com/team/my-app:v1.0
- Dockerfile / Containerfile — Text file with instructions to build image. Each instruction (FROM, COPY, RUN) creates a layer. Use multi-stage builds to reduce final image size.
- Build —
podman buildorbuildah budexecutes Dockerfile. OpenShift also supports BuildConfig for in-cluster builds (S2I, Docker, Custom strategies). - Layers — Images are stacked read-only layers. Base OS at bottom, app code at top. Shared layers between images save disk and pull time.
- Tag — Names image with registry/repository:tag format. Use semantic versioning (
:v1.2.0) not:latestin production. - Push — Uploads layers to registry. OpenShift has built-in registry at
image-registry.openshift-image-registry.svc:5000. External: Quay, Docker Hub, private registries. - Pull — When pod starts, kubelet tells CRI-O to pull image. Pull policy:
Always,IfNotPresent,Never. Use ImagePullSecret for private registries.
How Resources Wire Together
Each resource references others via specific YAML fields. Understanding these connections is key to building and debugging applications.
Resource Quick Reference
| Resource | Scope | Purpose |
|---|---|---|
| Container | Pod | Running process from an image |
| Image | Registry | Immutable binary artifact (OCI format) |
| Pod | Namespace | Smallest deployable unit; wraps 1+ containers |
| Deployment | Namespace | Manages ReplicaSets with rolling updates and rollback |
| ReplicaSet | Namespace | Ensures N pod replicas are running (managed by Deployment) |
| DaemonSet | Namespace | Runs one pod per matching node |
| StatefulSet | Namespace | Ordered pods with stable network IDs and per-pod PVCs |
| ConfigMap | Namespace | Stores non-sensitive config as key-value pairs |
| Secret | Namespace | Stores sensitive data (tokens, passwords) |
| Service | Namespace | Stable VIP + DNS name for pod access |
| Route | Namespace | External hostname with TLS termination |
| Namespace / Project | Cluster | Logical isolation; Project adds default RBAC |
oc new-project instead of kubectl create namespace.
Pod Anatomy — How a Pod Uses Resources
A Pod consumes configuration, secrets, and storage by referencing other Kubernetes objects. Compare this to how a traditional VM gets its config.
ConfigMaps & Secrets
Both decouple configuration from the container image (shown wired into the Pod above). A ConfigMap holds non-sensitive key-value data; a Secret holds sensitive data and is RBAC-protected. A pod consumes either as environment variables or as files in a mounted volume.
# ConfigMap — non-sensitive config apiVersion: v1 kind: ConfigMap metadata: name: app-config data: LOG_LEVEL: info app.properties: | timeout=30 retries=3 --- # Secret — sensitive data (stringData is auto base64-encoded on apply) apiVersion: v1 kind: Secret metadata: name: db-credentials type: Opaque stringData: username: appuser password: s3cr3t-p@ss
# Consume inside a container — three patterns env: - name: LOG_LEVEL # single key as env var valueFrom: configMapKeyRef: { name: app-config, key: LOG_LEVEL } envFrom: - secretRef: { name: db-credentials } # every key as env vars volumeMounts: - name: config-vol # mount as files mountPath: /etc/app
Secret Types
| Type | Purpose |
|---|---|
Opaque | Default — arbitrary user-defined key-value data |
kubernetes.io/dockerconfigjson | Registry pull credentials (used by imagePullSecrets) |
kubernetes.io/tls | TLS cert + key (tls.crt, tls.key) for Routes/Ingress |
kubernetes.io/basic-auth | Username + password for Git/source secrets |
kubernetes.io/service-account-token | Auto-generated token for a ServiceAccount |
immutable: true on stable ones to reduce API-server load and prevent accidental edits.
Deployment In Depth
A Deployment is the primary controller for stateless workloads. It creates and manages ReplicaSets, which in turn create Pods. When you update a Deployment (e.g., new image), it creates a new ReplicaSet and gradually shifts pods from old to new — this is a rolling update.
# Create a deployment oc create deployment nginx --image=nginx:1.25 --replicas=3 # Update image (triggers rolling update) oc set image deployment/nginx nginx=nginx:1.26 # Check rollout status oc rollout status deployment/nginx # Rollback to previous version oc rollout undo deployment/nginx # View revision history oc rollout history deployment/nginx
Namespaces & Projects
Logical isolation boundaries — how OpenShift organizes and secures multi-tenant workloads.
Namespace vs Project
A Namespace is the Kubernetes-native scope for namespaced resources. An OpenShift Project is an alternative, user-facing representation of a Namespace that can carry OpenShift display annotations and is exposed through the Project API. The important distinction is the creation workflow, not two independent isolation objects.
oc new-project submits a ProjectRequest. The cluster's project request template can add annotations, quotas, policies, and a RoleBinding that grants the requester admin. kubectl create namespace creates the underlying Namespace directly and does not run that request template or automatically grant the caller project administration.
Project Anatomy
Default System Namespaces
| Namespace | Purpose |
|---|---|
| openshift-apiserver | OpenShift API Server pods |
| openshift-etcd | etcd cluster members |
| openshift-ingress | Ingress Controller (HAProxy) pods |
| openshift-monitoring | Prometheus, Alertmanager, Thanos |
| openshift-logging | Loki, Vector, logging stack |
| openshift-operators | AllNamespaces operator installs |
| openshift-image-registry | Internal container image registry |
| kube-system | Kubernetes core components |
| default | Default namespace for ad-hoc resources |
Governance Resources
Multi-Tenancy Model
OpenShift provides soft multi-tenancy via namespace isolation. Each team gets their own Project with:
- RBAC — Role-based access scoped to the project. Users cannot see other projects by default.
- Resource Quotas — Cluster admin sets CPU/memory/pod limits per project
- Network Isolation — NetworkPolicy restricts cross-namespace traffic
- Node Isolation — Taints + tolerations can dedicate nodes per team
Common Commands
# Create a new project (with default RBAC)
oc new-project my-app --display-name="My Application"

# Switch to a project
oc project my-app

# List all projects you have access to
oc get projects

# Admin: create project for another user
oc adm new-project team-backend --admin=alice

# Set resource quota
oc create quota compute --hard=cpu=8,memory=16Gi,pods=20 -n my-app

# View current resource usage vs quota
oc describe quota -n my-app

# Delete a project (WARNING: deletes all resources inside)
oc delete project my-app
Pod Lifecycle
Understanding how pods are created, scheduled, run, and terminated in OpenShift.
What is a Pod?
A pod is the smallest deployable unit in Kubernetes/OpenShift. It wraps one or more containers that share the same network namespace (IP address), storage volumes, and lifecycle. Most pods run a single application container.
Pod Lifecycle Flow
Resource Management
requests guarantee a minimum amount of CPU/memory. limits set the maximum. If a container exceeds its memory limit, it gets OOMKilled. If it exceeds CPU limit, it gets throttled.
resources: requests: cpu: "250m" # 0.25 CPU cores guaranteed memory: "256Mi" # 256 MiB guaranteed limits: cpu: "1000m" # Max 1 CPU core (throttled beyond) memory: "512Mi" # Max 512 MiB (OOMKilled beyond)
Quality of Service (QoS) Classes
The kubelet derives a QoS class for every pod from its requests and limits — you don’t set it directly. QoS decides eviction order when a node runs low on memory: lower-priority pods are killed first to protect critical ones.
| QoS Class | Condition | Eviction priority | Typical use |
|---|---|---|---|
| Guaranteed | limits == requests for CPU and memory on every container | Evicted last | Databases, critical stateful workloads |
| Burstable | At least one container has a request set, but not Guaranteed | Evicted middle (those most over their requests first) | Most general-purpose apps |
| BestEffort | No requests or limits set anywhere | Evicted first | Batch jobs, non-critical workloads |
requests == limits for anything that must not be evicted. CPU pressure throttles rather than evicts.
Health Probes
OpenShift uses three probe types (shown in the lifecycle diagram above) to manage container health and traffic. Each can use an httpGet, tcpSocket, exec, or grpc handler.
| Probe | Question it answers | On failure |
|---|---|---|
| startupProbe | Has the app finished starting? | Restart container; disables liveness/readiness until it passes (for slow-starting apps) |
| livenessProbe | Is the container still alive (not deadlocked)? | Restart the container |
| readinessProbe | Can it serve traffic right now? | Remove from Service endpoints (no restart) until it passes |
containers: - name: web startupProbe: # slow boot: allow up to 30 × 10s = 300s httpGet: { path: /healthz, port: 8080 } failureThreshold: 30 periodSeconds: 10 livenessProbe: # restart if deadlocked httpGet: { path: /healthz, port: 8080 } periodSeconds: 10 readinessProbe: # pull from load balancer until deps are up httpGet: { path: /ready, port: 8080 } periodSeconds: 5
livenessProbe (short timeout, hitting a slow endpoint) causes restart loops. Use readinessProbe for dependency checks (DB not ready) and livenessProbe only for true deadlock detection. Use startupProbe for legacy apps with long warm-up.
oc set probe deployment/myapp --readiness --get-url=http://:8080/ready — then watch endpoints update with oc get endpoints myapp -w.
Deployments & Workloads
How to deploy applications and choose the right workload controller on OpenShift.
Deployment Methods
Deployment Sources
| Source | What It Is | When to Use |
|---|---|---|
| Git Repository | Application source code in a git repo (GitHub, GitLab, Bitbucket). OpenShift can build directly from source using S2I or Dockerfile. | Developers pushing code. CI/CD pipelines. No pre-built image available. |
| Container Image | Pre-built OCI image from a registry (Quay, Docker Hub, internal registry). Already contains app + dependencies. | Most common. Image built externally by CI pipeline. Vendor-provided images. |
| Helm Chart | Package of templated Kubernetes YAML manifests with configurable values.yaml. Versioned, reusable, shareable. | Complex apps with many resources. Community-maintained charts. Parameterized deployments. |
| YAML / Kustomize | Raw Kubernetes manifests applied directly. Kustomize adds patching and overlay for environment-specific config. | Full control over resources. GitOps workflows. Environment overlays (dev/staging/prod). |
Deployment Methods
| Method | How It Works | Best For |
|---|---|---|
| oc new-app | Auto-detects source type (git, image, template) and creates Deployment + Service + BuildConfig. One command to go from zero to running app. | Quick start. Dev/test environments. Learning OpenShift. |
| Source-to-Image (S2I) | OpenShift-specific build strategy. Combines source code + builder image (e.g., python-311) → produces runnable image. No Dockerfile needed. | Developers who don’t want to write Dockerfiles. Standardized builds across teams. |
| Helm Install | helm install renders chart templates with values and applies to cluster. Manages releases with upgrade/rollback. | Packaged applications. OperatorHub alternatives. Multi-environment deploys. |
| GitOps (ArgoCD) | OpenShift GitOps operator deploys ArgoCD. Watches git repo, auto-syncs cluster state to match repo. Declarative, auditable. | Production. Multi-cluster. Compliance. Audit trail. Team collaboration. |
| oc apply -f | Applies YAML manifests directly. Supports directories, URLs, kustomize overlays (oc apply -k). | CI/CD pipelines. Scripted deployments. Full manifest control. |
| Tekton Pipelines | OpenShift Pipelines operator. Kubernetes-native CI/CD. Tasks run as pods. Pipeline = ordered tasks (build, test, deploy). | Cloud-native CI/CD. Replace Jenkins. Reusable task catalog. |
# Deploy from container image oc new-app --image=registry.example.com/team/my-app:v1.0 --name=my-app # Deploy from git repo (S2I auto-detect) oc new-app https://github.com/team/my-app.git --name=my-app # Deploy from Helm chart helm install my-app ./chart --set replicas=3 # Deploy from YAML oc apply -f deployment.yaml # Deploy with Kustomize overlays oc apply -k overlays/production/ # Expose app externally oc expose svc/my-app
Workload Controllers
| Controller | Purpose | Use Case |
|---|---|---|
| Deployment | Manages stateless pods via ReplicaSets. Rolling updates, rollback, scaling. | Web apps, APIs, microservices — most workloads |
| StatefulSet | Ordered pod creation with stable network identity (pod-0, pod-1...) and per-pod PVCs. | Databases, Kafka, ZooKeeper, etcd — stateful apps |
| DaemonSet | Runs exactly one pod per node (or per matching node). Auto-scales with cluster. | Monitoring agents, log collectors, CSI drivers, CNI plugins |
| Job | Runs pod(s) to completion, then stops. Tracks success/failure count. | Batch processing, data migration, one-time tasks |
| CronJob | Creates Jobs on a cron schedule. Manages job history (successfulJobsHistoryLimit). | Scheduled reports, backups, cleanup tasks |
Deployment Strategies
Autoscaling
Automatically adjust pod replicas, container resources, and cluster capacity to match workload demand.
Why Autoscaling?
Static resource allocation wastes capacity during low demand and causes outages during spikes. OpenShift provides four complementary autoscaling mechanisms that operate at two distinct levels:
- Pod-level scaling — adjusts the number of pod replicas (HPA) or the CPU/memory requests on each pod (VPA).
- Node-level scaling — adds or removes worker nodes when the cluster itself runs out of schedulable capacity (Cluster Autoscaler + MachineAutoscaler).
Autoscaling Architecture
Autoscaling Mechanisms Comparison
| Mechanism | Scope | What It Changes | API / Kind | When to Use |
|---|---|---|---|---|
| HPA | Pod-level | Replica count of a Deployment, StatefulSet, or ReplicaSet | autoscaling/v2HorizontalPodAutoscaler |
Workloads with variable request rates — web APIs, queue consumers |
| VPA | Pod-level | CPU/memory requests & limits on pod containers | autoscaling.k8s.io/v1VerticalPodAutoscaler |
Right-sizing long-running pods; avoid over/under-provisioning |
| Cluster Autoscaler | Cluster-level | Number of nodes (via MachineSets) — add when pods pending, remove when underused | autoscaling.openshift.io/v1ClusterAutoscaler |
Elastic clusters on IaaS; scale capacity to match demand |
| MachineAutoscaler | Per-MachineSet | Min/max replica bounds for a specific MachineSet | autoscaling.openshift.io/v1beta1MachineAutoscaler |
Limit per-AZ or per-instance-type node counts; required companion for Cluster Autoscaler |
HPA — Horizontal Pod Autoscaler
HPA watches metrics (CPU utilisation, memory, or custom/external metrics) and adjusts the replicas field on a target workload controller. It runs a control loop every 15 seconds by default and uses the autoscaling/v2 API for multi-metric and custom metric support.
HPA YAML Example
apiVersion: autoscaling/v2 kind: HorizontalPodAutoscaler metadata: name: my-app-hpa namespace: my-project spec: scaleTargetRef: apiVersion: apps/v1 kind: Deployment name: my-app minReplicas: 2 maxReplicas: 10 metrics: - type: Resource resource: name: cpu target: type: Utilization averageUtilization: 70 # scale up when avg CPU > 70% - type: Resource resource: name: memory target: type: Utilization averageUtilization: 80 behavior: scaleDown: stabilizationWindowSeconds: 300 # wait 5 min before scaling down policies: - type: Percent value: 25 periodSeconds: 60
# Quick HPA via CLI oc autoscale deployment/my-app --min=2 --max=10 --cpu-percent=70 # Check HPA status oc get hpa my-app-hpa # NAME REFERENCE TARGETS MINPODS MAXPODS REPLICAS # my-app-hpa Deployment/my-app 45%/70% 2 10 3
VPA — Vertical Pod Autoscaler
VPA analyses historical and real-time resource usage and recommends (or applies) right-sized CPU and memory requests. On OpenShift it is delivered by the VerticalPodAutoscaler Operator installed from OperatorHub.
VPA Modes
| Mode | Behaviour | When to Use |
|---|---|---|
| Off | Calculates recommendations only — does not apply them. View with oc get vpa -o yaml. | Audit existing workloads without risk. First step for any new VPA rollout. |
| Initial | Sets requests at pod creation time only. Running pods are not restarted. | Batch jobs, CronJobs — each new pod gets optimised requests. |
| Auto | Updates requests on running pods (evicts and recreates with new values). | Long-running workloads where occasional restarts are acceptable. |
VPA YAML Example
apiVersion: autoscaling.k8s.io/v1 kind: VerticalPodAutoscaler metadata: name: my-app-vpa namespace: my-project spec: targetRef: apiVersion: apps/v1 kind: Deployment name: my-app updatePolicy: updateMode: Auto # Off | Initial | Auto resourcePolicy: containerPolicies: - containerName: '*' minAllowed: cpu: 100m memory: 64Mi maxAllowed: cpu: 2 memory: 2Gi
Cluster Autoscaler
The Cluster Autoscaler is a cluster-scoped singleton CR that watches for unschedulable pods (pods stuck in Pending because no node has enough resources). When detected, it triggers a scale-up of the appropriate MachineSet. It also scales nodes down when they are underutilised and their pods can be rescheduled elsewhere.
ClusterAutoscaler YAML
apiVersion: autoscaling.openshift.io/v1 kind: ClusterAutoscaler metadata: name: default # must be named "default" (singleton) spec: podPriorityThreshold: -10 # ignore pods with priority below this resourceLimits: maxNodesTotal: 24 # hard cap on total cluster nodes cores: min: 8 max: 256 memory: min: 16 max: 1024 # GiB scaleDown: enabled: true delayAfterAdd: 10m # wait after adding a node delayAfterDelete: 5m unneededTime: 5m # node must be underused this long balanceSimilarNodeGroups: true
MachineAutoscaler
A MachineAutoscaler sets the minReplicas and maxReplicas bounds for a single MachineSet. Create one MachineAutoscaler per MachineSet (typically one per availability zone or instance type). The Cluster Autoscaler uses these bounds when deciding which MachineSet to scale.
MachineAutoscaler YAML
apiVersion: autoscaling.openshift.io/v1beta1 kind: MachineAutoscaler metadata: name: worker-us-east-1a namespace: openshift-machine-api spec: minReplicas: 1 maxReplicas: 6 scaleTargetRef: apiVersion: machine.openshift.io/v1beta1 kind: MachineSet name: cluster-abc-worker-us-east-1a
How They Work Together
In a well-configured cluster, autoscaling forms a chain reaction:
- HPA increases pod replicas when request load rises.
- New pods go Pending if existing nodes lack capacity.
- Cluster Autoscaler detects unschedulable pods and picks a MachineSet that can satisfy the request.
- MachineAutoscaler bounds constrain how many new Machines (nodes) that MachineSet can add.
- The MachineSet creates a new Machine → the Machine API provisions a VM/instance → it joins as a new worker node.
- Pending pods are scheduled onto the new node.
- When load drops, HPA reduces replicas, the Cluster Autoscaler detects underused nodes, and scales them down (respecting PDBs).
maxNodesTotal on the Cluster Autoscaler to prevent runaway costs. Create one MachineAutoscaler per MachineSet per availability zone, and set minReplicas ≥ 1 to maintain HA spread.
oc autoscale deployment/my-app --min=2 --max=8 --cpu-percent=60 — then generate load with oc run load --image=busybox --restart=Never -- /bin/sh -c "while true; do wget -q -O- http://my-app:8080; done" and watch replicas scale with oc get hpa -w.
Installation & Bootstrap
How OpenShift clusters are installed across different platforms, and the bootstrap process that brings a cluster to life.
Installation by Platform
VMware vSphere — IPI vs UPI
VMware vSphere supports both IPI and UPI. IPI automates everything; UPI gives full control at cost of manual steps.
| Task | IPI (Installer-Provisioned) | UPI (User-Provisioned) |
|---|---|---|
| Build Network | Automated | Manual |
| Setup Load Balancer | Automated | Manual |
| Configure DNS | Automated | Manual |
| Hardware Provisioning | Automated | Manual |
| OS Installation | Automated (RHCOS PXE/ISO) | Manual (RHCOS ISO/PXE) |
| Ignition Configs | Generated & applied automatically | Generated, manually applied |
| Node Scaling | MachineSet auto-scaling | Manual node addition |
IPI vs UPI Decision Matrix
| Requirement | IPI | UPI |
|---|---|---|
| DHCP | Required | Optional (static IPs) |
| DNS | Auto-configured | Pre-configured required |
| vCenter Privilege | Admin-level required | Read-only sufficient |
| Node Naming | Auto-generated | Custom naming |
| External Load Balancer | Auto-provisioned | Pre-configured required |
| IP Assignment | DHCP only | Static or DHCP |
Bootstrap Process
The bootstrap process is a temporary, self-destructing sequence that brings the cluster from zero to a running control plane.
Network Connectivity Ports
| Protocol | Port Range | Purpose |
|---|---|---|
| TCP | 6443 | Kubernetes API server |
| TCP | 22623 | Machine Config Server (bootstrap) |
| TCP | 2379-2380 | etcd server + peer communication |
| TCP | 9000-9999 | Host-level services (node exporter, etc.) |
| TCP | 10250-10259 | Kubernetes node ports (kubelet, controllers) |
| TCP | 30000-32767 | NodePort services |
| UDP | 4789 | VXLAN (legacy SDN) |
| UDP | 6081 | Geneve (OVN-Kubernetes) |
| UDP | 9000-9999 | Host-level services |
| TCP/UDP | 500, 4500 | IPsec (if enabled) |
Agent-Based Installer
Generates a single bootable ISO containing the Assisted Service, discovery agent, and OCP release image. Fully self-contained — no external service or internet needed. One host acts as the rendezvous host, running the Assisted Service locally.
Disconnected / Air-Gapped Installation
A mirror registry is an OCI-compliant container image registry that holds copies of images from external sources (Red Hat registries, Docker Hub, etc.). In disconnected environments, it replaces internet-based registries entirely — all nodes pull images from it instead of going online.
How it works: Use the supported
oc-mirror --v2 workflow to select and mirror OCP release payloads, Operator catalogs, and additional images. It supports registry-to-registry and file-based workflows for fully disconnected sites. Apply the generated cluster resources, including ImageDigestMirrorSet (IDMS), ImageTagMirrorSet (ITMS), catalog resources, and update-service configuration as required.Registry options: The mirror registry for Red Hat OpenShift is a small-scale registry included with an OpenShift subscription. Production deployments can use Red Hat Quay or a compatible third-party registry, but the registry must be reachable by every cluster machine and should match the cluster's availability requirements. The OpenShift integrated image registry cannot be the mirroring target.
Legacy note:
ImageContentSourcePolicy (ICSP) and oc-mirror v1 are deprecated. Agent-based installation still consumes mirror mappings in install-config.yaml; use the output and procedure documented for the exact installer and OCP release.Day-2: Preserve the oc-mirror v2 workspace/cache and repeat the workflow for release and Operator updates. Review generated resources and available update edges before starting a disconnected cluster update.
Bare Metal — Assisted Installer
Red Hat’s SaaS-hosted installation service at console.redhat.com or deployable on-prem via the Infrastructure Operator (part of MCE/RHACM). Provides a web UI and REST API for guided cluster deployment.
Networking & Routes
How traffic flows from external clients to your application pods inside OpenShift.
Network Architecture
OpenShift has three distinct networks, each serving a different purpose:
- Host Network (Physical) — Real routable IPs on node NICs. Carries API (:6443), etcd (:2379), kubelet (:10250), and Geneve tunnel traffic. The only network with actual packets on the wire.
- Service Network (Virtual) — ClusterIP range 172.30.0.0/16. No real interface exists — OVN-Kubernetes implements via OVS flow rules. CoreDNS resolves service names to ClusterIPs.
- Pod Network (Overlay) — Each pod gets a unique IP from 10.128.0.0/14. Each node gets a /23 subnet (510 IPs). Cross-node traffic tunneled via Geneve (UDP 6081) over Host Network.
Ingress Traffic Flow
How Services Work
A Service provides a stable VIP and DNS name for a set of pods. It uses label selectors to dynamically discover backend pods. When pods scale or restart, endpoints update automatically.
Routes & Ingress Controller
A Route exposes a Service to external traffic via a hostname. The Ingress Controller (HAProxy) watches Route objects and configures proxying rules automatically.
MetalLB — LoadBalancer Services on Bare Metal
On a cloud provider, a Service of type LoadBalancer automatically gets a real external IP via the cloud's LB API. Bare-metal clusters have no such API — MetalLB fills that gap, assigning IPs from a pool you own and announcing them to the local network so external routers/switches know where to send traffic.
| Mode | How Traffic Arrives | Trade-offs |
|---|---|---|
| Layer 2 (L2) | One node is elected leader for each IP and answers ARP (IPv4) / NDP (IPv6) requests for it — all traffic for that IP enters through that single node. | Simple, no router config needed. Not true load balancing (one node is the bottleneck) and failover takes a few seconds. |
| BGP | Every node peers with an upstream router and advertises a route for each service IP; the router ECMP-balances traffic across all nodes. | True multi-node load balancing and fast failover, but requires a BGP-speaking router and network team coordination. |
# Pool of external IPs MetalLB can hand out apiVersion: metallb.io/v1beta1 kind: IPAddressPool metadata: name: apps-pool namespace: metallb-system spec: addresses: - 192.168.1.240-192.168.1.250 --- # Announce that pool via Layer 2 (ARP/NDP) apiVersion: metallb.io/v1beta1 kind: L2Advertisement metadata: name: apps-l2 namespace: metallb-system spec: ipAddressPools: - apps-pool
LoadBalancer Service instead of hand-configuring an external VIP — a frequent choice for bare-metal/UPI clusters covered in the Installation & Bootstrap section.
Cluster Network Defaults
| Network | Default CIDR | Details |
|---|---|---|
| Pod Network | 10.128.0.0/14 | /23 per node = 512 subnets, 510 IPs per node |
| Service Network | 172.30.0.0/16 | 65,534 ClusterIP addresses |
| Host Network | Infrastructure-dependent | Physical/VM network connecting nodes |
api.<cluster>.<domain> → API LB VIP (port 6443) — control plane access
api-int.<cluster>.<domain> → Internal API LB — node-to-API communication
*.apps.<cluster>.<domain> → Ingress LB VIP (ports 443/80) — application routes
See Installation & Bootstrap section for full DNS and load balancer details.
OVN-Kubernetes
OVN-Kubernetes is the default CNI plugin since OpenShift 4.12. It replaces the legacy OpenShift SDN.
- Encapsulation: Uses Geneve tunnels (not VXLAN)
- Logical networking: Creates logical switches, routers, ports, ACLs, and load balancers
- No kube-proxy: OVN handles service load balancing natively via OVS flows
- NetworkPolicy: Enforced via OVN ACLs for microsegmentation
EgressIP
By default, outbound traffic from pods uses the node IP as source. This is a problem when external firewalls need to whitelist your cluster — you'd need to allow ALL node IPs, and they change when nodes scale. EgressIP assigns a predictable, static source IP to all outbound traffic from a namespace.
# 1. Label nodes as egress-assignable oc label node worker-1 k8s.ovn.org/egress-assignable="" oc label node worker-2 k8s.ovn.org/egress-assignable="" # 2. Create EgressIP object oc apply -f - <<EOF apiVersion: k8s.ovn.org/v1 kind: EgressIP metadata: name: my-app-egress spec: egressIPs: - 192.168.1.155 namespaceSelector: matchLabels: kubernetes.io/metadata.name: my-app EOF # 3. Verify EgressIP assignment oc get egressip oc get egressip my-app-egress -o yaml
Multus CNI
Multus is a meta-plugin — it does not provide networking itself but delegates to other CNI plugins. Every OpenShift pod already gets a primary interface (eth0) from OVN-Kubernetes. Multus lets you attach additional interfaces (e.g., net1, net2) using plugins like macvlan, SR-IOV, bridge, or IPVLAN. This is essential for telco/NFV workloads that need dedicated data-plane networks, storage networks, or direct L2 access to physical infrastructure.
NetworkPolicy governs the default or primary pod network. For supported Multus secondary networks, a cluster administrator can enable the MultiNetworkPolicy API and target a NetworkAttachmentDefinition. When that feature or plugin support is unavailable, enforce secondary-network security with VLAN ACLs, firewalls, and other infrastructure controls.
SriovNetwork CRs).
Secondary CNI Plugin Comparison
| Plugin | Layer | Use Case | Operator Needed |
|---|---|---|---|
| Macvlan | L2 | Direct physical network access — pod gets its own MAC on the host NIC | No |
| SR-IOV | Hardware | Telco / NFV — VF passthrough, near-native NIC performance, DPDK | Yes (SR-IOV Network Operator) |
| Bridge | L2 | Pod-to-pod on same node via Linux bridge | No |
| IPVLAN | L3 | Like macvlan but shared MAC address — fewer switch-level issues | No |
| Host-device | L2 | Move entire host NIC into pod network namespace | No |
apiVersion: k8s.cni.cncf.io/v1 kind: NetworkAttachmentDefinition metadata: name: macvlan-conf namespace: my-project spec: config: '{ "cniVersion": "0.3.1", "type": "macvlan", "master": "ens4", "mode": "bridge", "ipam": { "type": "whereabouts", "range": "192.168.1.0/24", "exclude": ["192.168.1.0/32", "192.168.1.1/32"] } }'
apiVersion: v1 kind: Pod metadata: name: my-multi-nic-pod annotations: k8s.v1.cni.cncf.io/networks: macvlan-conf # attach net1 spec: containers: - name: app image: registry.redhat.io/ubi9/ubi:latest command: ["sleep", "infinity"] # Verify inside the pod: # oc exec my-multi-nic-pod -- ip a # eth0 → 10.128.2.15 (OVN-K, cluster network) # net1 → 192.168.1.50 (macvlan, physical network)
# Step 1: SriovNetworkNodePolicy — configure VFs on physical NIC apiVersion: sriovnetwork.openshift.io/v1 kind: SriovNetworkNodePolicy metadata: name: policy-dpdk namespace: openshift-sriov-network-operator spec: nodeSelector: feature.node.kubernetes.io/network-sriov.capable: "true" numVfs: 8 nicSelector: pfNames: ["ens5f0"] deviceType: vfio-pci # for DPDK; use netdevice for kernel driver resourceName: dpdk_nic --- # Step 2: SriovNetwork — auto-creates NetworkAttachmentDefinition apiVersion: sriovnetwork.openshift.io/v1 kind: SriovNetwork metadata: name: sriov-dpdk-net namespace: openshift-sriov-network-operator spec: networkNamespace: my-project resourceName: dpdk_nic ipam: '{ "type": "whereabouts", "range": "10.10.10.0/24" }'
Deployment Strategies via Routes
alternateBackends in Route spec.NetworkPolicy
NetworkPolicy
Kubernetes-native microsegmentation — control which pods can talk to which at the network level.
How NetworkPolicy Works
from item, all selectors are ANDed (podSelector AND namespaceSelector must both match). Across multiple from items, they are ORed (match ANY item). This is the most common source of confusion.
# Allow DNS egress (add to every namespace with deny-all) apiVersion: networking.k8s.io/v1 kind: NetworkPolicy metadata: name: allow-dns spec: podSelector: {} policyTypes: [Egress] egress: - to: - namespaceSelector: matchLabels: kubernetes.io/metadata.name: openshift-dns ports: - port: 53 protocol: UDP - port: 53 protocol: TCP
# View policies in a namespace oc get networkpolicy -n my-app # Test connectivity between pods oc exec deploy/frontend -- curl -s -o /dev/null -w "%{http_code}" http://backend:8080/health
Storage & CSI Drivers
How persistent storage works in OpenShift using the Container Storage Interface.
Storage Architecture
Static vs Dynamic Provisioning
Reclaim Policies
| Policy | Behavior | Notes |
|---|---|---|
| Retain | PV persists after PVC deletion; admin must manually clean up | Safe for important data; requires manual intervention |
| Delete | PV and backend storage are automatically deleted when PVC is removed | Dynamic provisioning only; default for most cloud StorageClasses |
Volume Binding Mode
volumeBindingMode is a field on the StorageClass that controls when a PVC is actually bound to a PV — immediately on PVC creation, or only once a Pod that uses it has been scheduled to a node.
| Immediate | WaitForFirstConsumer | |
|---|---|---|
| When binding happens | As soon as the PVC is created | After a Pod using the PVC is scheduled |
| PVC state before pod exists | Bound | Pending (normal, expected) |
| Topology awareness | None — provisioner picks blind | Scheduler-driven — volume follows the chosen node |
| Typical use | Network storage reachable from every node (Ceph, NFS) | Zonal cloud disks, local storage, LVM Storage |
| Default when unspecified | Immediate | |
volume node affinity conflict error. For local disks or LVM storage, the volume is pinned to a specific node before the scheduler ever weighs CPU, memory, or affinity rules — the Pod can end up stuck Pending forever if that node can't also satisfy the pod's other requirements.
thin-csi), cloud provider StorageClasses (AWS EBS gp3-csi, Azure Disk), and LVM Storage all ship with WaitForFirstConsumer by default. ODF's ceph-rbd / cephfs StorageClasses ship with Immediate — that's fine because Ceph is reachable from every node in the cluster. Seeing a PVC sit in Pending under a WaitForFirstConsumer StorageClass before any pod uses it is normal, not an error.
Access Modes
| Mode | Abbreviation | Description | Backends |
|---|---|---|---|
| ReadWriteOnce | RWO | Single node read/write | All (EBS, Ceph RBD, vSphere VMDK) |
| ReadOnlyMany | ROX | Multiple nodes read-only | NFS, CephFS, some CSI drivers |
| ReadWriteMany | RWX | Multiple nodes read/write simultaneously | CephFS, NFS, Azure Files |
| ReadWriteOncePod | RWOP | Single pod read/write (GA since OCP 4.16) | CSI drivers with support |
CSI Architecture Details
Complete Example — PVC + Deployment
Create a PersistentVolumeClaim, then reference it in a Deployment. StorageClass triggers dynamic provisioning automatically.
# 1. PersistentVolumeClaim — request 10Gi block storage apiVersion: v1 kind: PersistentVolumeClaim metadata: name: app-data namespace: my-app spec: accessModes: - ReadWriteOnce # Single node read-write storageClassName: thin-csi # StorageClass name (vSphere thin disk) resources: requests: storage: 10Gi # Requested size
# 2. Deployment — mount PVC into container apiVersion: apps/v1 kind: Deployment metadata: name: my-app namespace: my-app spec: replicas: 1 selector: matchLabels: app: my-app template: metadata: labels: app: my-app spec: containers: - name: app image: registry.example.com/my-app:1.0 ports: - containerPort: 8080 volumeMounts: - name: data mountPath: /var/data # Path inside container resources: requests: cpu: "250m" memory: "256Mi" limits: cpu: "500m" memory: "512Mi" volumes: - name: data persistentVolumeClaim: claimName: app-data # References PVC above
# Apply and verify oc apply -f pvc.yaml -f deployment.yaml # Check PVC is Bound oc get pvc -n my-app # NAME STATUS VOLUME CAPACITY ACCESS STORAGECLASS # app-data Bound pvc-a1b2c3d4.. 10Gi RWO thin-csi # Verify mount inside pod oc exec deploy/my-app -- df -h /var/data
Security & SCC
How OpenShift enforces security at the pod level using Security Context Constraints.
Security Context Constraints (SCC)
SCC are an OpenShift-specific security mechanism that controls what a pod can do at the OS level: run as root, access host network, mount volumes, use capabilities, etc. They are evaluated during pod admission.
SCC Admission Flow
SCC Controls
Security Context Constraints control the following OS-level capabilities for pods:
| Control | Description |
|---|---|
| Privileged containers | Allow/deny running as privileged (full host access) |
| Linux capabilities | Add/drop specific capabilities (NET_ADMIN, SYS_PTRACE, etc.) |
| Host directories | Allow/deny hostPath volume mounts |
| SELinux context | Enforce specific SELinux labels on containers |
| User ID | Run as specific UID or UID range (MustRunAs, MustRunAsRange, RunAsAny) |
| Host namespaces | Allow/deny access to host PID, IPC namespaces |
| Host networking | Allow/deny use of host network + host ports |
| FSGroup | Set filesystem group ownership for volumes |
| Supplemental groups | Control additional group memberships |
| Read-only root FS | Force read-only root filesystem |
| Volume types | Restrict allowed volume types (emptyDir, configMap, PVC, etc.) |
| Seccomp profiles | Apply syscall filtering profiles |
RBAC — Role-Based Access Control
RBAC in OpenShift controls who can do what on which resources.
- Rules — Define verbs (get, list, create, update, delete) + resources (pods, services) + API groups
- Roles — A collection of rules. Role is namespace-scoped; ClusterRole is cluster-scoped
- Bindings — Bind subjects (users, groups, ServiceAccounts) to a Role. RoleBinding is namespace-scoped; ClusterRoleBinding is cluster-scoped
Cluster Role vs Local Role
OpenShift has two scopes for roles: ClusterRole (cluster-scoped, reusable across namespaces) and Role (namespace-scoped, applies only within its namespace). The binding type determines where permissions take effect:
| Combination | Scope | Use Case |
|---|---|---|
| Role + RoleBinding | Single namespace only | Custom per-project permissions (e.g., bot SA with limited access) |
| ClusterRole + RoleBinding | Single namespace (scoped down) | Reuse standard roles (view/edit/admin) in specific projects |
| ClusterRole + ClusterRoleBinding | All namespaces cluster-wide | Cluster-admin, global monitoring, platform-level operators |
view, edit, and admin ClusterRoles are reused across projects via namespace-scoped RoleBindings. You rarely need to create a local Role unless permissions are truly project-specific.
RBAC Authorization Flow
Default Cluster Roles
| ClusterRole | Scope | Permissions |
|---|---|---|
| cluster-admin | Cluster | Full access to all resources in all namespaces. Superuser. |
| admin | Namespace | Full control within a namespace. Can create roles and bindings. Cannot modify quota or namespace itself. |
| edit | Namespace | Read/write most resources (pods, deployments, services, configmaps, secrets). Cannot manage roles or bindings. |
| view | Namespace | Read-only access. Cannot view secrets or roles. No write operations. |
| self-provisioner | Cluster | Allows creating new projects. Bound to all authenticated users by default. Remove to lock down project creation. |
| basic-user | Cluster | Can read own user info. Get basic access to projects they belong to. |
ServiceAccounts
Every namespace has a default ServiceAccount. Pods use it for API authentication. Custom SAs isolate permissions per workload. Tokens are auto-mounted at /var/run/secrets/kubernetes.io/serviceaccount/token.
# Create a ServiceAccount oc create sa my-app -n my-namespace # Grant a role to a user in a namespace oc adm policy add-role-to-user edit developer -n my-project # Grant cluster-admin to a user oc adm policy add-cluster-role-to-user cluster-admin admin-user # Check if a user can perform an action oc auth can-i create deployments -n my-project --as developer # List role bindings in a namespace oc get rolebindings -n my-project # Remove self-provisioner from all authenticated users oc adm policy remove-cluster-role-from-group self-provisioner system:authenticated:oauth
admin, edit, and view roles are built using aggregation labels. When operators install CRDs, they can add rules to these roles automatically by setting rbac.authorization.k8s.io/aggregate-to-admin: "true" on their ClusterRoles.
OAuth Authentication Flow
cert-manager — Certificate Lifecycle
cert-manager automates issuing and renewing X.509 certificates — the day-1 pain it removes is manually generating certs, copying them into Secrets, and remembering to rotate them before they expire.
apiVersion: cert-manager.io/v1 kind: ClusterIssuer metadata: name: letsencrypt-prod spec: acme: server: https://acme-v02.api.letsencrypt.org/directory email: platform-team@example.com privateKeySecretRef: name: letsencrypt-prod-key solvers: - http01: ingress: class: openshift-default --- apiVersion: cert-manager.io/v1 kind: Certificate metadata: name: myapp-tls namespace: my-app spec: secretName: myapp-tls-secret dnsNames: - myapp.apps.cluster.example.com issuerRef: name: letsencrypt-prod kind: ClusterIssuer
spec.tls.certificate/key, or reference the Secret directly via spec.tls.externalCertificate (newer OCP releases). Or use the cert-manager Operator for Red Hat OpenShift to manage the cluster's default Ingress Controller certificate and API server certificate the same declarative way — replacing the self-signed certs OpenShift ships with by default.
Logging & Monitoring
Core platform monitoring plus optional Operators for log collection, storage, and console integration.
Monitoring Architecture
OpenShift ships a fully integrated monitoring stack managed by the Cluster Monitoring Operator. All components are deployed automatically and run in the openshift-monitoring namespace.
cluster-monitoring-config. Without persistent storage, pod recreation can lose metrics, silences, and notification state.
Monitoring Components
| Component | What It Does | Details |
|---|---|---|
| Prometheus (x2 HA) | Time-series database. Scrapes metrics from platform targets via the pull model. | Runs in openshift-monitoring. Core metrics have 15-day default retention, but storage is ephemeral until an administrator configures a PVC for each replica. |
| Thanos Sidecar | Runs alongside each Prometheus. Exposes StoreAPI for remote reads. | Enables Thanos Querier to aggregate data from multiple Prometheus instances without data duplication. |
| Thanos Querier | Unified PromQL query endpoint. Aggregates data from all Thanos Sidecars. | Single entry point for OCP Console dashboards and external Grafana. Deduplicates HA pairs. |
| Alertmanager (x2 HA) | Receives firing alerts from Prometheus. Routes, deduplicates, groups, and sends notifications. | Supports Slack, PagerDuty, email, webhook, OpsGenie. Silencing and inhibition rules. Cluster-scoped HA gossip. |
| node-exporter | DaemonSet exposing host-level metrics: CPU, memory, disk, network per node. | Scraped by Prometheus. Metrics like node_cpu_seconds_total, node_memory_MemAvailable_bytes. |
| kube-state-metrics | Generates metrics from Kubernetes object state (deployments, pods, nodes, etc.). | Metrics like kube_deployment_status_replicas, kube_pod_status_phase. Not resource usage — object state. |
| Prometheus Adapter | Exposes custom Prometheus metrics via Kubernetes Metrics API. | Enables HPA (Horizontal Pod Autoscaler) to scale based on custom metrics like requests-per-second. |
| UWM Prometheus | Separate Prometheus instance for user workloads. | Scrapes user-created ServiceMonitor/PodMonitor resources. Isolated from platform monitoring. Must be enabled. |
Logging Architecture
Logging is not installed by default with core OCP. A supported Loki-based deployment uses Loki for storage, Vector for collection, and the ClusterLogForwarder CR for routing. Layered Operators work together: Logging Operator (deploys Vector), Loki Operator (manages LokiStack), and Cluster Observability Operator (console integration).
Logging Components
| Component | What It Does | Details |
|---|---|---|
| Vector | Log collector. DaemonSet running on every node. Reads container logs and journald. | Rust-based, low memory (~50MB). Reads from /var/log/containers/ and journald. Replaces Fluentd (deprecated). Supports parsing, filtering, transforms. |
| ClusterLogForwarder | Custom resource defining log routing pipelines. Connects inputs (log types) to outputs (destinations). | Three input types: application, infrastructure, audit. Output types: lokiStack, splunk, elasticsearch, cloudwatch, kafka, syslog, http. Filter by namespace. |
| LokiStack | Log storage backend. Stores log data in object storage with metadata indexing. | Components: Distributor (receives), Ingester (writes chunks), Compactor (optimizes), Querier (reads), Query-frontend (caches). Requires S3-compatible object storage (ODF NooBaa, AWS S3, Azure Blob). |
| Logging Operator | Deploys and manages Vector DaemonSet. Watches ClusterLogForwarder CR. | Install from OperatorHub. Creates collector pods in openshift-logging namespace. |
| Loki Operator | Deploys and manages LokiStack. Handles sizing, storage config, tenant separation. | Sizes: 1x.demo, 1x.extra-small, 1x.small, 1x.medium. Manages schema upgrades and compaction. |
| Cluster Observability Operator | Provides UIPlugin for log viewing in OCP Console. | Adds “Logs” tab to pod/namespace views. LogQL query support. Replaces legacy Kibana UI. |
| Log Tenants | Loki enforces RBAC via three built-in tenants. | application: user pod logs. infrastructure: openshift-*/kube-* pod logs + journald. audit: API server, OAuth, OVN audit logs. |
# Check monitoring stack health oc get pods -n openshift-monitoring oc get pods -n openshift-user-workload-monitoring # Check logging stack health oc get pods -n openshift-logging # View Prometheus alerts firing oc get prometheusrules -A oc -n openshift-monitoring exec -c prometheus prometheus-k8s-0 -- promtool query instant http://localhost:9090 'ALERTS{alertstate="firing"}' # Check log collector status oc get clusterlogforwarder -n openshift-logging oc logs ds/collector -n openshift-logging --tail=20
Operators & OLM
How OpenShift uses the Operator pattern to manage platform components and applications.
What is an Operator?
An Operator encodes human operational knowledge into software. It watches Custom Resources (CRs) and takes automated action: provisioning, scaling, backup, upgrades, failover. OpenShift itself is managed by ~30 built-in Cluster Operators.
Operator Lifecycle
Operator Pattern — How It Works
An Operator is a controller that watches Custom Resources (CRDs) and runs a reconciliation loop: observe current state → compare with desired state → take corrective action. This encodes human operational knowledge into software.
Common Operators
| Operator | Source | What It Manages |
|---|---|---|
| Logging (Loki) | Red Hat | Log collection (Vector DaemonSet), storage (Loki), and forwarding |
| Compliance | Red Hat | CIS/NIST/PCI-DSS compliance scanning and remediation |
| Network Observability | Red Hat | eBPF-based network flow metrics, topology, and tracing |
| ODF | Red Hat | Ceph storage cluster (block, file, object) |
| ACS (StackRox) | Red Hat | Container security: CVE scanning, admission control, runtime monitoring |
| ACM | Red Hat | Multi-cluster lifecycle, governance, observability |
| cert-manager | Red Hat (community version also available) | TLS certificate automation (Let's Encrypt, ACME) — "cert-manager Operator for Red Hat OpenShift" |
| External Secrets | Community | Sync secrets from external stores (Vault, AWS SM, Azure KV) |
# List installed operators (ClusterServiceVersions) oc get csv -A # List subscriptions oc get sub -A # Check pending install plans (Manual approval) oc get installplan -A # Approve a pending install plan oc patch installplan <name> -n <ns> --type merge -p '{"spec":{"approved":true}}' # Check cluster operators status oc get co
ACM — Advanced Cluster Management
Optional layered product for managing multiple OpenShift and Kubernetes clusters from a single hub.
What is ACM?
Red Hat ACM provides multi-cluster lifecycle management: provision clusters, enforce governance policies, deliver applications, aggregate observability, and search resources across the fleet.
Hub & Spoke Architecture
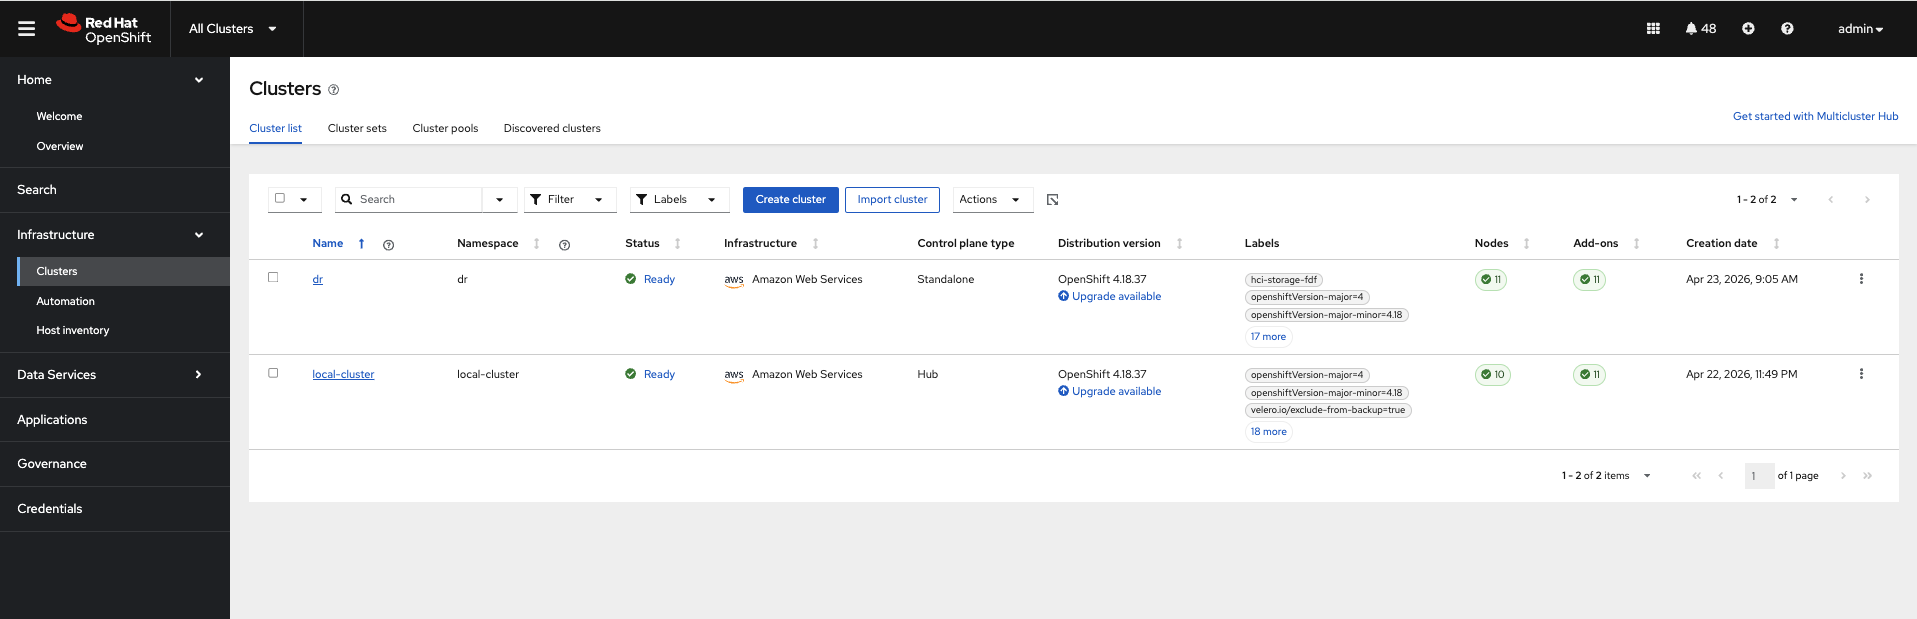
Hosted Control Planes (HyperShift)
Through MCE, the ACM hub can run Hosted Control Planes: spoke clusters whose control planes (API server, etcd, controllers) run as pods on the hub, while only worker nodes live at the spoke site. This cuts per-cluster cost (no 3 dedicated control-plane machines), speeds up cluster creation to minutes, and decouples control-plane and worker upgrades — widely used for fleet, edge, and telco deployments.
Governance & Policy Framework
ACM’s Governance, Risk & Compliance (GRC) framework lets you define policies on the hub and distribute them to managed clusters. Each policy specifies what to check, where to apply it (via Placement), and how to respond (inform or enforce).
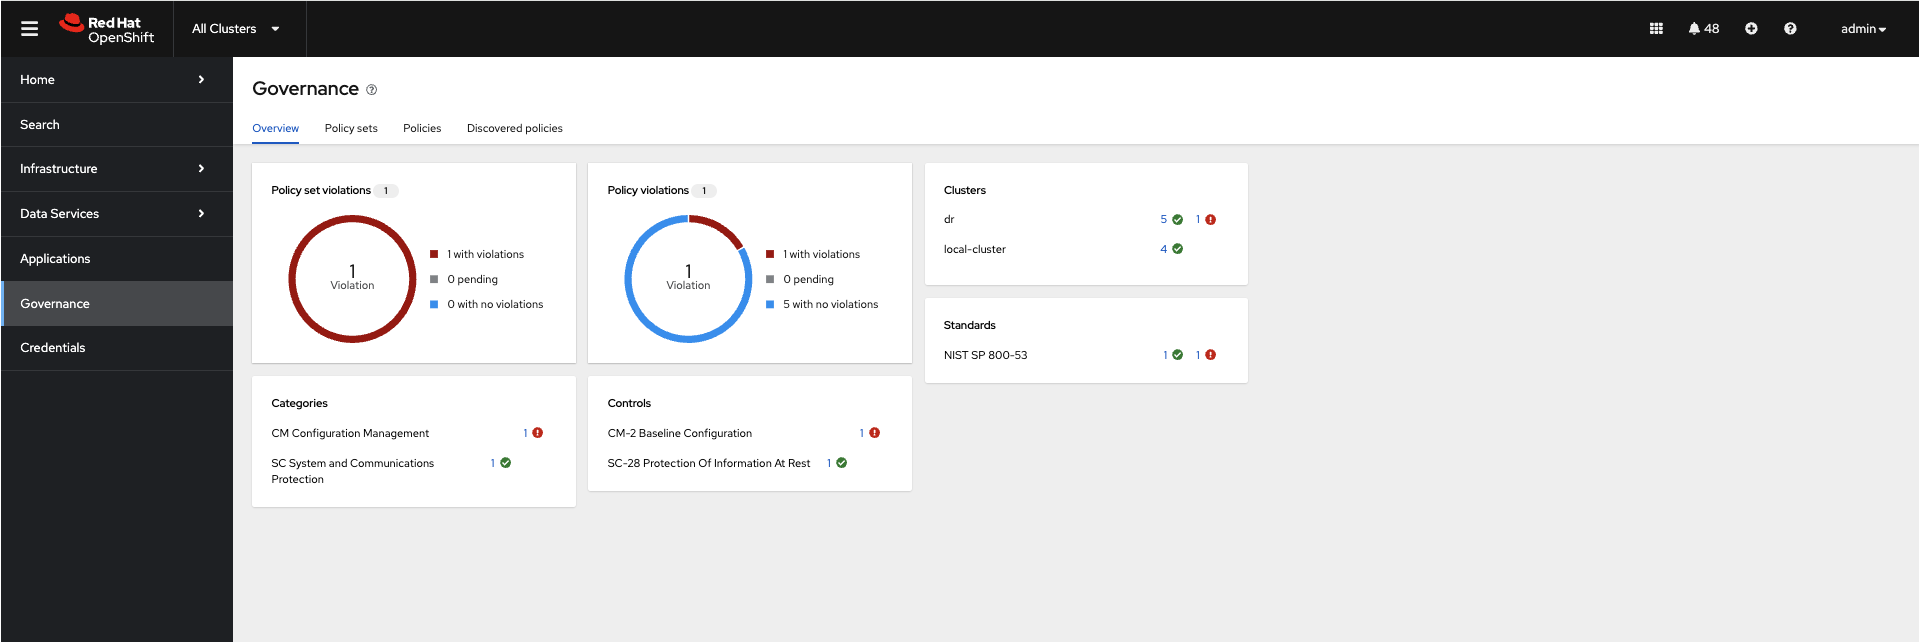
Policy Types
| Policy Type | Purpose | Example Use Case |
|---|---|---|
| ConfigurationPolicy | Enforce or audit any K8s resource configuration | Require resource limits on all Deployments |
| CertificatePolicy | Monitor certificate expiration | Alert when certs expire within 30 days |
| OperatorPolicy | Ensure operators are installed & configured | Require compliance-operator on all clusters |
| Gatekeeper constraint | Admission-time enforcement via OPA (ACM deploys & manages Gatekeeper) | Reject pods without required labels at admission |
IamPolicy template (limit cluster-admin role bindings) is deprecated and removed in current ACM releases. Replace it with a Gatekeeper constraint or a ConfigurationPolicy that audits ClusterRoleBindings.
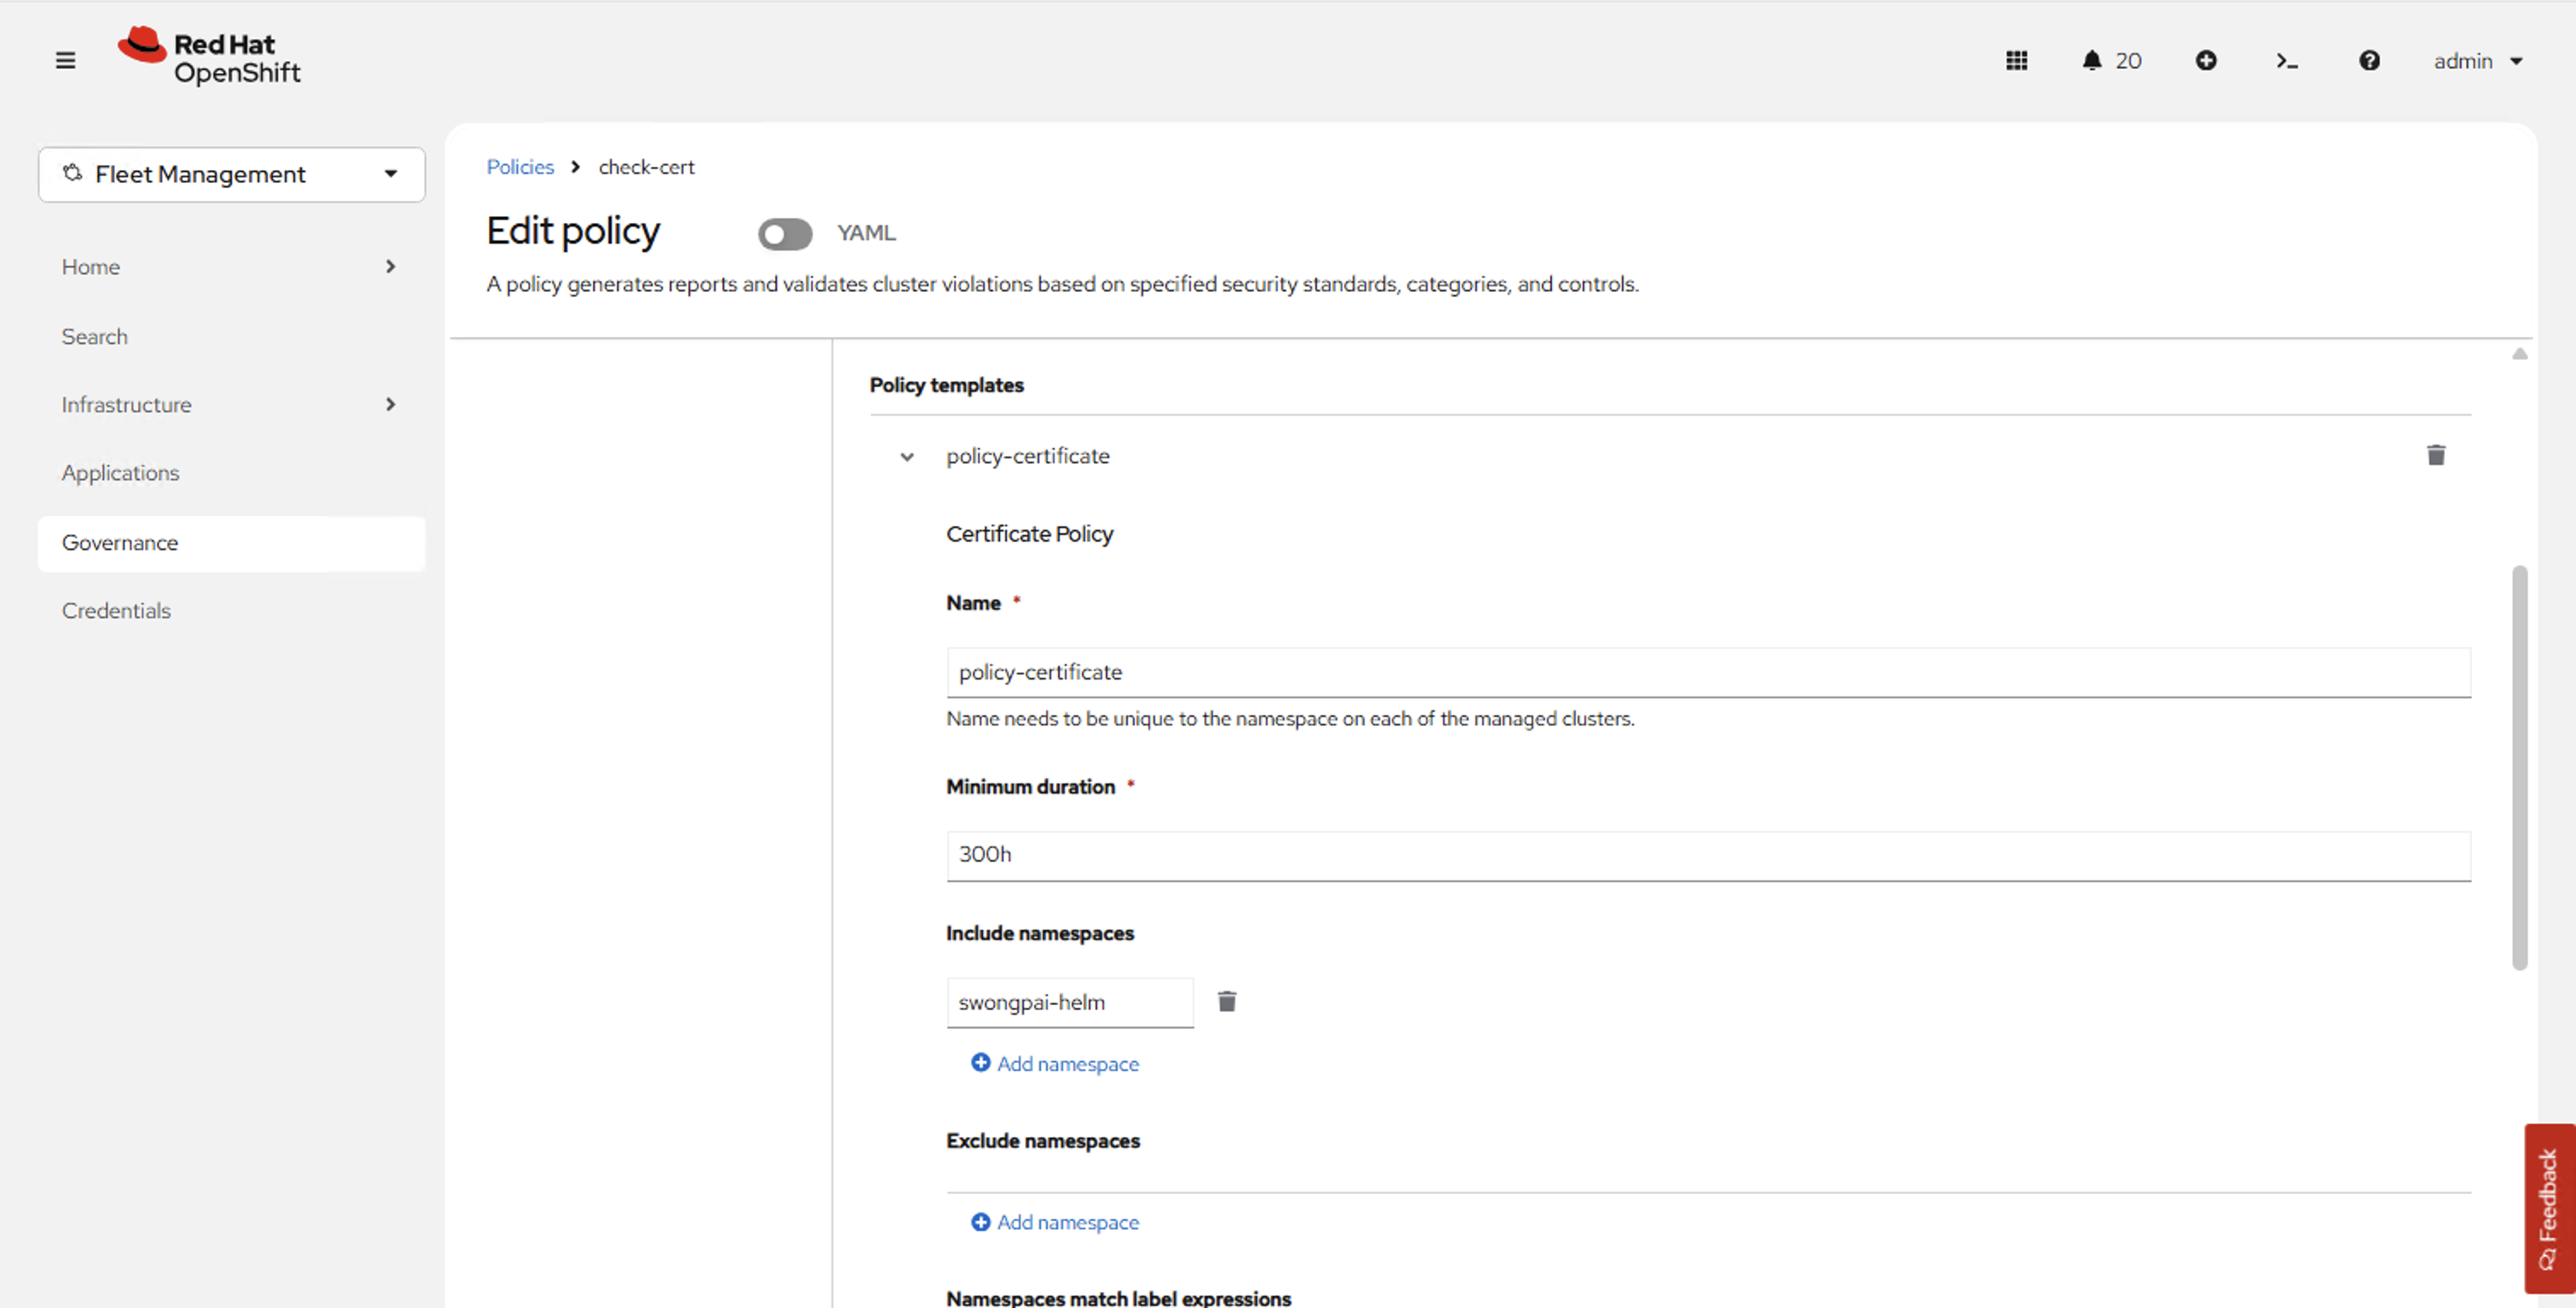
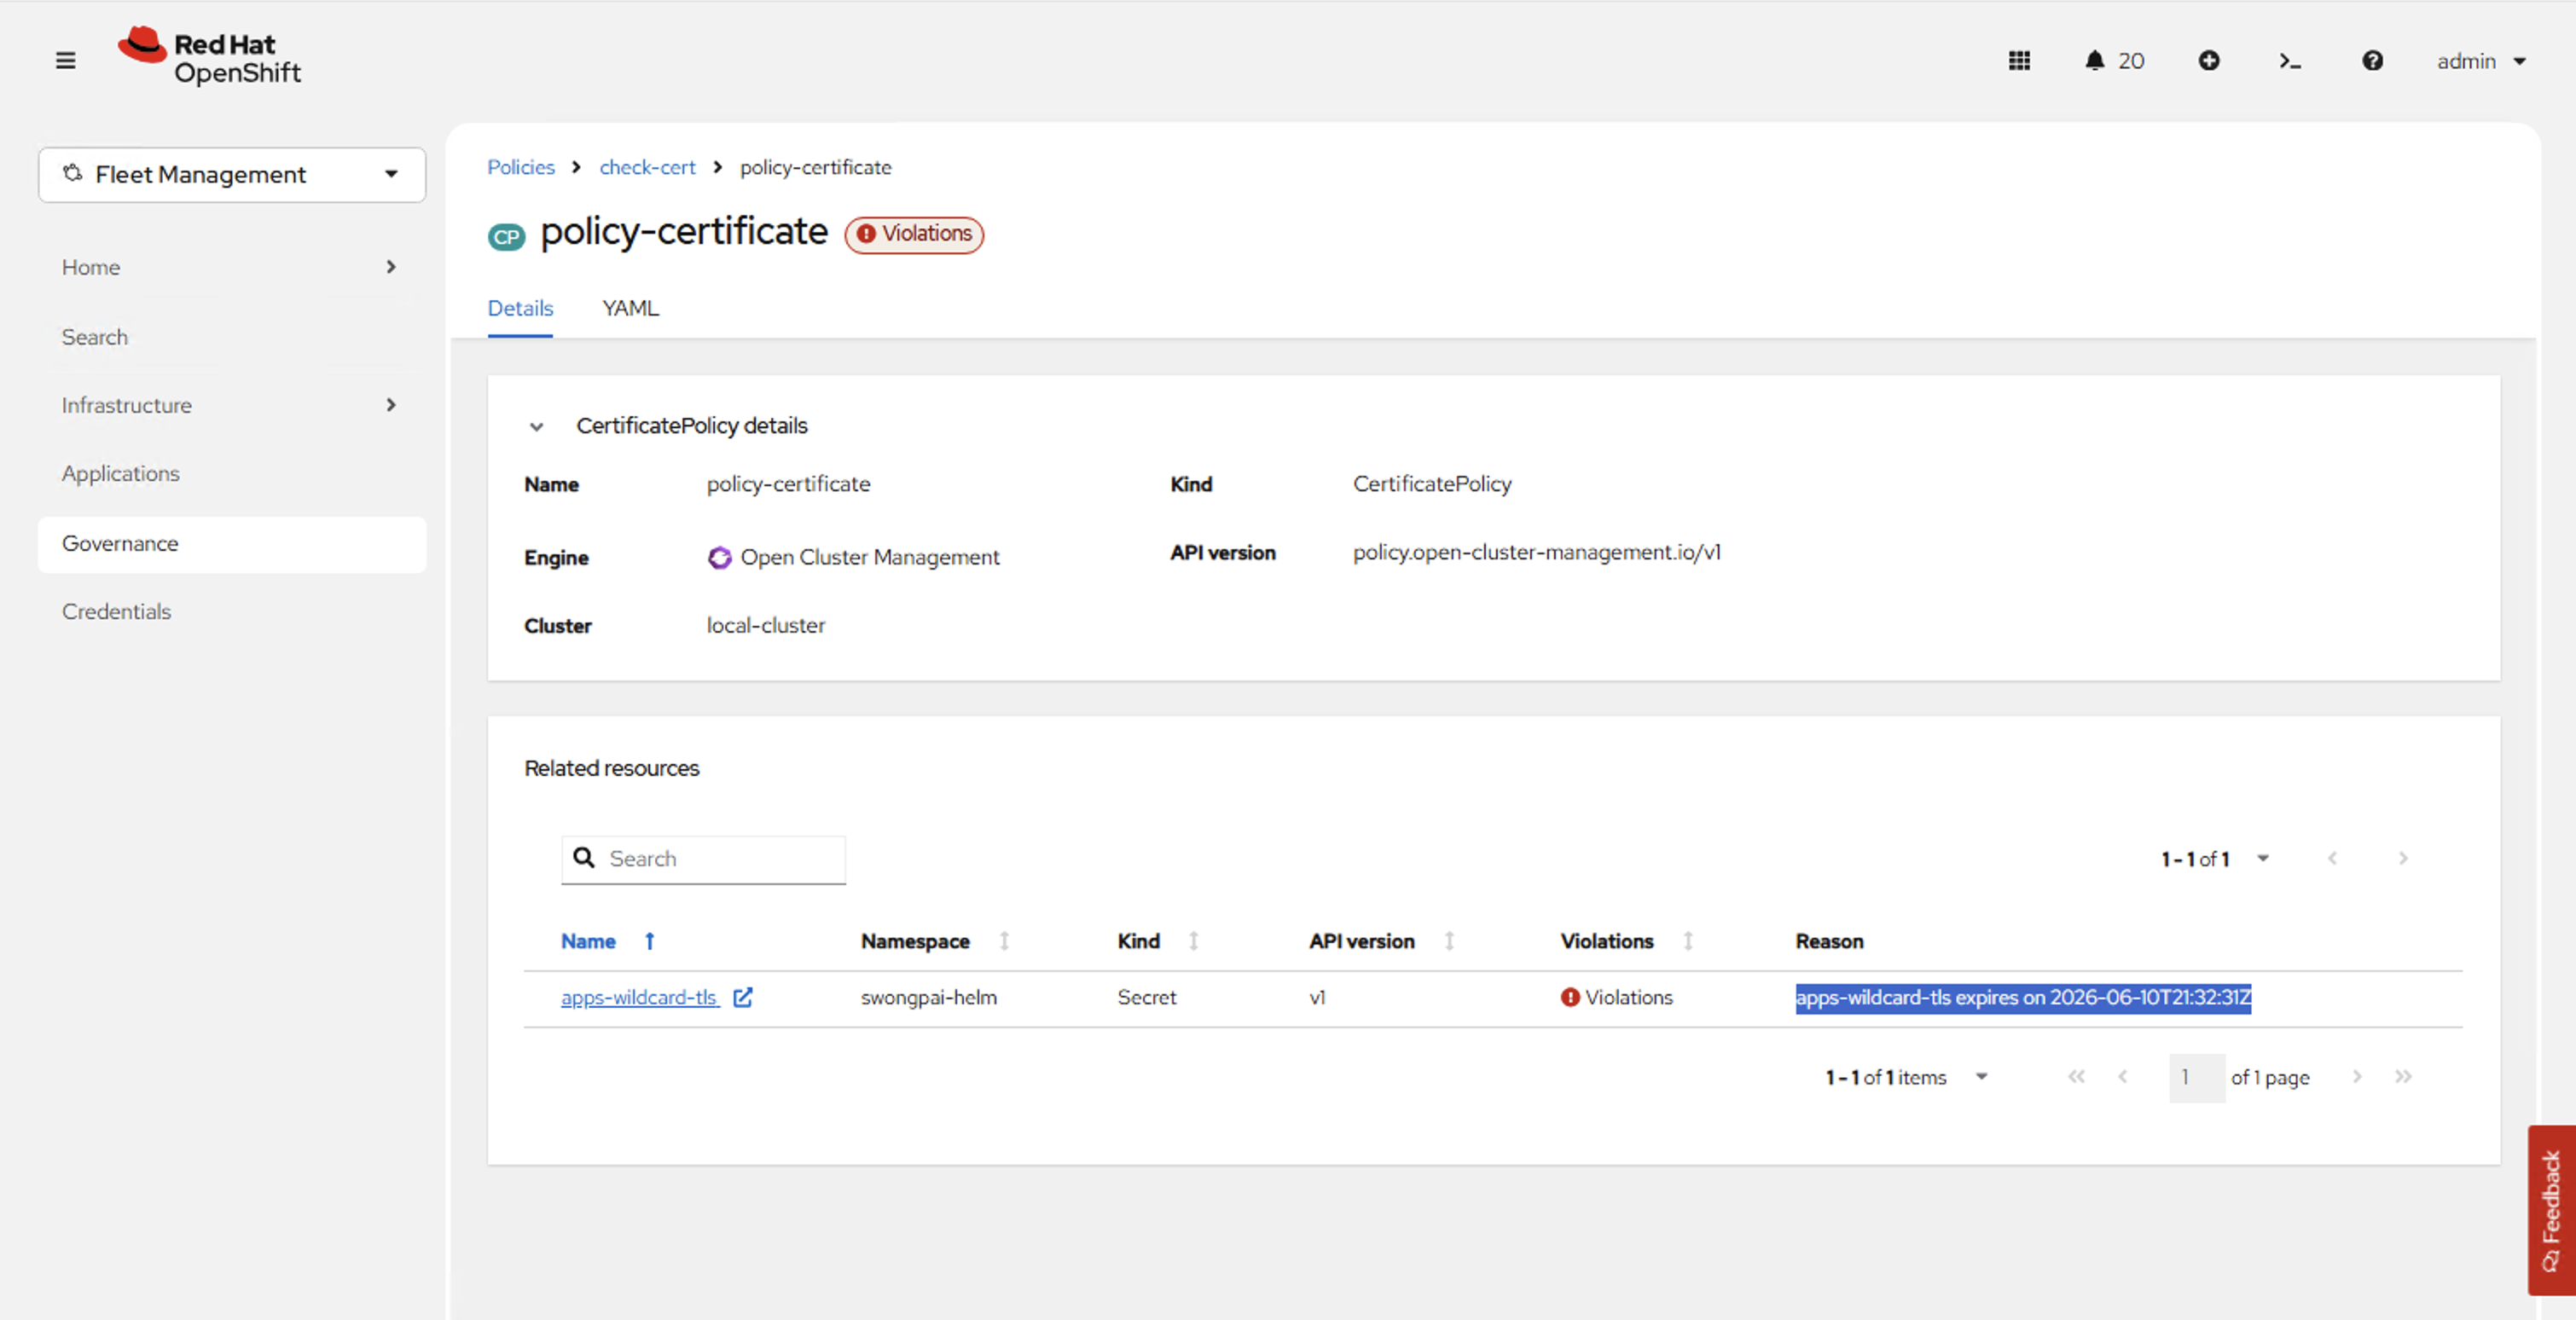
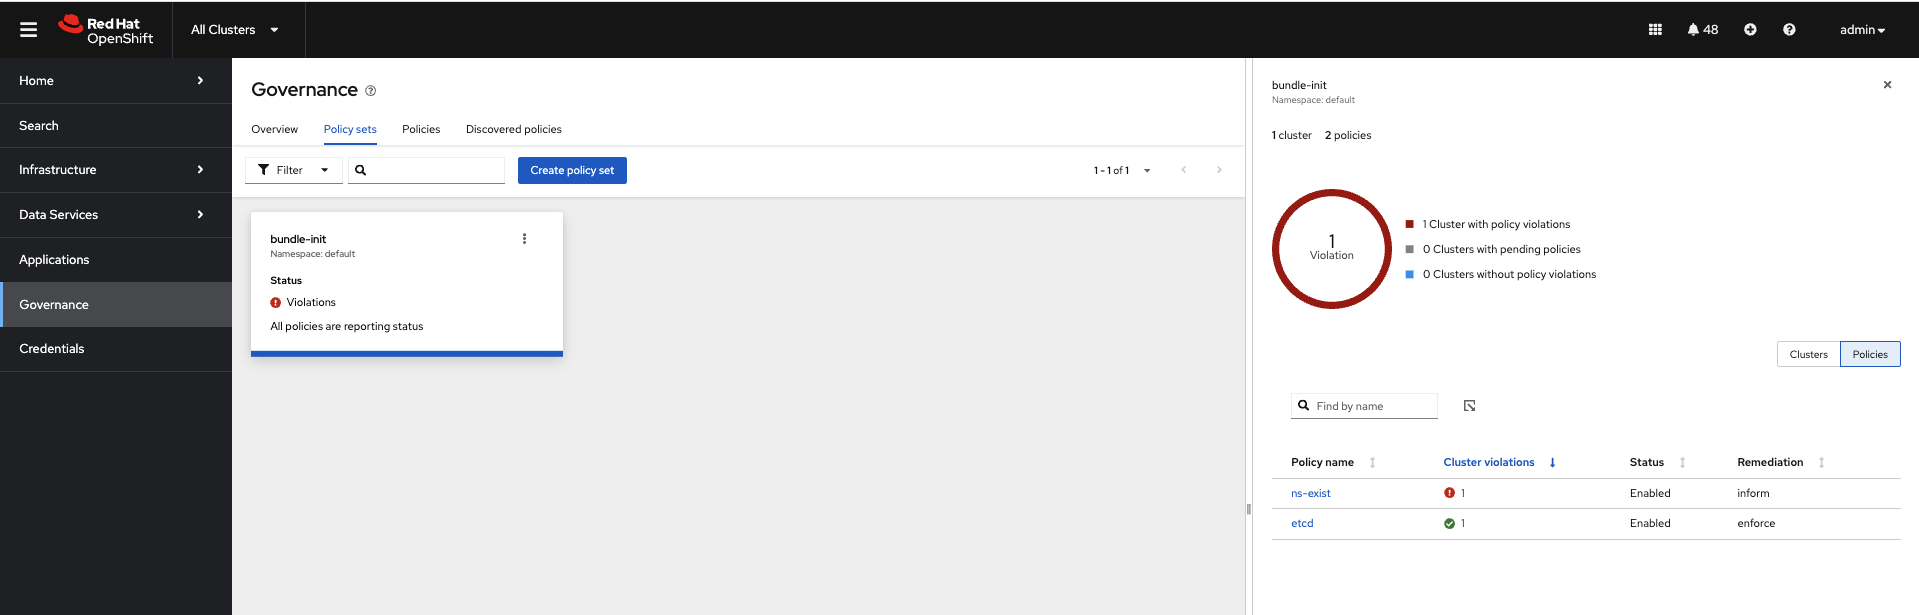
Live Example — CertificatePolicy Catching an Expiring Certificate
A CertificatePolicy named check-cert monitors TLS secrets in the swongpai-helm namespace with a minimum duration of 300 hours. When a certificate falls below that threshold, ACM flags it as NonCompliant and shows exactly which secret is about to expire.
How Policy Works
A Policy is a wrapper that contains one or more policy templates (ConfigurationPolicy, CertificatePolicy, etc.). The Policy is created on the hub, bound to target clusters via PlacementBinding + Placement, and distributed by the Policy Controller. On each managed cluster, a local controller evaluates the templates and reports compliance status back to the hub.
Policy Structure
Every Policy has three core settings:
| Field | Values | Meaning |
|---|---|---|
remediationAction | inform / enforce | inform = audit only, report violations. enforce = auto-create/update/delete resources to match desired state. |
severity | low / medium / high / critical | Displayed in dashboard. No enforcement impact — purely informational for prioritization. |
disabled | true / false | Toggle policy on/off without deleting it. Useful for testing before rollout. |
remediationAction. Set to inform to audit and report violations without changing anything. Set to enforce to automatically remediate — ACM will create/update/delete resources to match desired state. Start with inform in production, switch to enforce after validation. The policy-level remediationAction overrides the template-level setting.
ConfigurationPolicy — Compliance Types
ConfigurationPolicy is the most common and versatile template. It compares desired object definitions against actual cluster state using three compliance types:
| complianceType | Behavior | When to use |
|---|---|---|
musthave | Object must exist with at least the specified fields. Extra fields on the object are ignored. | Ensure a Namespace has specific labels, a LimitRange exists, or a NetworkPolicy is present. |
mustonlyhave | Object must exist with exactly the specified fields. Extra fields are removed on enforce. | Lock down a SecurityContextConstraint or RBAC RoleBinding — no extra permissions allowed. |
mustnothave | Object must not exist. If found, enforce deletes it. | Forbid default ServiceAccount tokens, remove permissive NetworkPolicies, delete test namespaces in production. |
ConfigurationPolicy Example
apiVersion: policy.open-cluster-management.io/v1 kind: ConfigurationPolicy metadata: name: require-limitrange spec: remediationAction: inform # start with audit severity: medium namespaceSelector: include: ["*"] exclude: ["openshift-*", "kube-*"] object-templates: - complianceType: musthave objectDefinition: apiVersion: v1 kind: LimitRange metadata: name: default-limits spec: limits: - type: Container default: cpu: "500m" memory: "512Mi" defaultRequest: cpu: "100m" memory: "128Mi"
apiVersion: policy.open-cluster-management.io/v1 kind: ConfigurationPolicy metadata: name: no-privileged-pods spec: remediationAction: inform severity: high namespaceSelector: include: ["*"] exclude: ["openshift-*", "kube-*"] object-templates: - complianceType: mustnothave objectDefinition: apiVersion: v1 kind: Pod metadata: namespace: "{{ .metadata.namespace }}" spec: containers: - securityContext: privileged: true
Full Policy Wrapper
A ConfigurationPolicy doesn’t work alone — it must be wrapped in a Policy and bound to clusters via PlacementBinding + Placement. One frequently missed prerequisite: Placement only selects clusters from ManagedClusterSets that are bound to the policy namespace via a ManagedClusterSetBinding. Here’s the complete set of resources:
# 1. Policy — wraps ConfigurationPolicy template apiVersion: policy.open-cluster-management.io/v1 kind: Policy metadata: name: policy-require-limitrange namespace: open-cluster-management-policies annotations: policy.open-cluster-management.io/standards: NIST SP 800-53 policy.open-cluster-management.io/categories: CM Configuration Management policy.open-cluster-management.io/controls: CM-2 Baseline Configuration spec: remediationAction: inform disabled: false policy-templates: - objectDefinition: apiVersion: policy.open-cluster-management.io/v1 kind: ConfigurationPolicy metadata: name: require-limitrange spec: remediationAction: inform severity: medium namespaceSelector: include: ["*"] exclude: ["openshift-*", "kube-*"] object-templates: - complianceType: musthave objectDefinition: apiVersion: v1 kind: LimitRange metadata: name: default-limits spec: limits: - type: Container default: cpu: "500m" memory: "512Mi" --- # 2. ManagedClusterSetBinding — Placement only selects clusters from # ManagedClusterSets bound to the policy namespace apiVersion: cluster.open-cluster-management.io/v1beta2 kind: ManagedClusterSetBinding metadata: name: global namespace: open-cluster-management-policies spec: clusterSet: global --- # 3. Placement — select target clusters apiVersion: cluster.open-cluster-management.io/v1beta1 kind: Placement metadata: name: placement-require-limitrange namespace: open-cluster-management-policies spec: predicates: - requiredClusterSelector: labelSelector: matchExpressions: - key: env operator: In values: ["production", "staging"] --- # 4. PlacementBinding — links Policy ↔ Placement apiVersion: policy.open-cluster-management.io/v1 kind: PlacementBinding metadata: name: binding-require-limitrange namespace: open-cluster-management-policies placementRef: apiGroup: cluster.open-cluster-management.io kind: Placement name: placement-require-limitrange subjects: - apiGroup: policy.open-cluster-management.io kind: Policy name: policy-require-limitrange
PolicyGenerator — GitOps for Policies
PolicyGenerator is a Kustomize plugin that eliminates boilerplate. Instead of writing Policy + PlacementBinding + Placement by hand for each rule, you write a compact policyGenerator.yaml and run kustomize build — it generates all three resources automatically. This is the recommended approach for managing policies in Git (GitOps).
How PolicyGenerator Works
| Concept | What it does |
|---|---|
policyDefaults | Set defaults for all policies: namespace, remediationAction, severity, placement selectors. Individual policies can override. |
policies[].manifests | Point to YAML files containing the raw Kubernetes objects you want to enforce (LimitRange, NetworkPolicy, etc.). PolicyGenerator wraps each in a ConfigurationPolicy automatically. |
placementBindingDefaults | Default name for generated PlacementBinding resources. |
policies[].policyAnnotations | Map compliance standards/categories/controls for audit reporting (NIST, CIS, PCI-DSS). |
PolicyGenerator Example
apiVersion: policy.open-cluster-management.io/v1 kind: PolicyGenerator metadata: name: gen-security-baseline placementBindingDefaults: name: binding-security-baseline policyDefaults: namespace: open-cluster-management-policies remediationAction: inform severity: medium consolidateManifests: false # one ConfigurationPolicy per manifest file placement: labelSelector: matchExpressions: - key: env operator: In values: ["production", "staging"] policies: - name: require-resource-limits manifests: - path: manifests/limitrange.yaml policyAnnotations: policy.open-cluster-management.io/standards: NIST SP 800-53 policy.open-cluster-management.io/categories: CM Configuration Management - name: require-network-policies severity: high remediationAction: enforce # override default for this policy manifests: - path: manifests/deny-all-netpol.yaml - path: manifests/allow-dns-netpol.yaml policyAnnotations: policy.open-cluster-management.io/standards: CIS Kubernetes Benchmark - name: require-pod-disruption-budget manifests: - path: manifests/pdb.yaml
# kustomization.yaml — in the same directory as policyGenerator.yaml apiVersion: kustomize.config.k8s.io/v1beta1 kind: Kustomization generators: - policyGenerator.yaml # Run: kustomize build --enable-alpha-plugins . # Output: Policy + PlacementBinding + Placement for each entry
PolicyGenerator Workflow
| Step | Action | Tool |
|---|---|---|
| 1 | Write plain K8s manifests (LimitRange, NetworkPolicy, etc.) | kubectl / editor |
| 2 | Write policyGenerator.yaml referencing manifests | editor |
| 3 | Run kustomize build --enable-alpha-plugins . | kustomize CLI |
| 4 | Review generated Policy + PlacementBinding + Placement | review |
| 5 | Commit to Git → ArgoCD/GitOps applies to hub | git + ArgoCD |
| 6 | ACM distributes policies to matched clusters | ACM Policy Controller |
policyGenerator.yaml + raw manifests in a Git repo. Use ArgoCD ApplicationSet (with ACM Placement) to apply them to the hub — full GitOps lifecycle for governance. Start all policies with remediationAction: inform, review compliance dashboards, then switch to enforce per-policy.
Application Deployment
ACM delivers applications to managed clusters using ArgoCD ApplicationSets with ACM Placement. ArgoCD supports two deployment modes: Push (hub ArgoCD applies to remote clusters) and Pull (each cluster runs its own ArgoCD that pulls from Git). Both use the same ApplicationSet + Placement CRDs on the hub.
For ArgoCD fundamentals (Application, AppProject, sync/health status, drift detection) that this multi-cluster model builds on, see the GitOps & Pipelines section.
Push vs Pull — How to Choose
| Factor | Push Model | Pull Model |
|---|---|---|
| Network requirement | Hub must reach spoke API servers | Spokes only need Git access (outbound) |
| ArgoCD on spokes | Not required | Required (or Argo CD Agent) |
| Drift detection | Centralized on hub | Local per cluster |
| Failure blast radius | Hub failure stops all deployments | Hub failure only stops new placements; existing clusters self-heal |
| Scale | Tens of clusters | Hundreds to thousands |
| Disconnected / air-gap | Not possible | Supported (Git mirror on-site) |
| Best for | Centralized ops, dev/staging, small fleets | Edge, telco, regulated, large fleets |
ApplicationSet with ACM Placement
apiVersion: argoproj.io/v1alpha1 kind: ApplicationSet metadata: name: my-app namespace: openshift-gitops spec: generators: - clusterDecisionResource: configMapRef: acm-placement labelSelector: matchLabels: cluster.open-cluster-management.io/placement: my-placement requeueAfterSeconds: 180 template: metadata: name: 'my-app-{{name}}' spec: project: default source: repoURL: https://github.com/org/my-app.git targetRevision: main path: 'overlays/{{name}}' destination: server: '{{server}}' namespace: my-app
Live Example — ApplicationSet Deploying via GitOps
An ApplicationSet named timecheck pulls from a Git repo (github.com/Surote/simple-fastapi-deployment) via ArgoCD push model. ACM Placement targets the local cluster. The topology view shows the full resource tree: ApplicationSet → Placement → Cluster → Route + Deployment + Service → ReplicaSet → Pod.
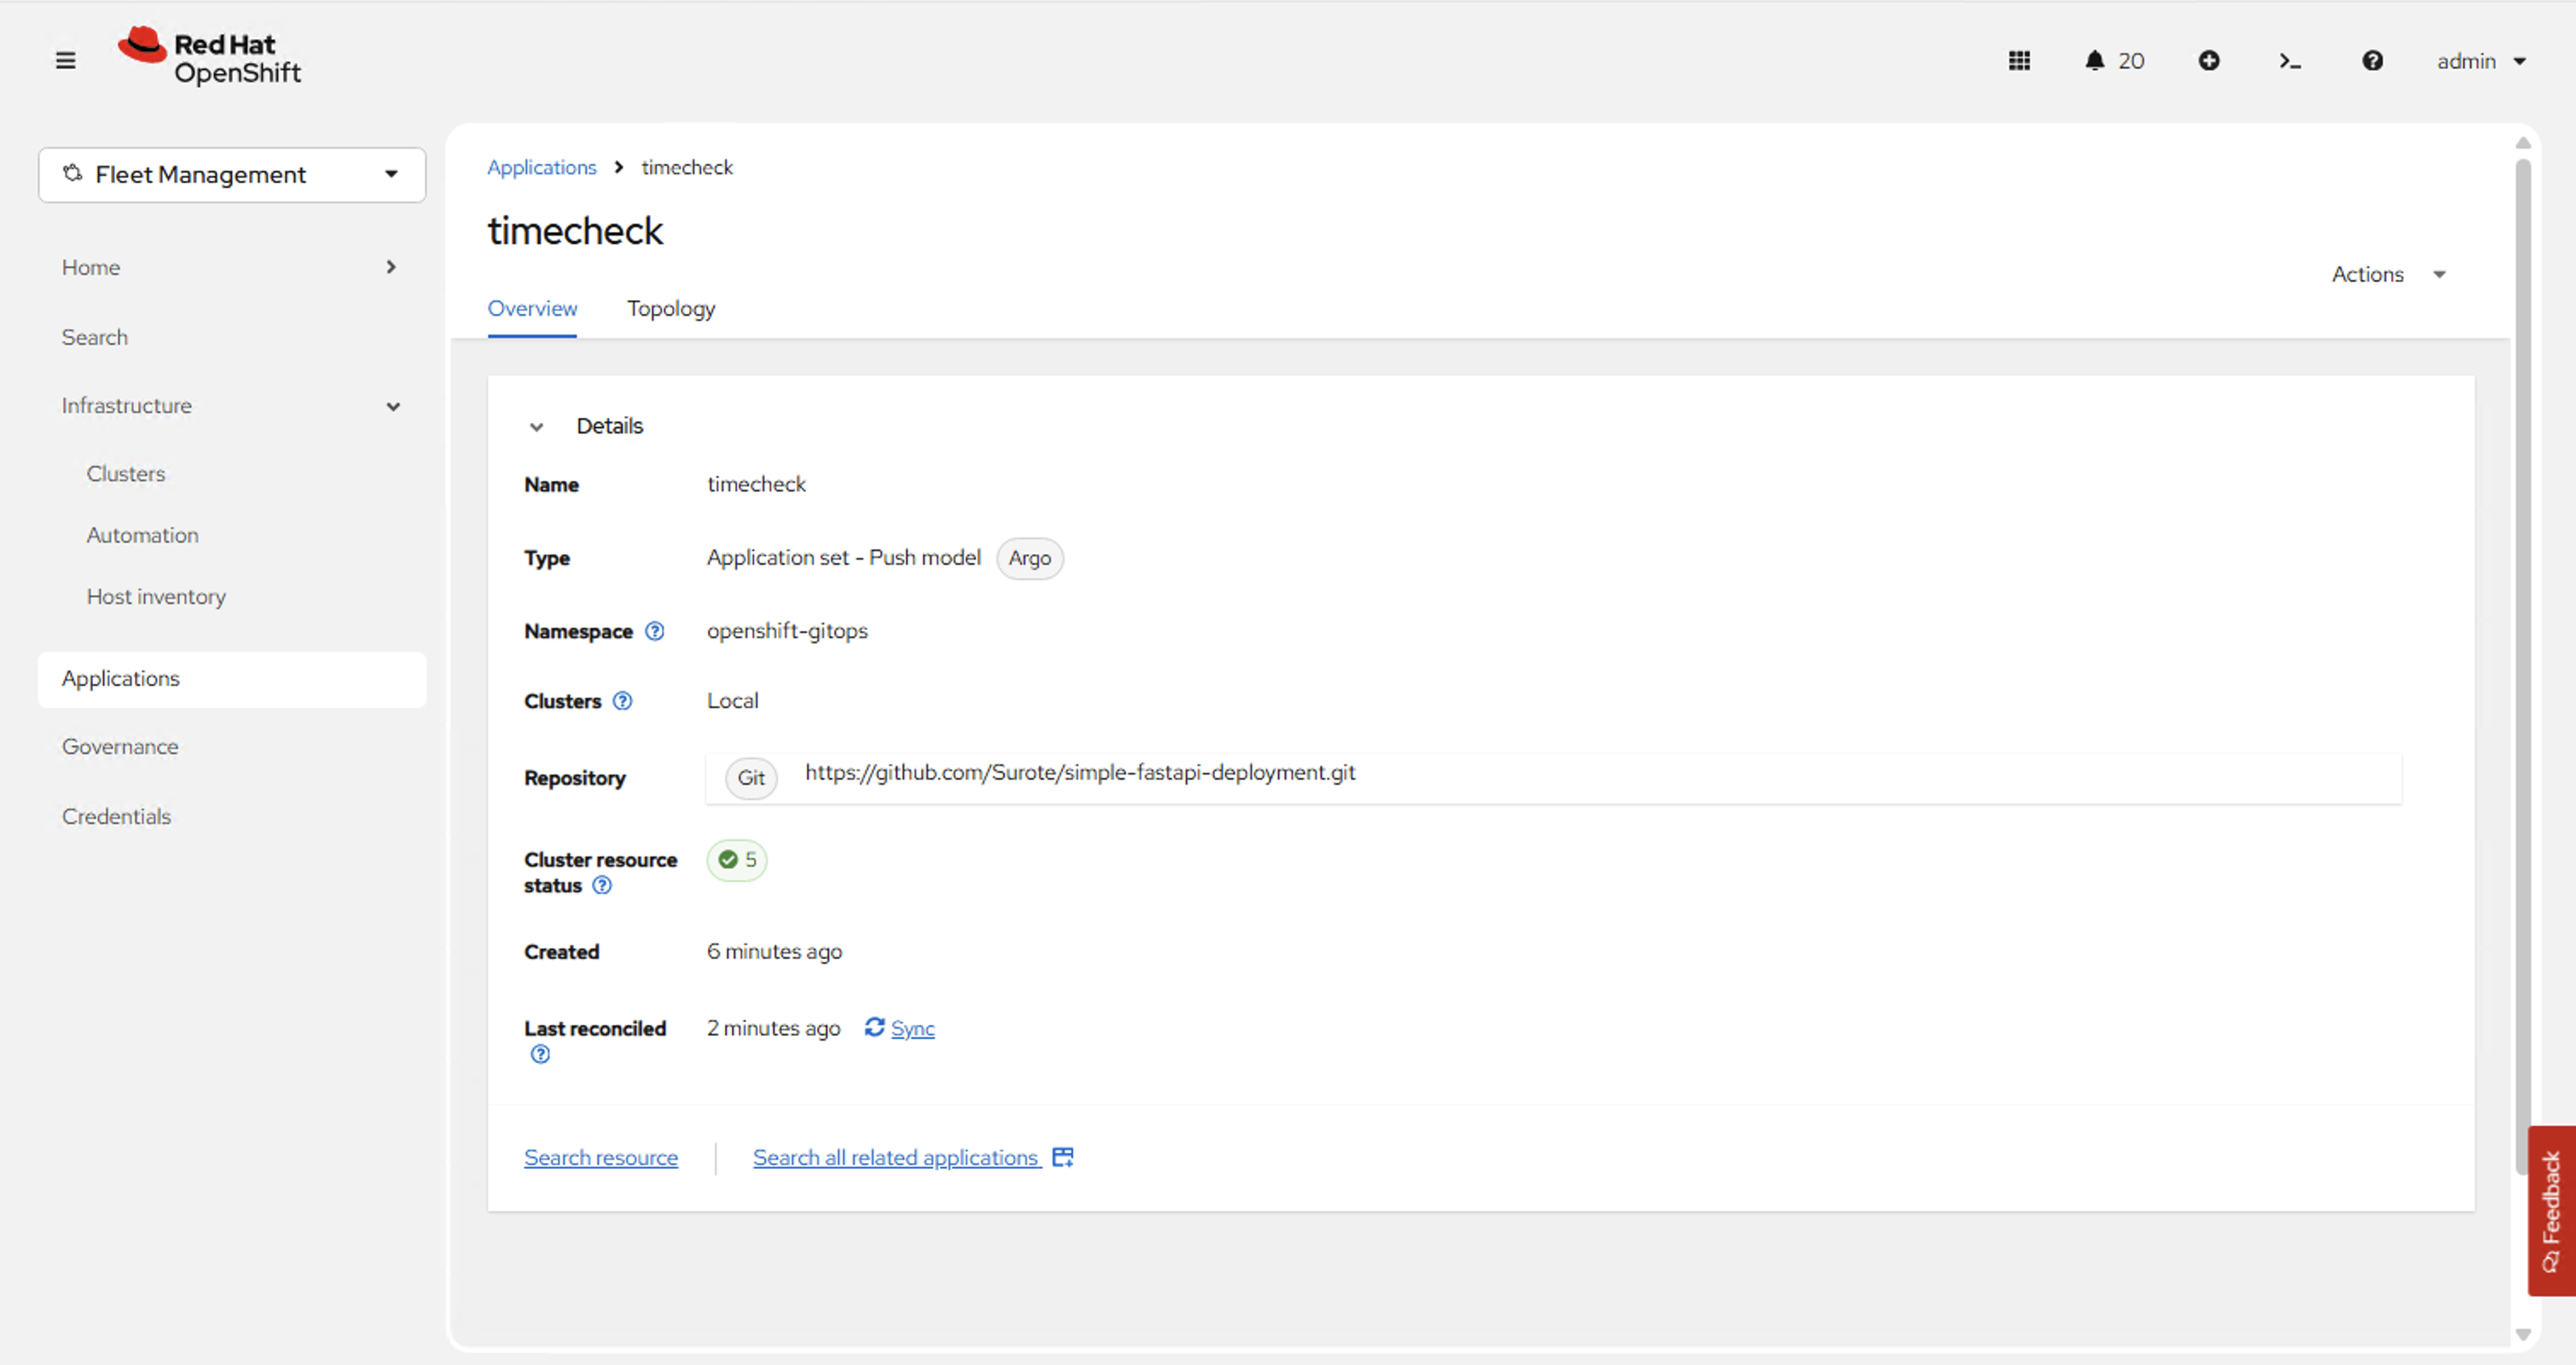
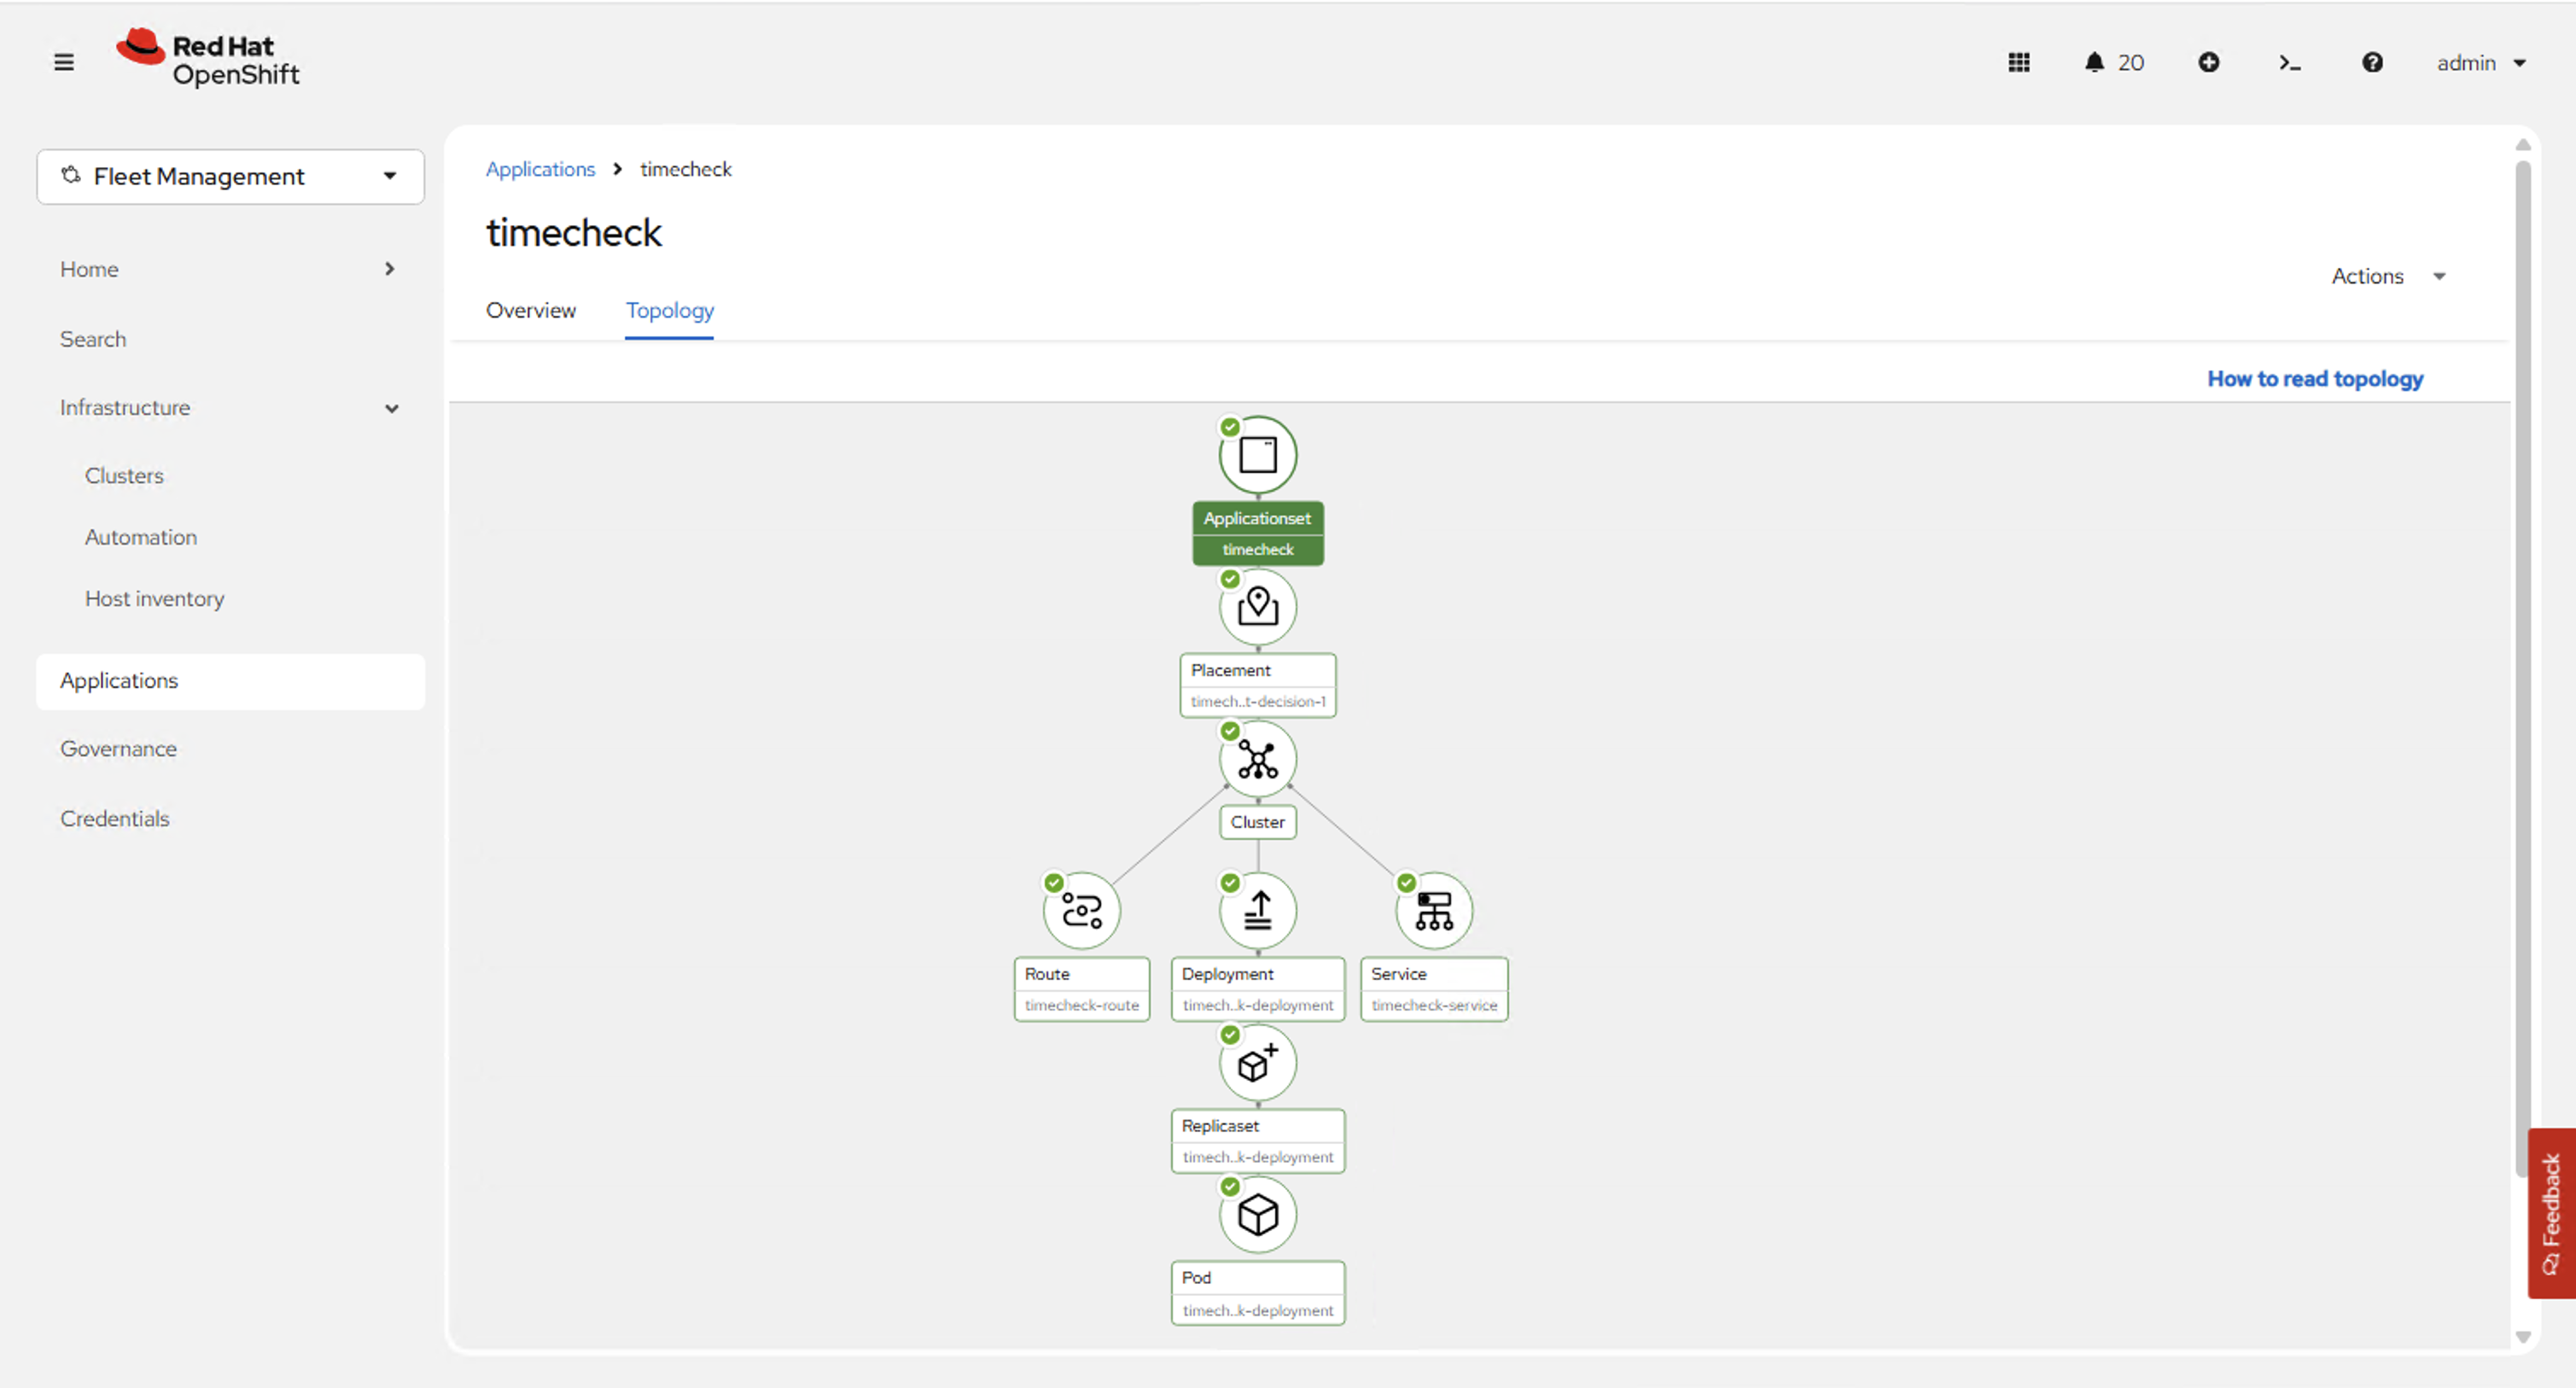
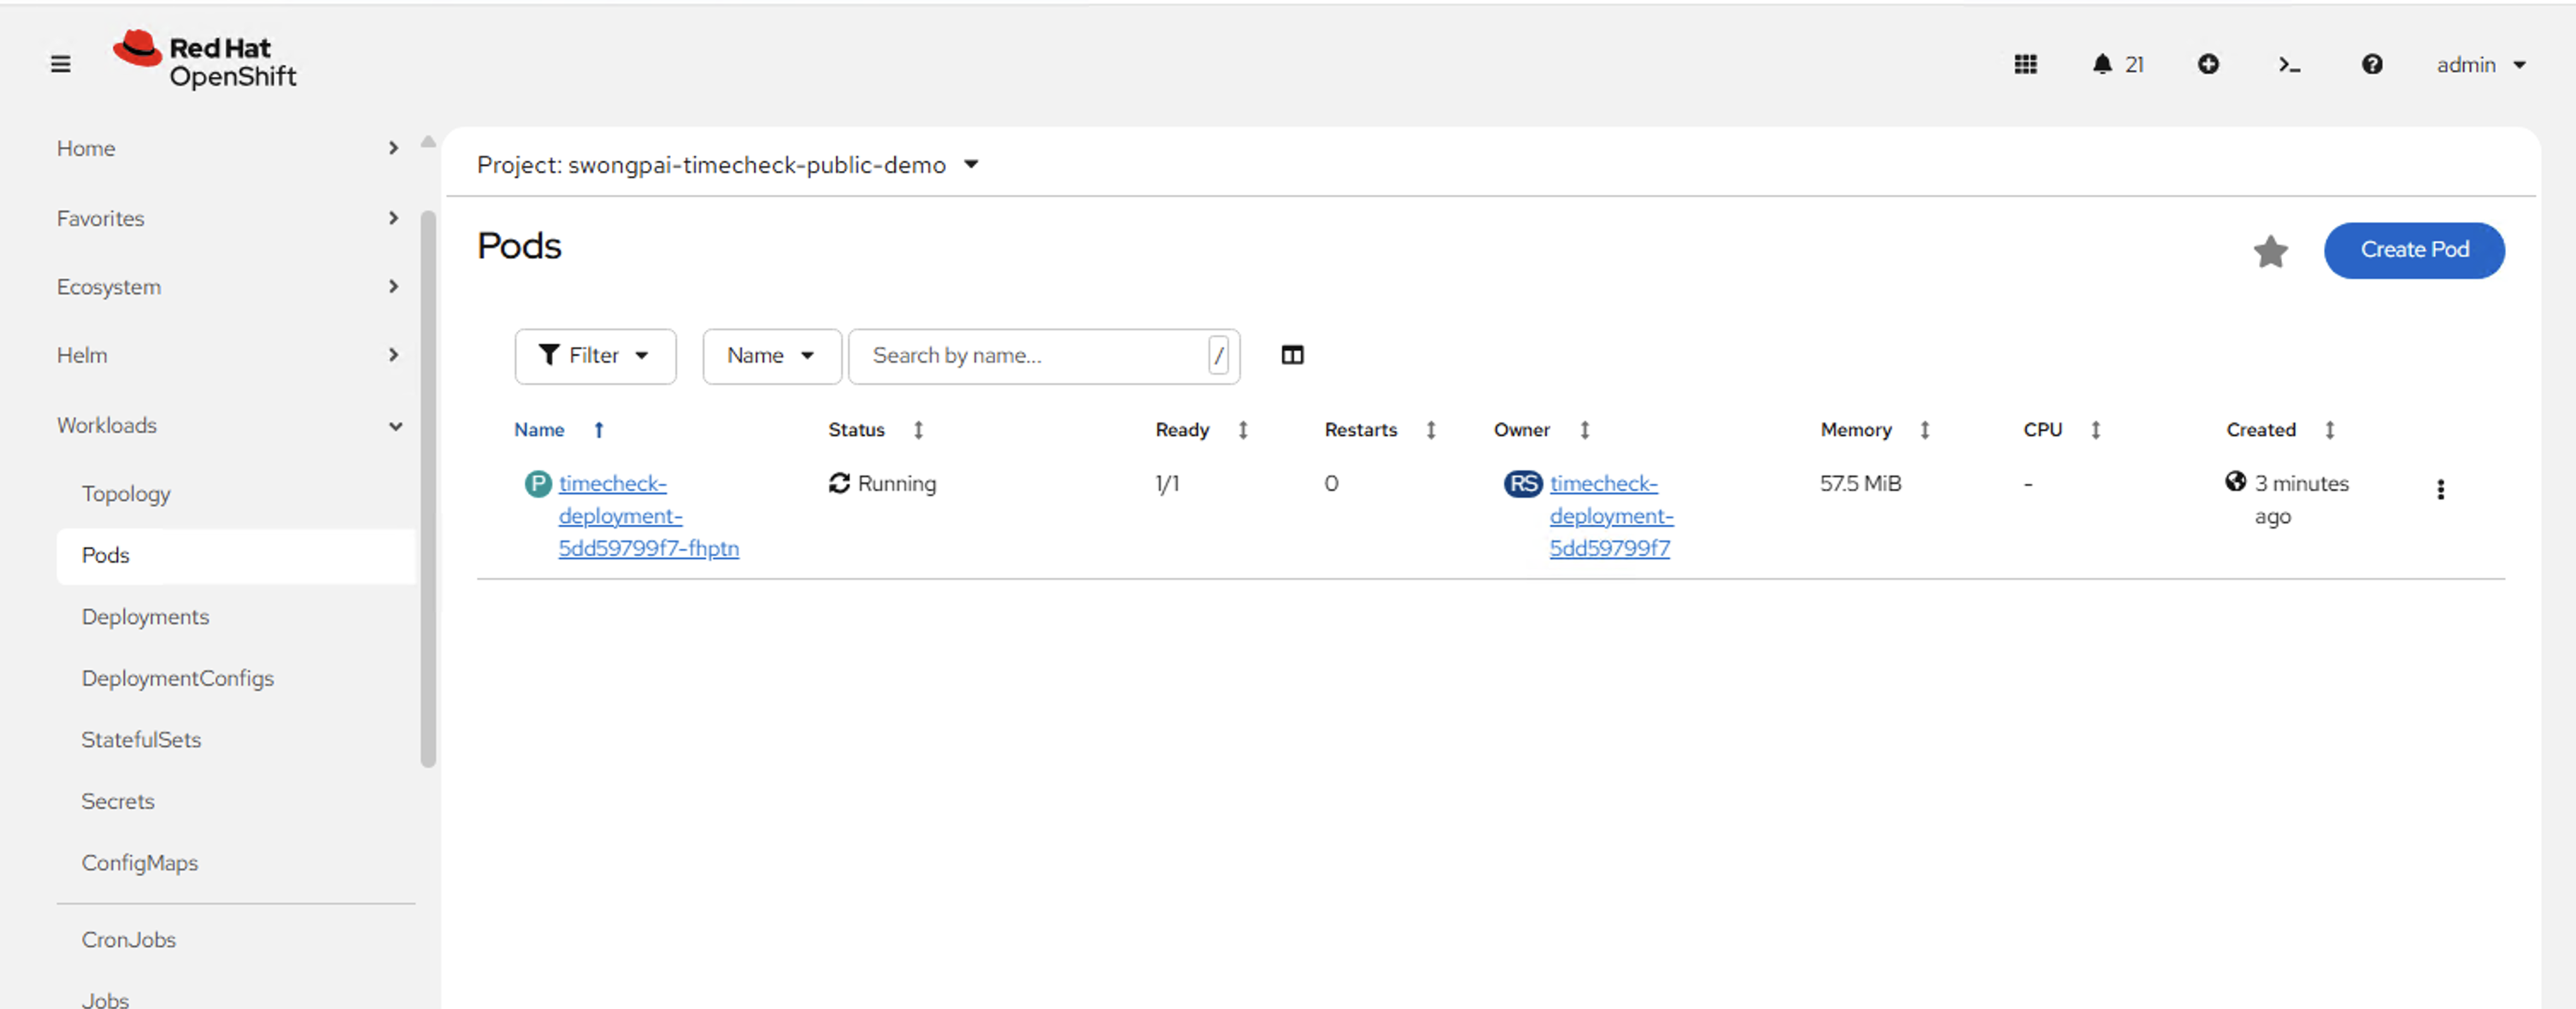
Observability
ACM aggregates metrics from all managed clusters into a central Thanos deployment on the hub. Each managed cluster runs a metrics-collector (based on Prometheus) that pushes metrics to the hub’s Thanos Receive endpoint. Grafana dashboards on the hub provide fleet-wide visibility: cluster health, resource utilization, API server latency, etcd performance, and custom alerts across the entire fleet.
MultiClusterObservability CR with a thanos.yaml secret containing bucket credentials. Retention defaults to 5 days for recent, 1 year for downsampled.
MultiClusterObservability CR
apiVersion: observability.open-cluster-management.io/v1beta2 kind: MultiClusterObservability metadata: name: observability spec: observabilityAddonSpec: enableMetrics: true interval: 300 # collection interval (seconds) storageConfig: metricObjectStorage: name: thanos-object-storage # Secret with S3 creds key: thanos.yaml statefulSetSize: 10Gi # local cache per Thanos component retentionConfig: retentionResolutionRaw: 5d retentionResolution5m: 14d retentionResolution1h: 365d advanced: queryFrontend: replicas: 2 receive: replicas: 3
# thanos.yaml — referenced by MultiClusterObservability type: s3 config: bucket: acm-observability endpoint: s3.openshift-storage.svc:443 insecure: false access_key: <from ObjectBucketClaim Secret> secret_key: <from ObjectBucketClaim Secret>
What's New in Recent ACM Releases
| Version | Highlights |
|---|---|
| 2.14 | Observability backup/restore for hub migrations. namespaceMapping on restore (OADP) — restore resources into a different namespace. |
| 2.15 | Fleet virtualization perspective — manage OpenShift Virtualization VMs across all clusters from the hub. Right-sizing recommendations for cluster resources. Argo CD agent (Tech Preview) — pull-based GitOps that scales to large/edge fleets. |
| 2.16 | Baseline used by this guide — see the ACM 2.16 release notes for details. |
ACS — Advanced Cluster Security
Optional layered product for full-lifecycle container security from build to runtime.
What is ACS?
Red Hat ACS (formerly StackRox) provides vulnerability management, compliance scanning, network segmentation, and runtime threat detection across your entire container environment. It secures workloads at every stage — build, deploy, and runtime — from a single centralized console.
Key Capabilities
ACS Architecture
ACS uses a hub-spoke model. Central runs on a dedicated cluster (or the ACM hub). Each protected cluster runs Secured Cluster components that report to Central via gRPC/mTLS.
Policy & Violation Flow
ACS ships with an extensive built-in security policy library covering CVEs, misconfigurations, runtime anomalies, and compliance standards. Policies evaluate at build, deploy, or runtime — violations trigger alerts, block deployments, or kill pods depending on enforcement configuration. Policies can also be managed declaratively as code via the SecurityPolicy CRD (GitOps-friendly).
Deploying ACS on OpenShift
ACS is deployed via the RHACS Operator from OperatorHub. Install Central on a hub cluster, then deploy SecuredCluster bundles on each managed cluster.
Deployment Steps
| # | Step | Detail |
|---|---|---|
| 1 | Install RHACS Operator | OperatorHub → Advanced Cluster Security for Kubernetes → Install |
| 2 | Create Central CR | Deploys Central, Scanner V4, Dashboard UI, Central DB on hub cluster |
| 3 | Generate init-bundle | roxctl central init-bundles generate — creates cluster-specific TLS secrets |
| 4 | Apply init-bundle | Apply generated Secret to each managed cluster’s stackrox namespace |
| 5 | Create SecuredCluster CR | Deploys Sensor + Collector + Admission Controller on each managed cluster |
Central CR
apiVersion: platform.stackrox.io/v1alpha1 kind: Central metadata: name: stackrox-central-services namespace: stackrox spec: central: exposure: route: enabled: true # auto-create Route persistence: persistentVolumeClaim: claimName: stackrox-db db: isEnabled: Default # managed PostgreSQL persistence: persistentVolumeClaim: claimName: central-db scanner: analyzer: scaling: autoScaling: Enabled maxReplicas: 5 minReplicas: 2 replicas: 3 scannerComponent: AutoSense # V4 when available
SecuredCluster CR
apiVersion: platform.stackrox.io/v1alpha1 kind: SecuredCluster metadata: name: stackrox-secured-cluster namespace: stackrox spec: clusterName: production centralEndpoint: central-stackrox.apps.hub.example.com:443 admissionControl: # 4.9+ console: single ON/OFF enforcement toggle listenOnCreates: true listenOnUpdates: true listenOnEvents: true # runtime enforcement contactImageScanners: ScanIfMissing perNode: collector: collection: CORE_BPF # only supported method since ACS 4.5 imageFlavor: Regular taintToleration: TolerateTaints
inform enforcement on all policies — switch to enforce per-policy after tuning to avoid false-positive blocks in production.
Key Features Deep Dive
Vulnerability Management
ACS scans images using Scanner V4 — the default scanner since ACS 4.8 (the legacy StackRox Scanner is deprecated) — and correlates CVEs with deployment context: is the vulnerable package in the running container? Is the port exposed? Is there a known exploit? This produces a risk score that prioritizes remediation beyond raw CVSS. Since ACS 4.10, base-image layers are distinguished from application-added layers, so platform and app teams each see the CVEs they own.
| Capability | Detail |
|---|---|
| Image scanning | Scans on first deploy + continuous re-scan as new CVEs are published |
| Risk prioritization | Combines CVSS + exploit availability + deployment exposure + network reachability |
| Fix tracking | Shows which CVEs have fixes available in newer package versions |
| Image policy | Block images from untrusted registries, with :latest tag, or exceeding CVE thresholds |
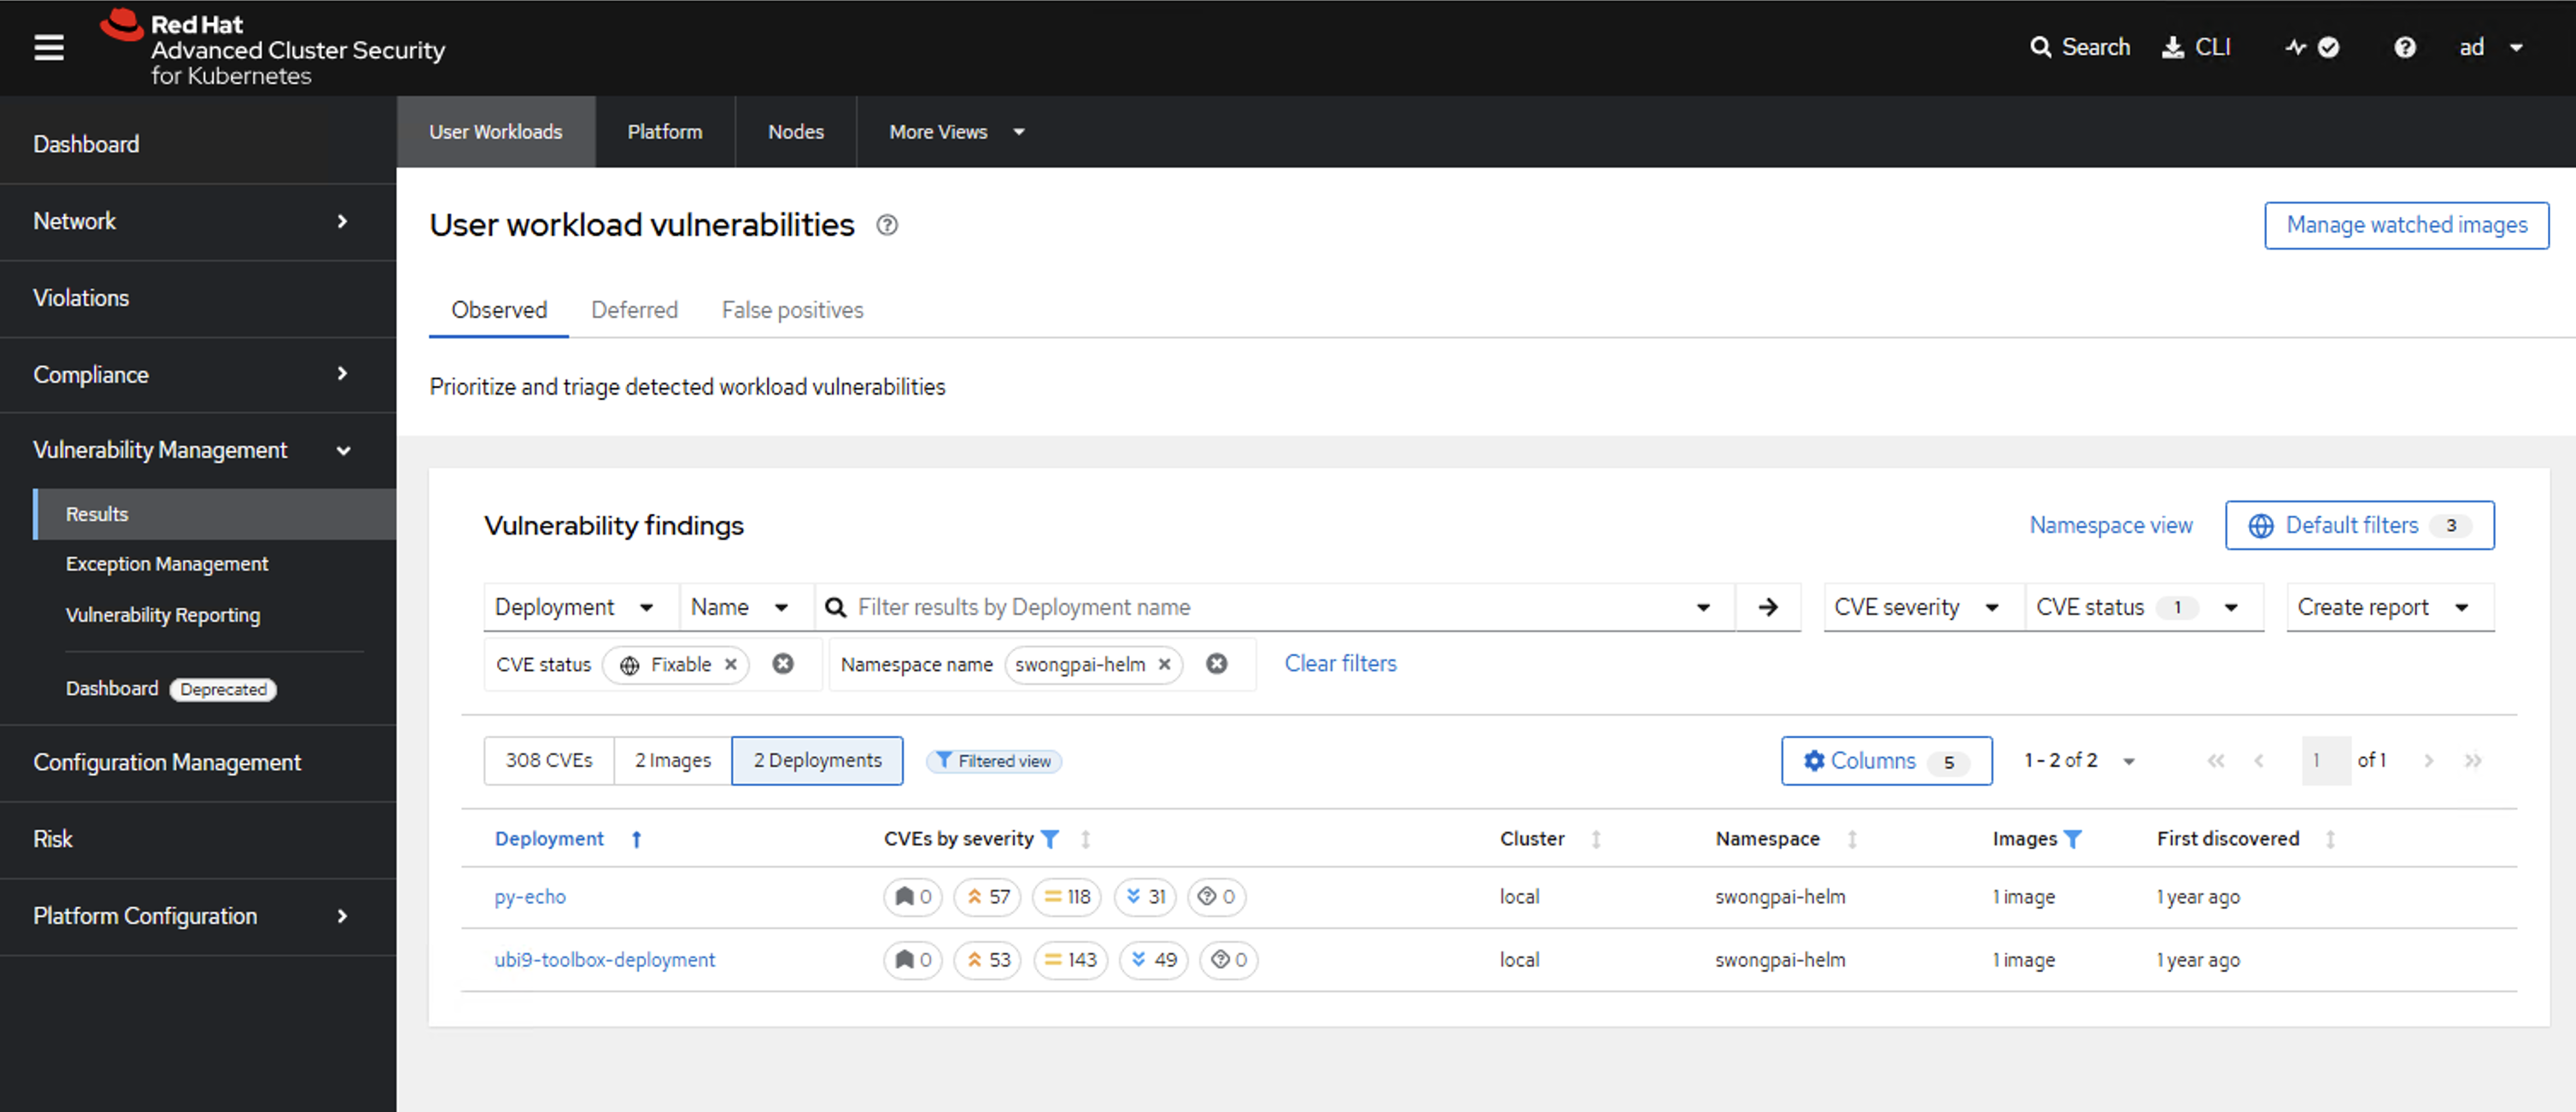
Network Segmentation
ACS builds a real-time network flow graph from Collector observations. Visualize actual pod-to-pod and pod-to-external traffic, then generate NetworkPolicy YAML from observed flows — zero-trust microsegmentation without manual policy writing.
- Visualize active network flows per namespace and deployment
- Detect unexpected connections (e.g., frontend directly reaching database)
- Auto-generate NetworkPolicy from baseline traffic patterns
- Simulate policy changes before applying
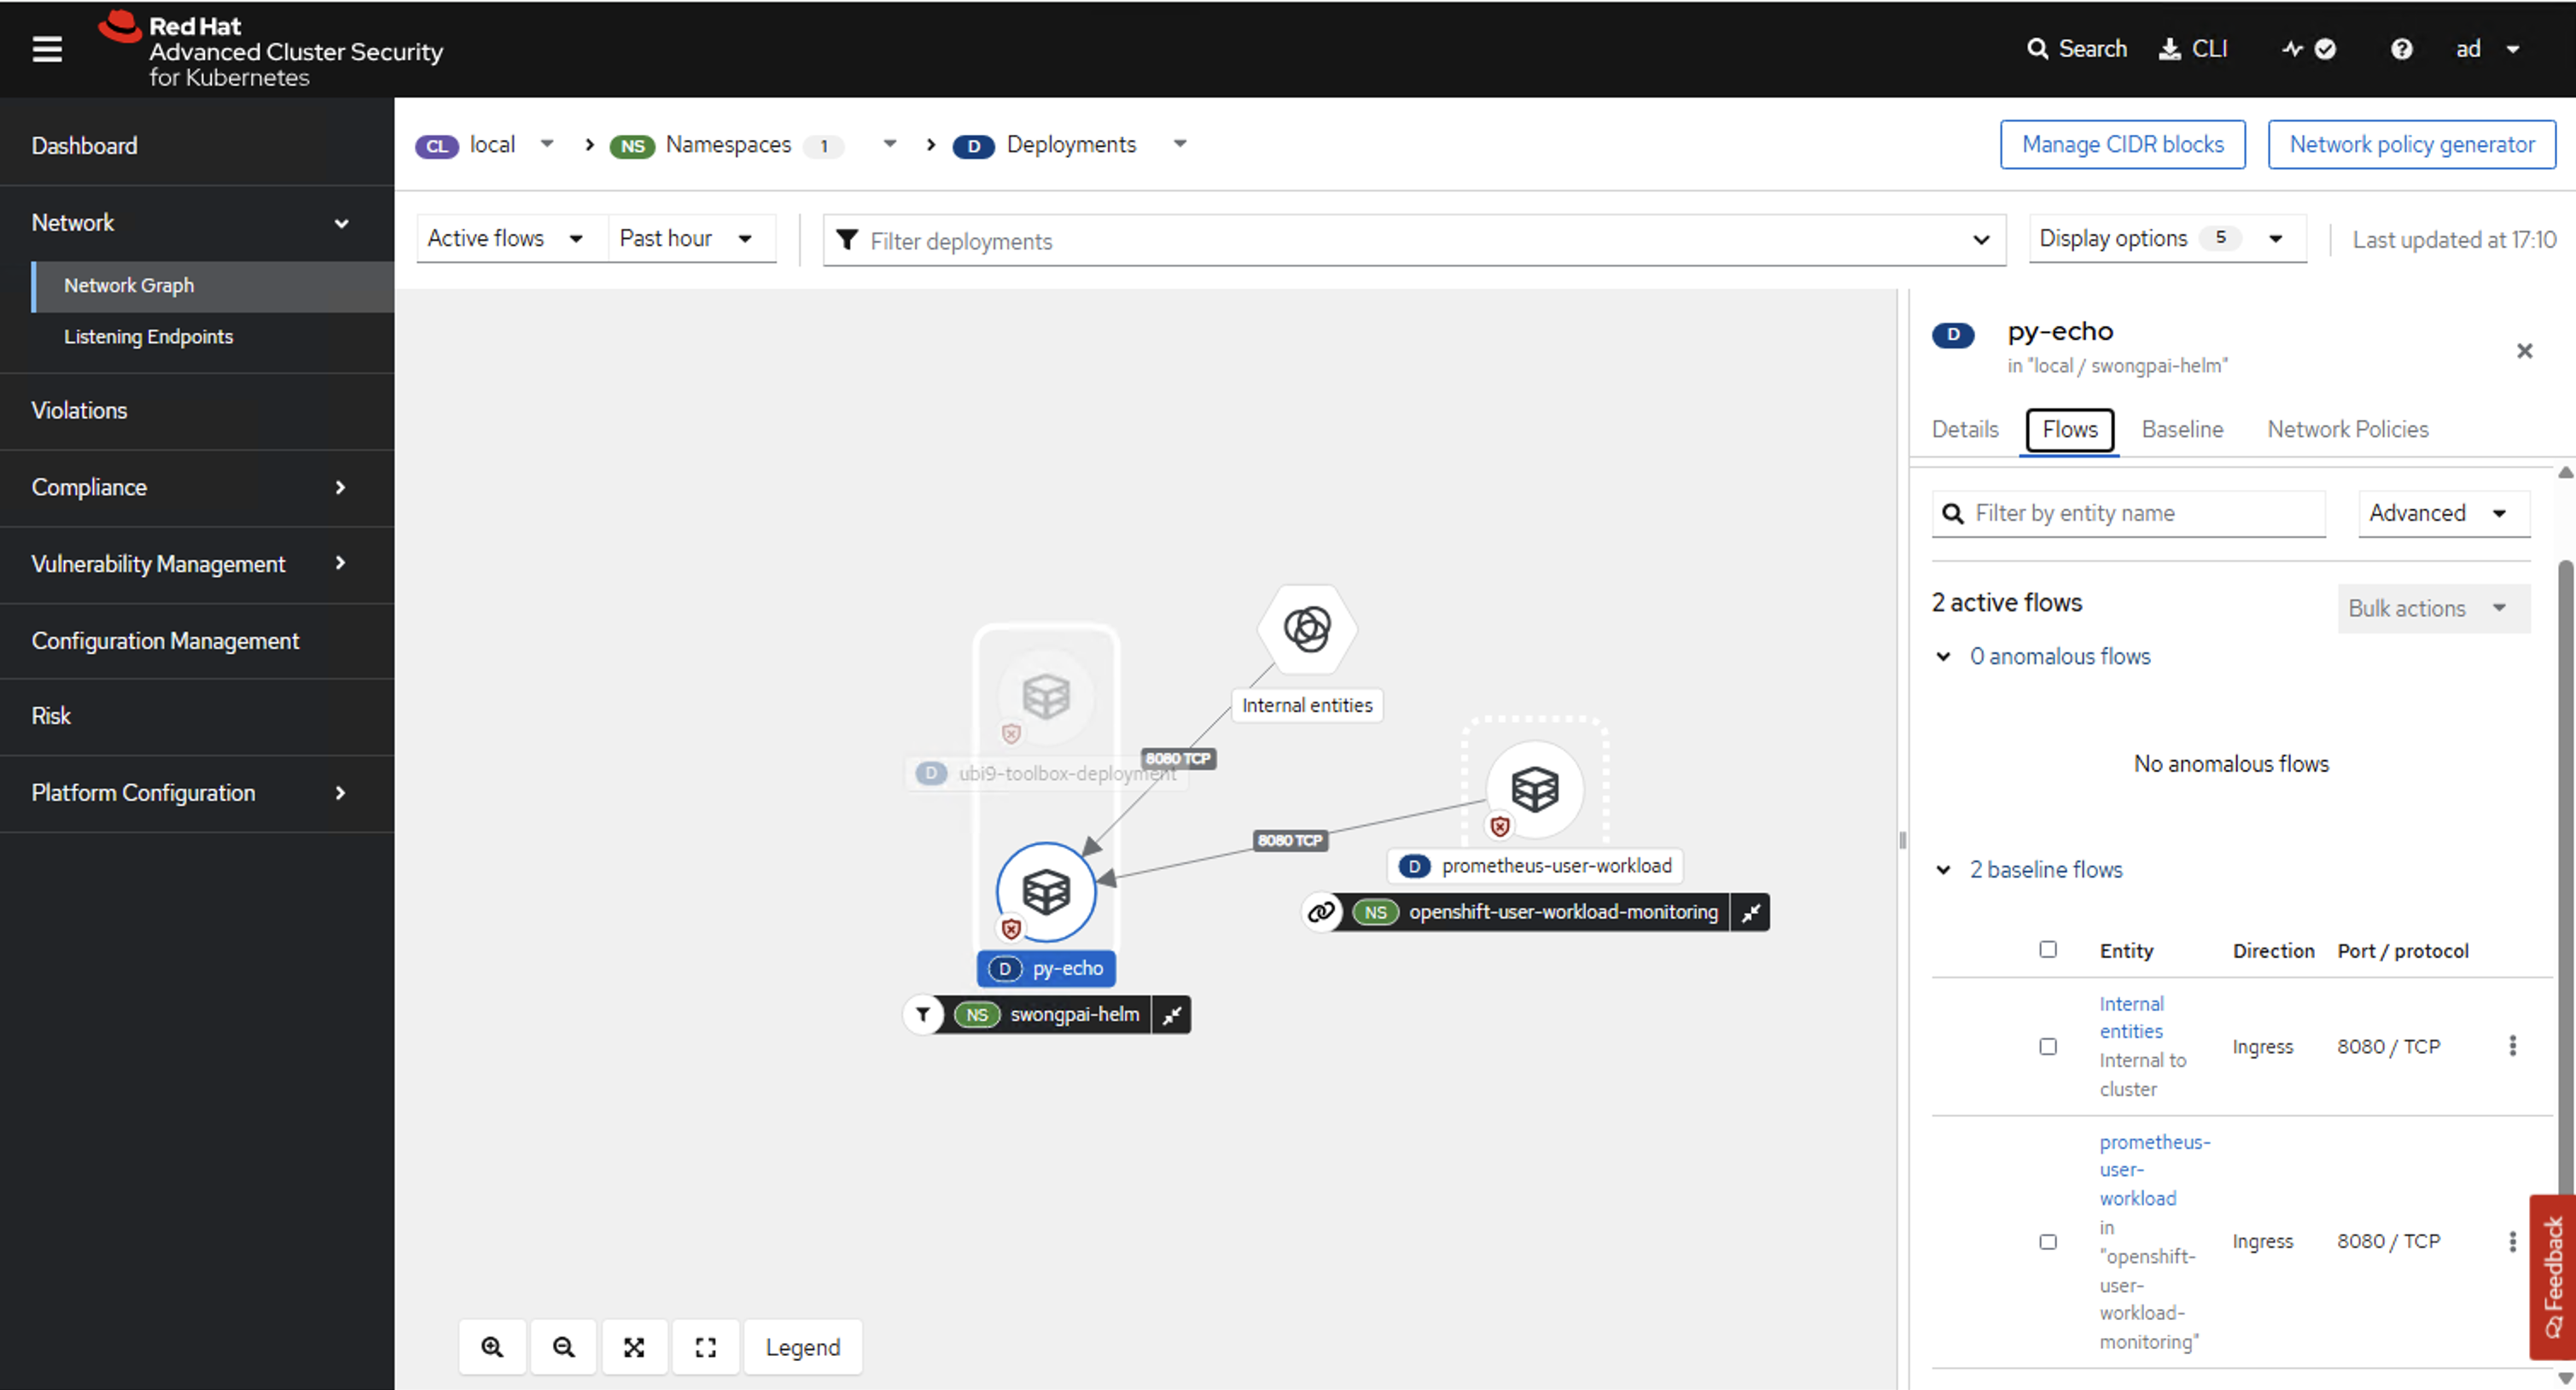
Runtime Detection
Collector uses CO-RE BPF probes (Compile Once – Run Everywhere eBPF) on each node to monitor all container processes, network connections, and file access in real-time — without modifying containers, requiring sidecars, or loading per-kernel drivers.
- Process monitoring — detect unexpected binaries (crypto miners, reverse shells, nmap)
- Network monitoring — detect unexpected outbound connections or lateral movement
- File access — detect reads/writes to sensitive paths (
/etc/shadow,/proc) - Response actions — alert only, scale to zero, or kill pod immediately
Live Example — Process Discovery in Action
Run a few commands inside a pod terminal, and Collector picks them up instantly. Below: curl and tracepath executed in a toolbox pod, then flagged by ACS under Risk → Process Discovery with full parent-process lineage and timestamps.
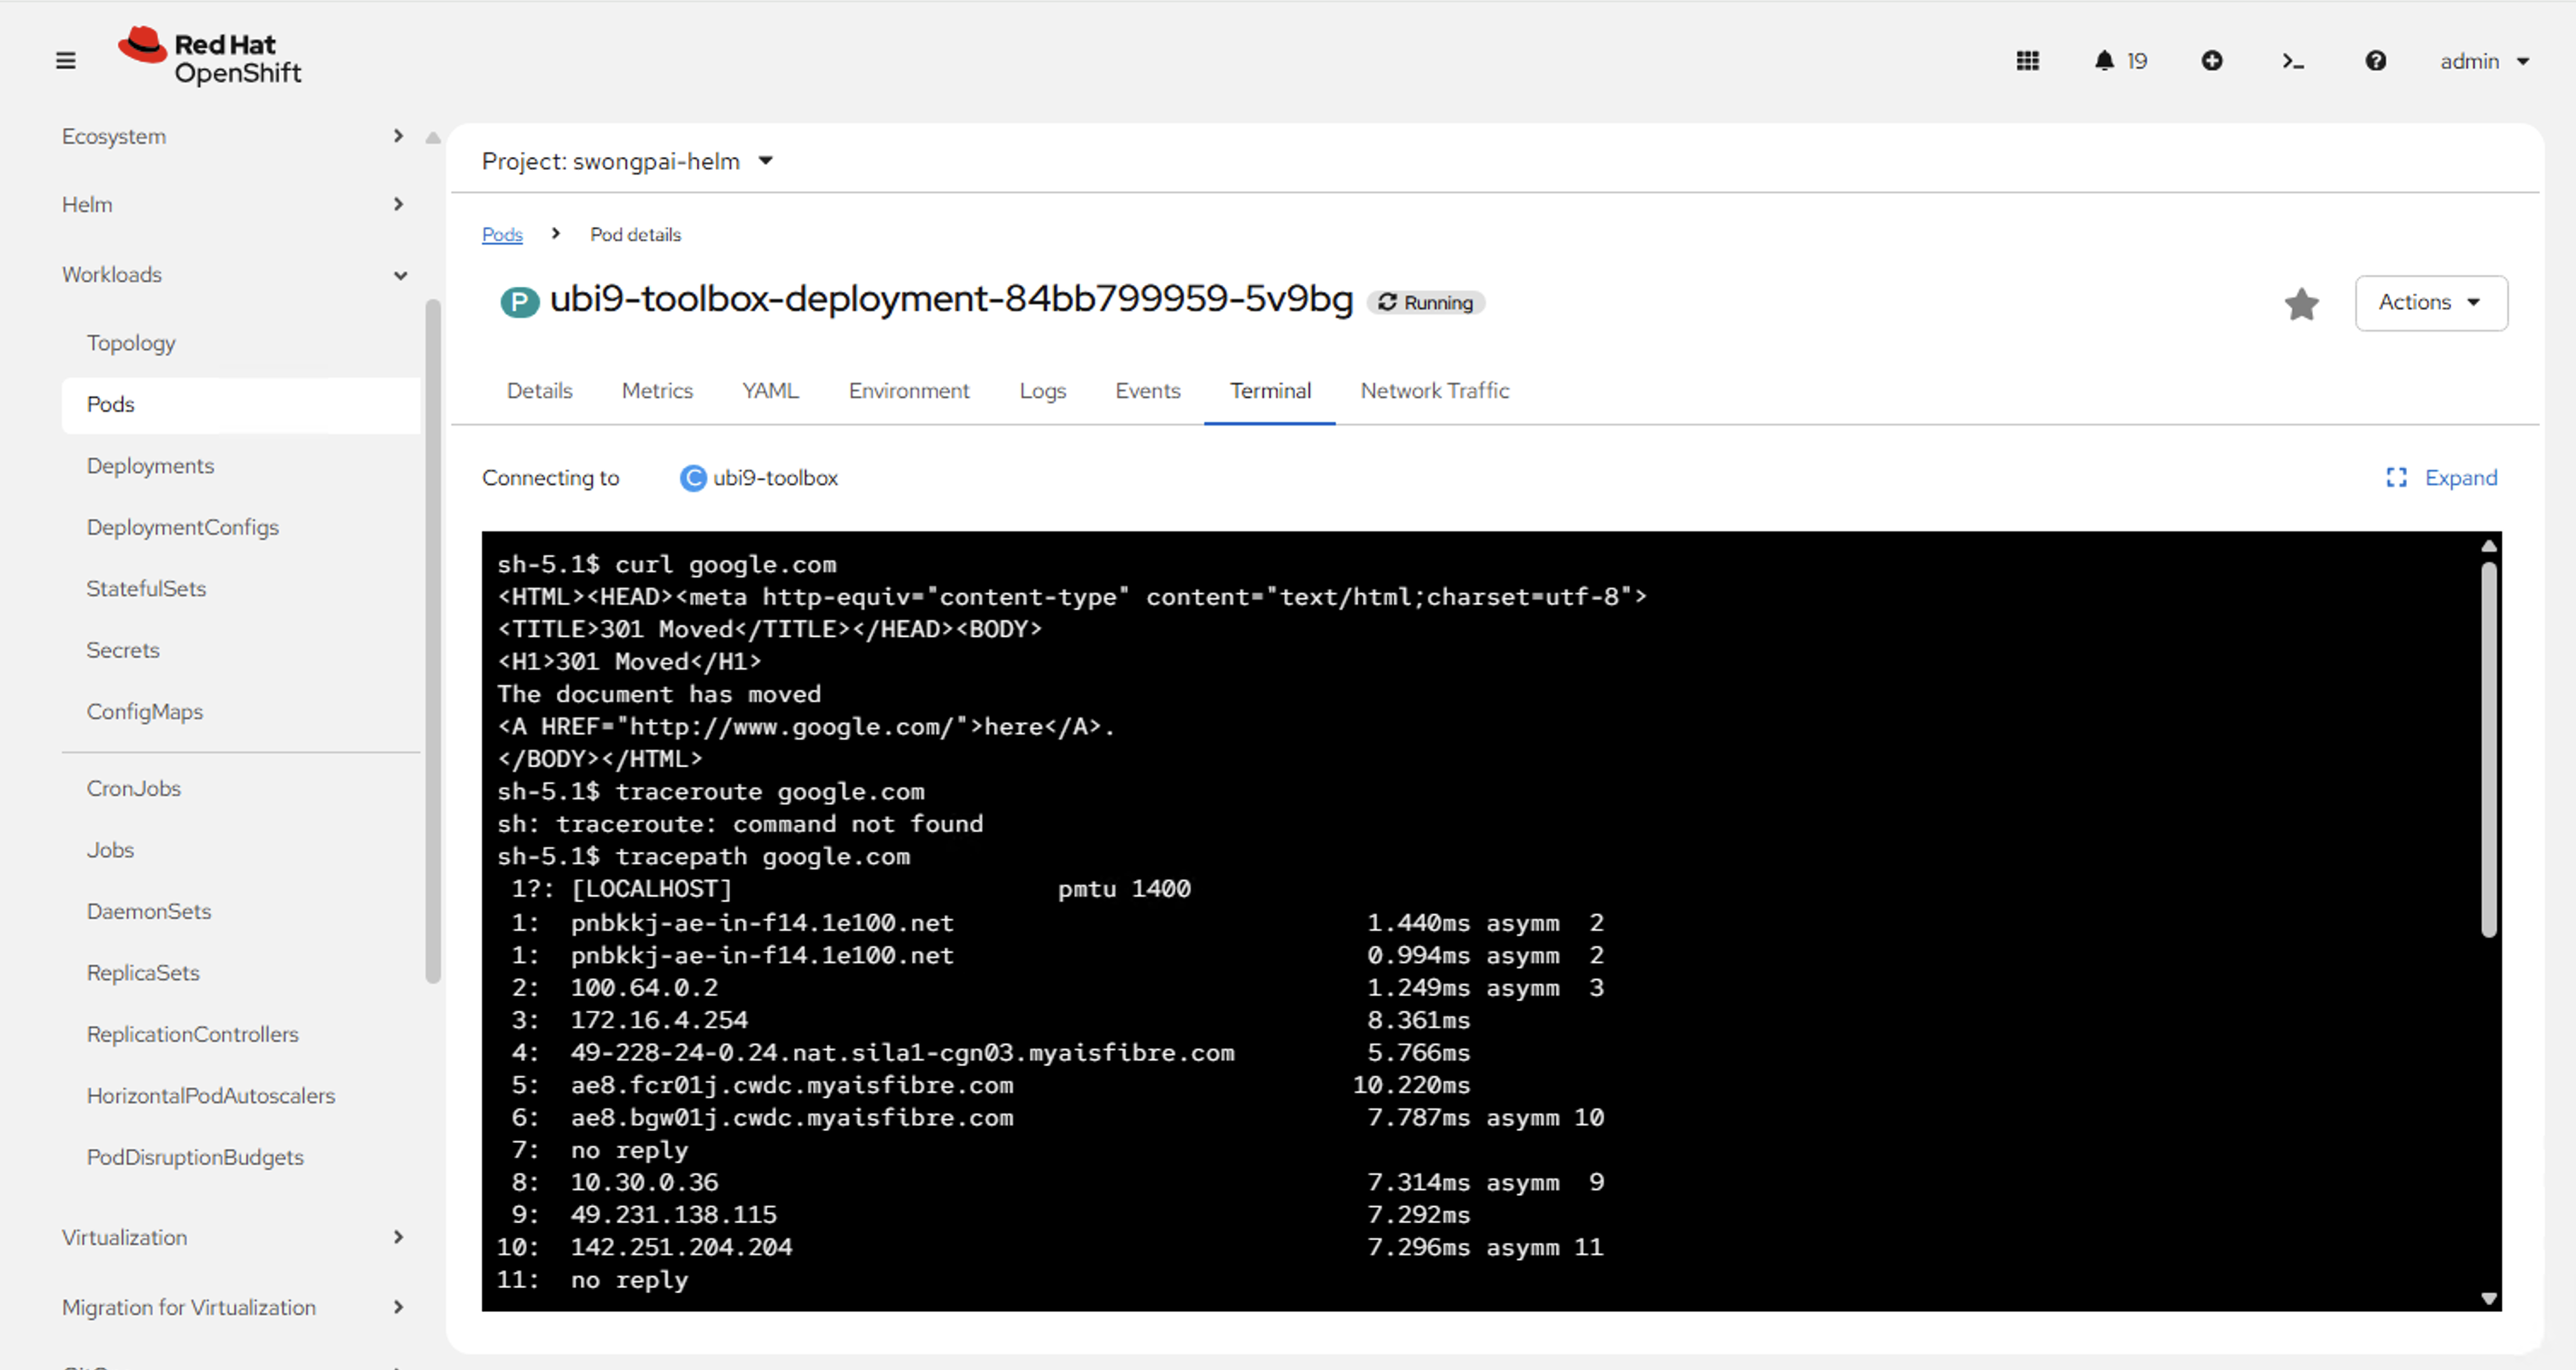
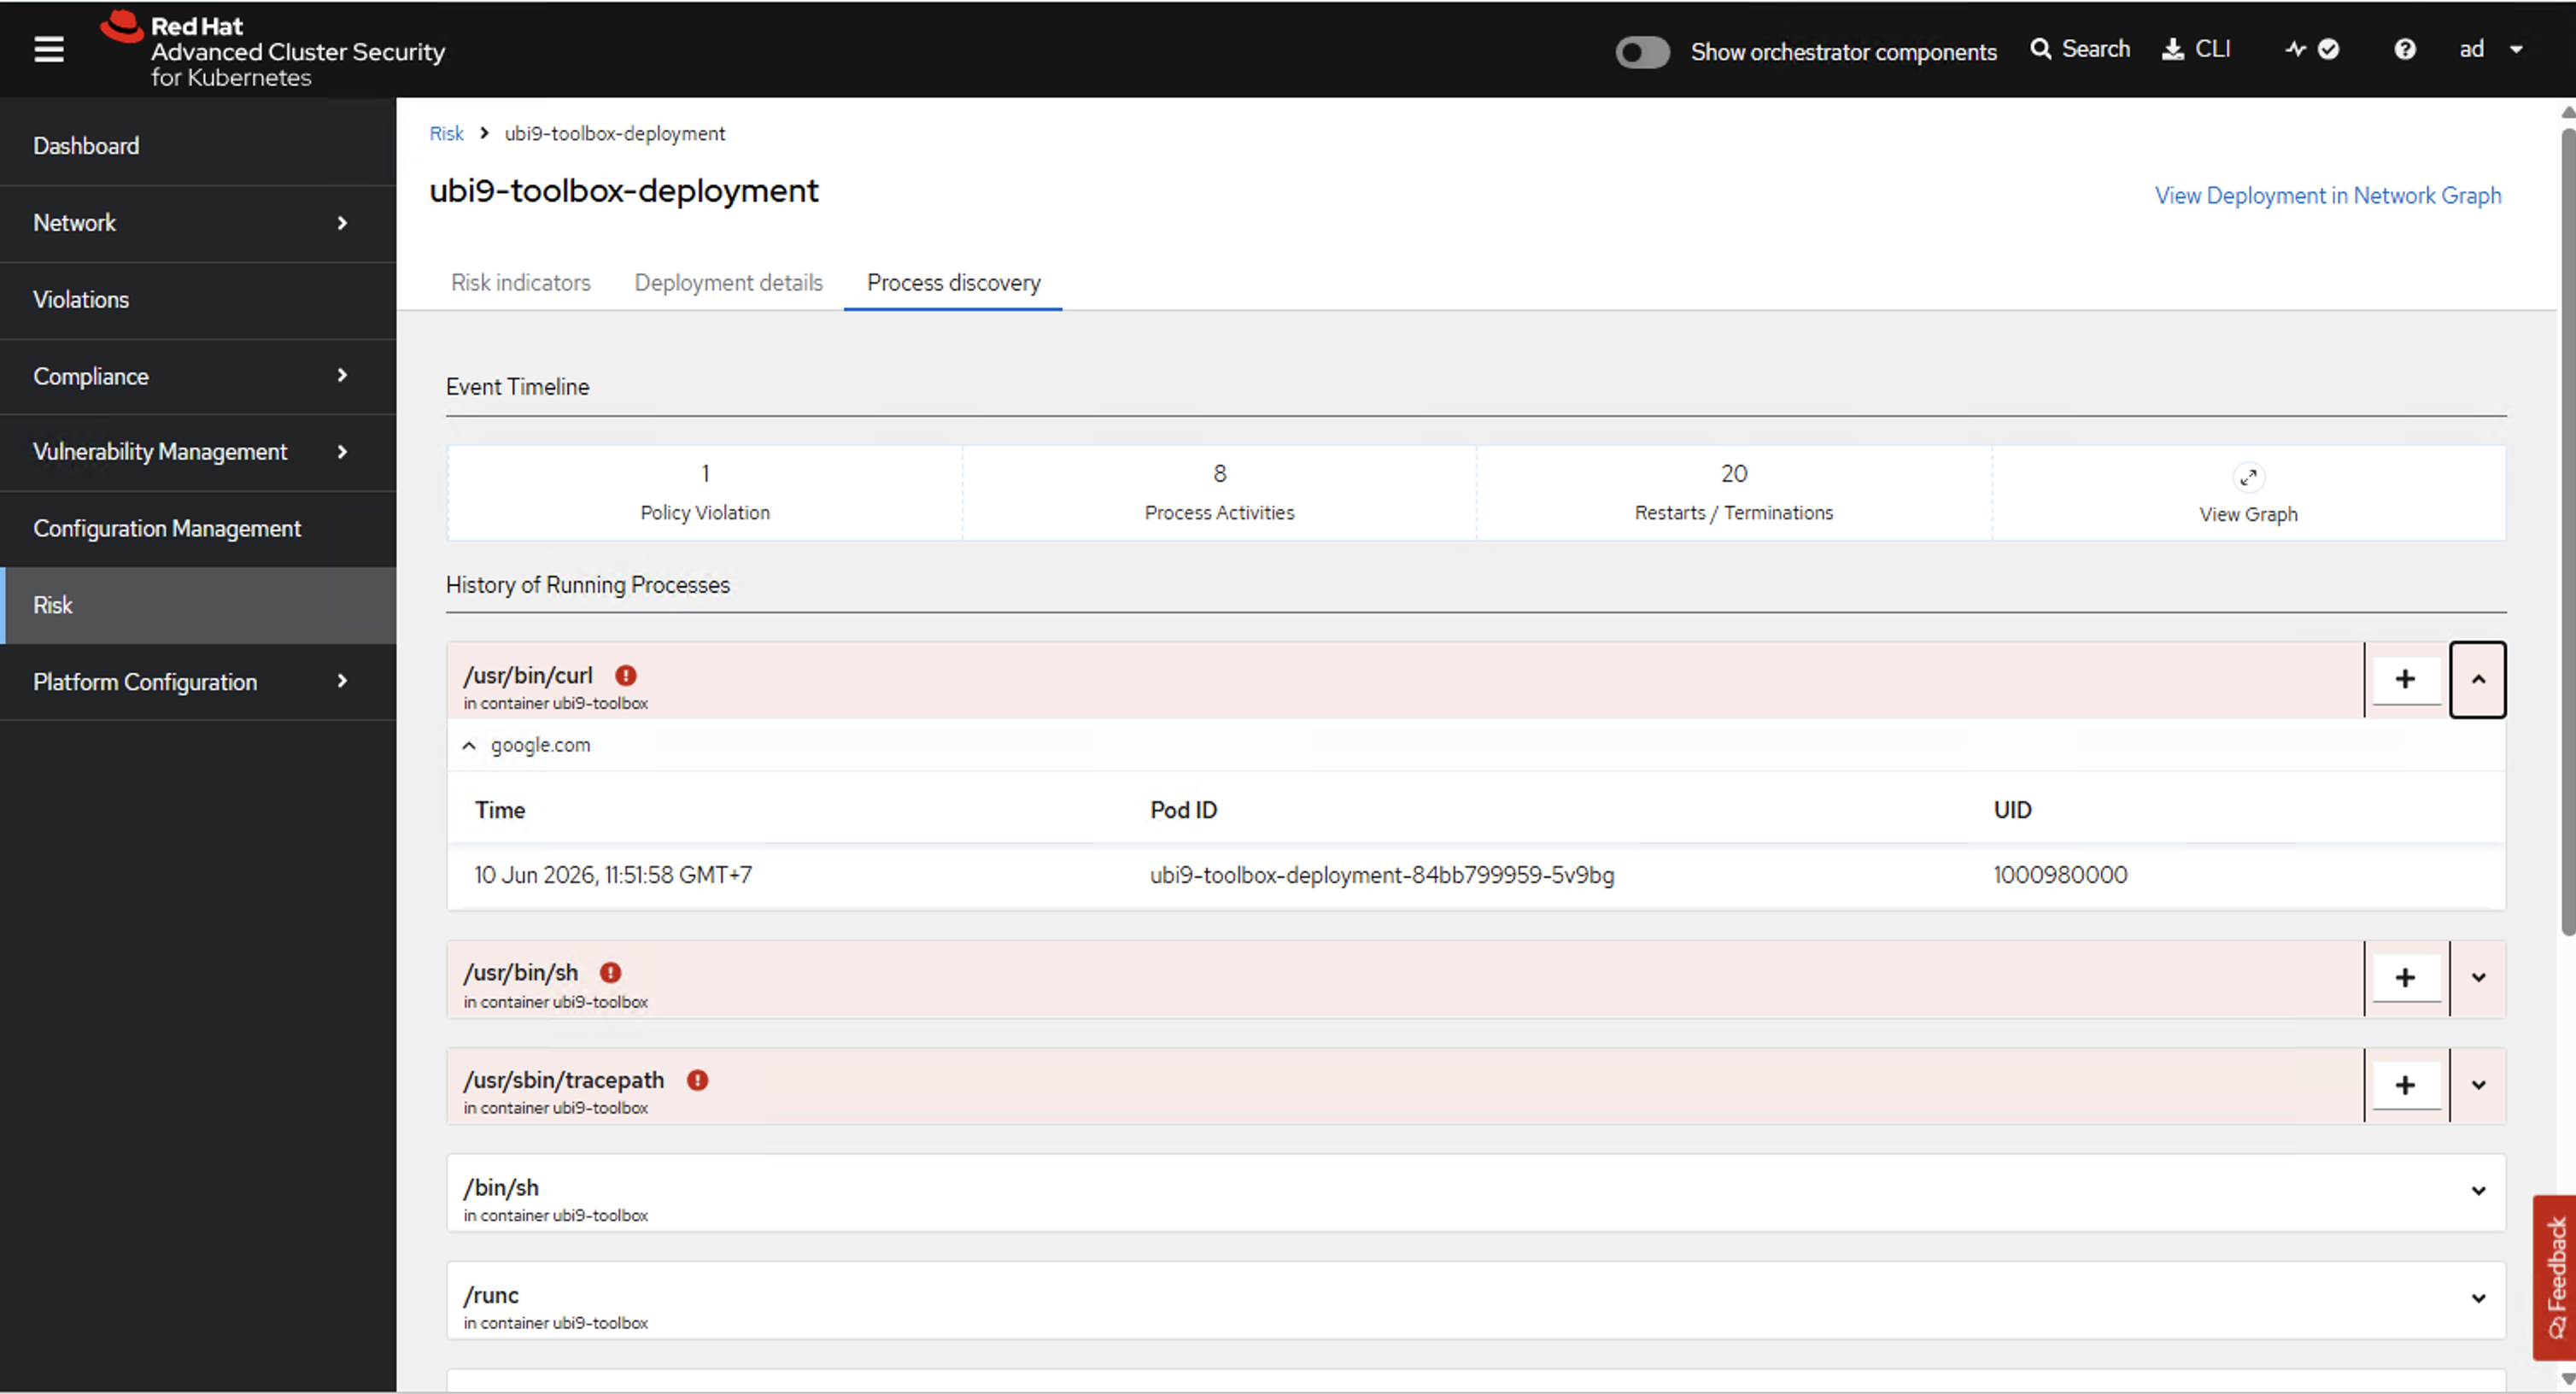
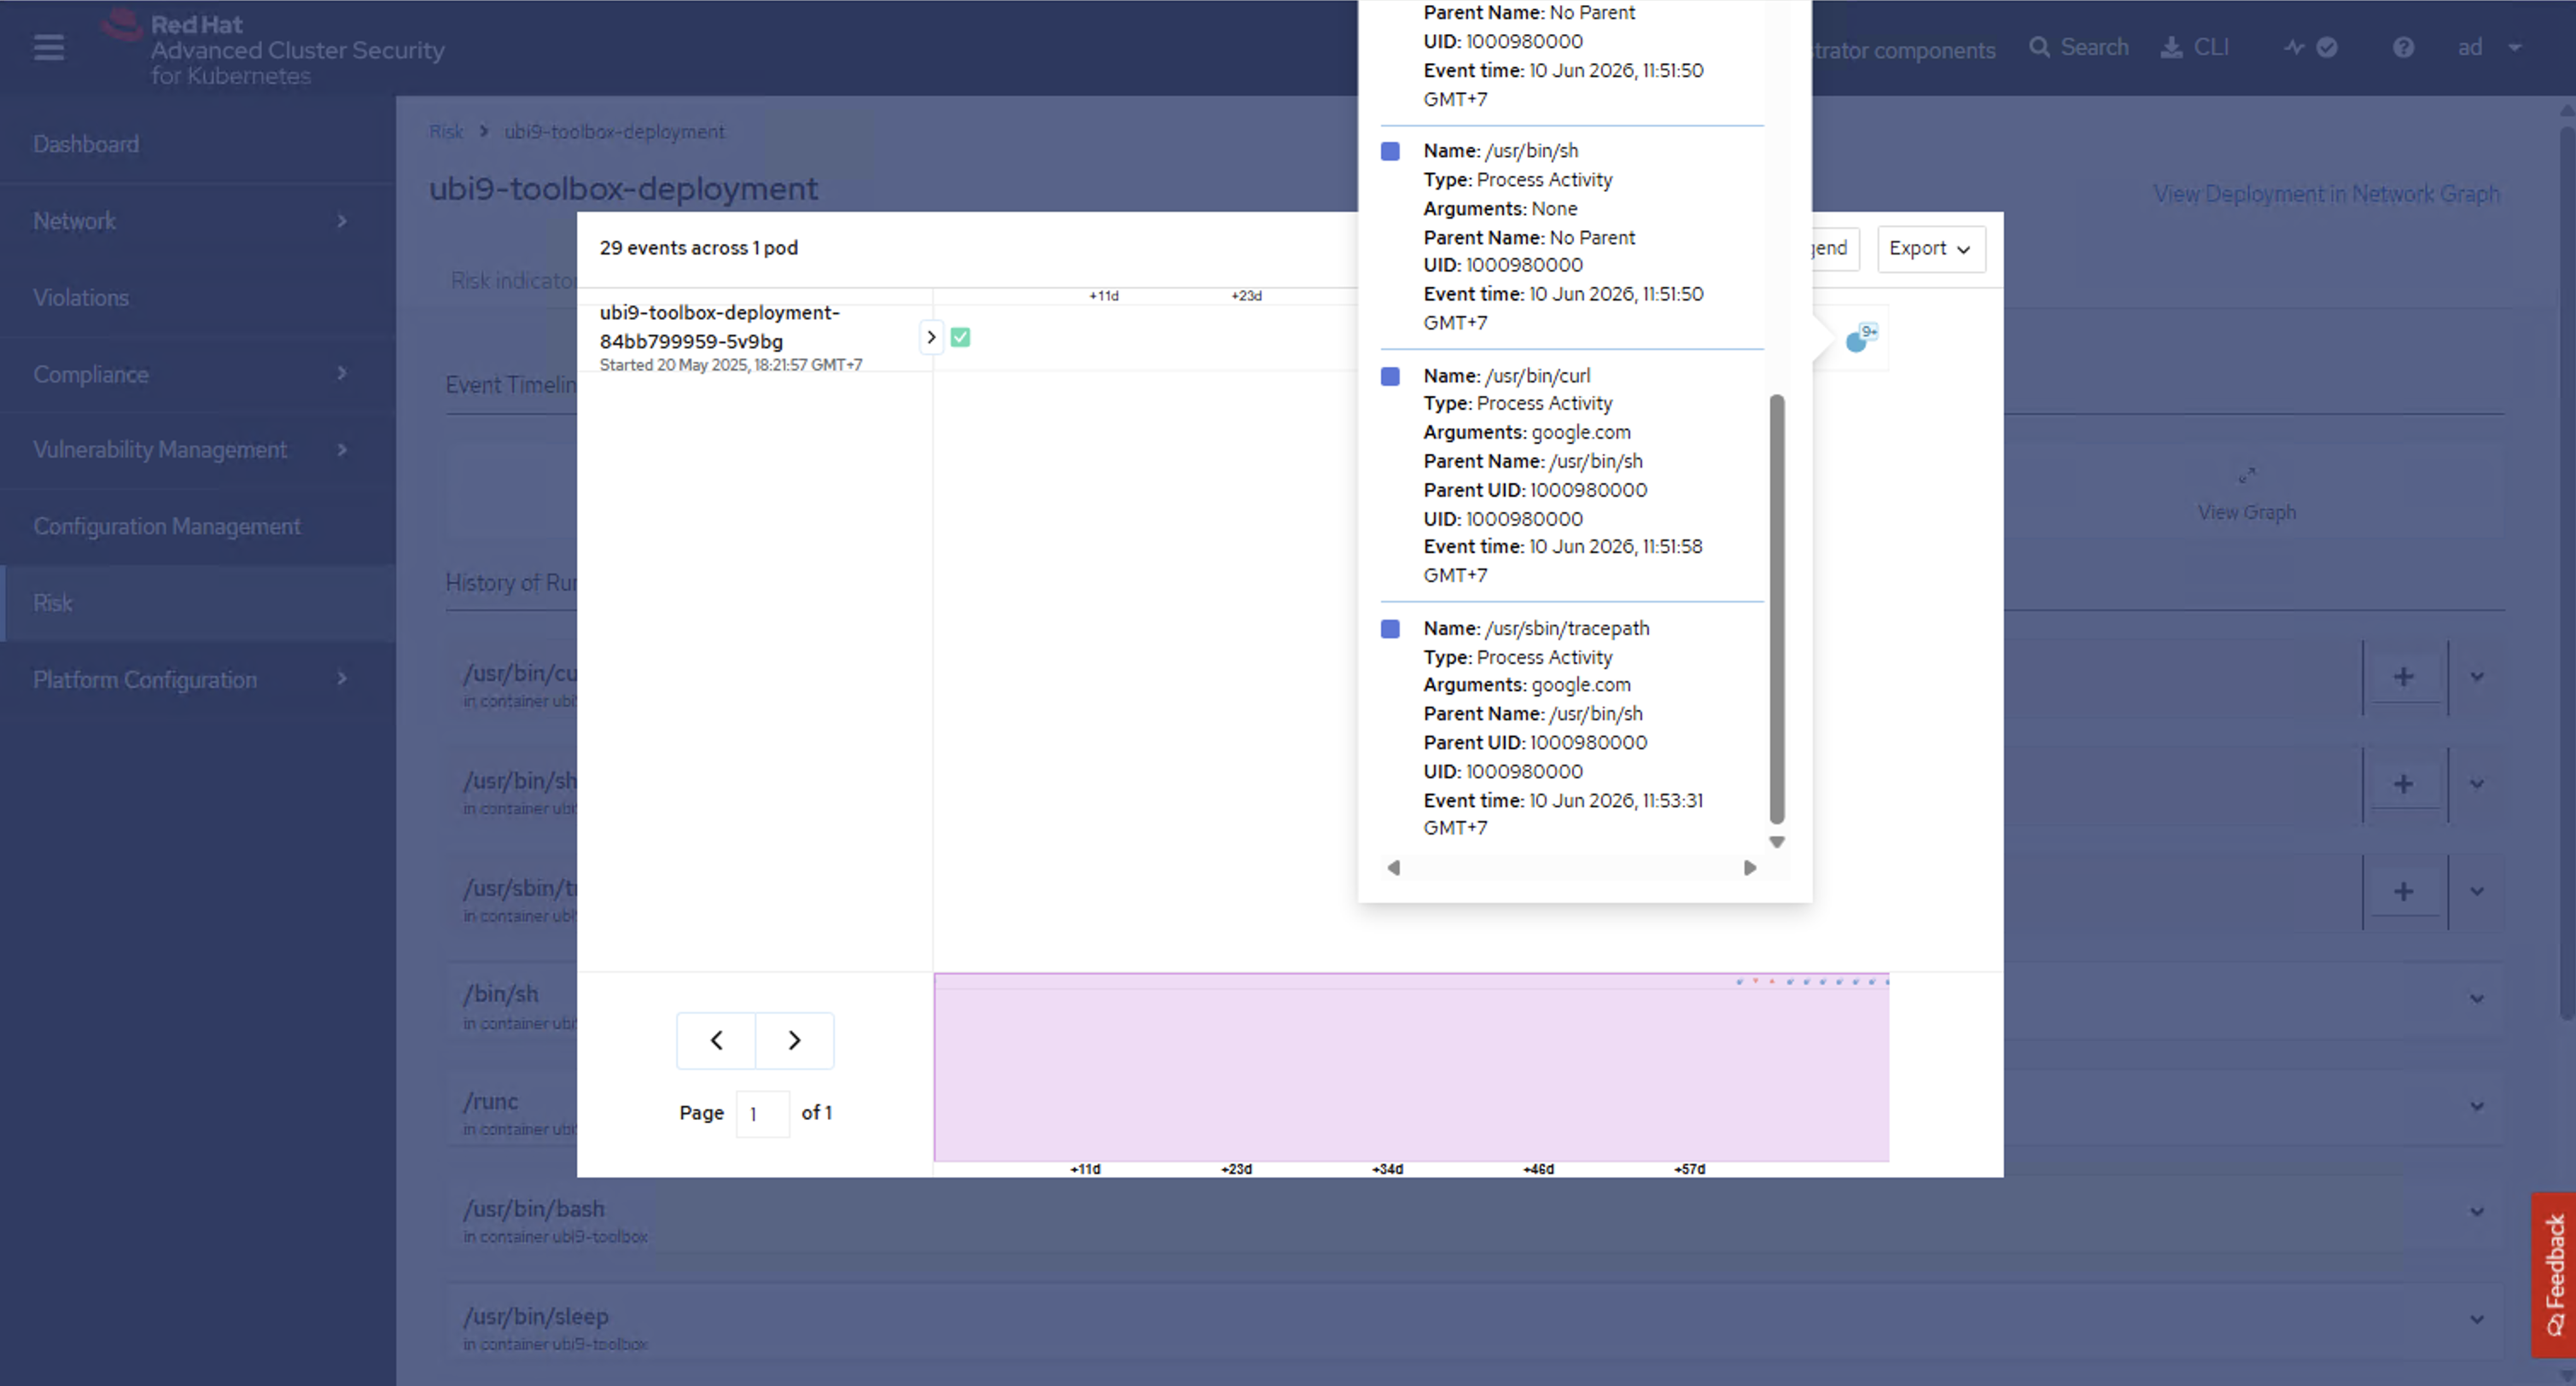
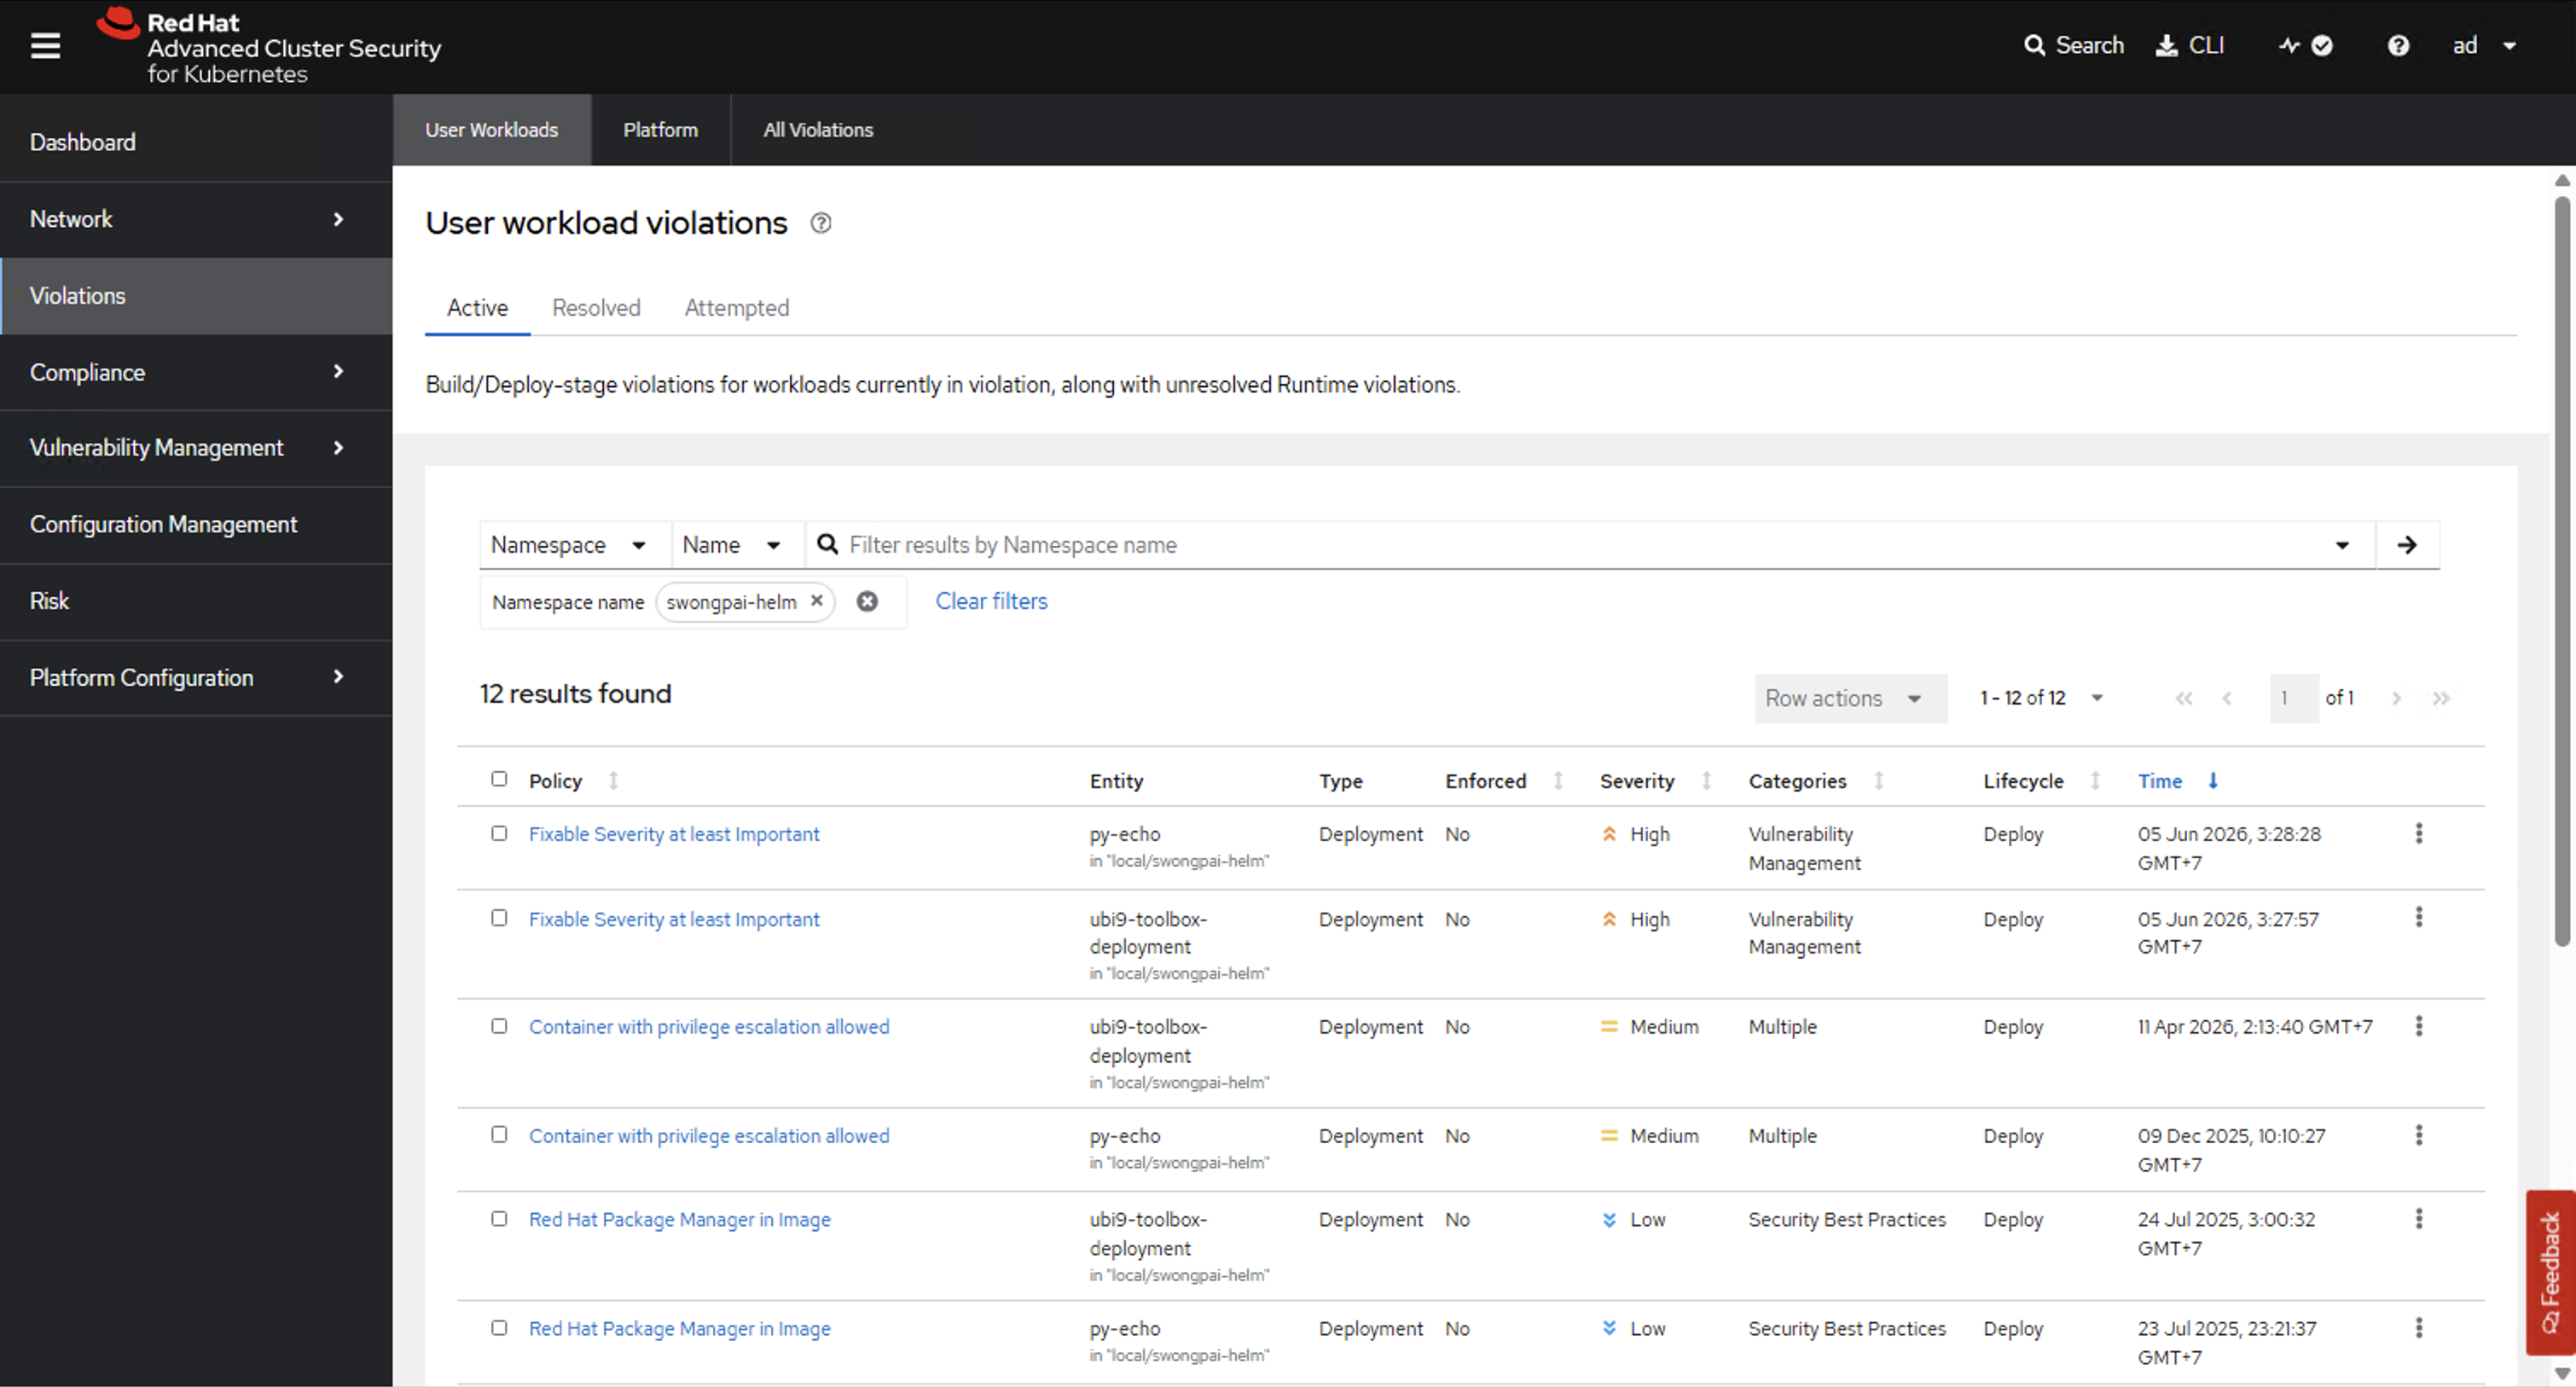
Compliance Scanning
ACS continuously evaluates clusters against industry compliance standards and generates audit-ready reports. Current ACS delivers this through Compliance v2: the Compliance Operator runs the actual node/platform scans on each secured cluster, while ACS schedules scans, aggregates fleet-wide results, and produces reports.
- Supported standards: CIS Kubernetes Benchmark, NIST SP 800-190, PCI DSS 4.0, HIPAA, NERC-CIP
- Per-cluster and per-namespace compliance dashboards
- Export PDF/CSV reports for auditors
- Requires the Compliance Operator installed on each secured cluster for node-level checks
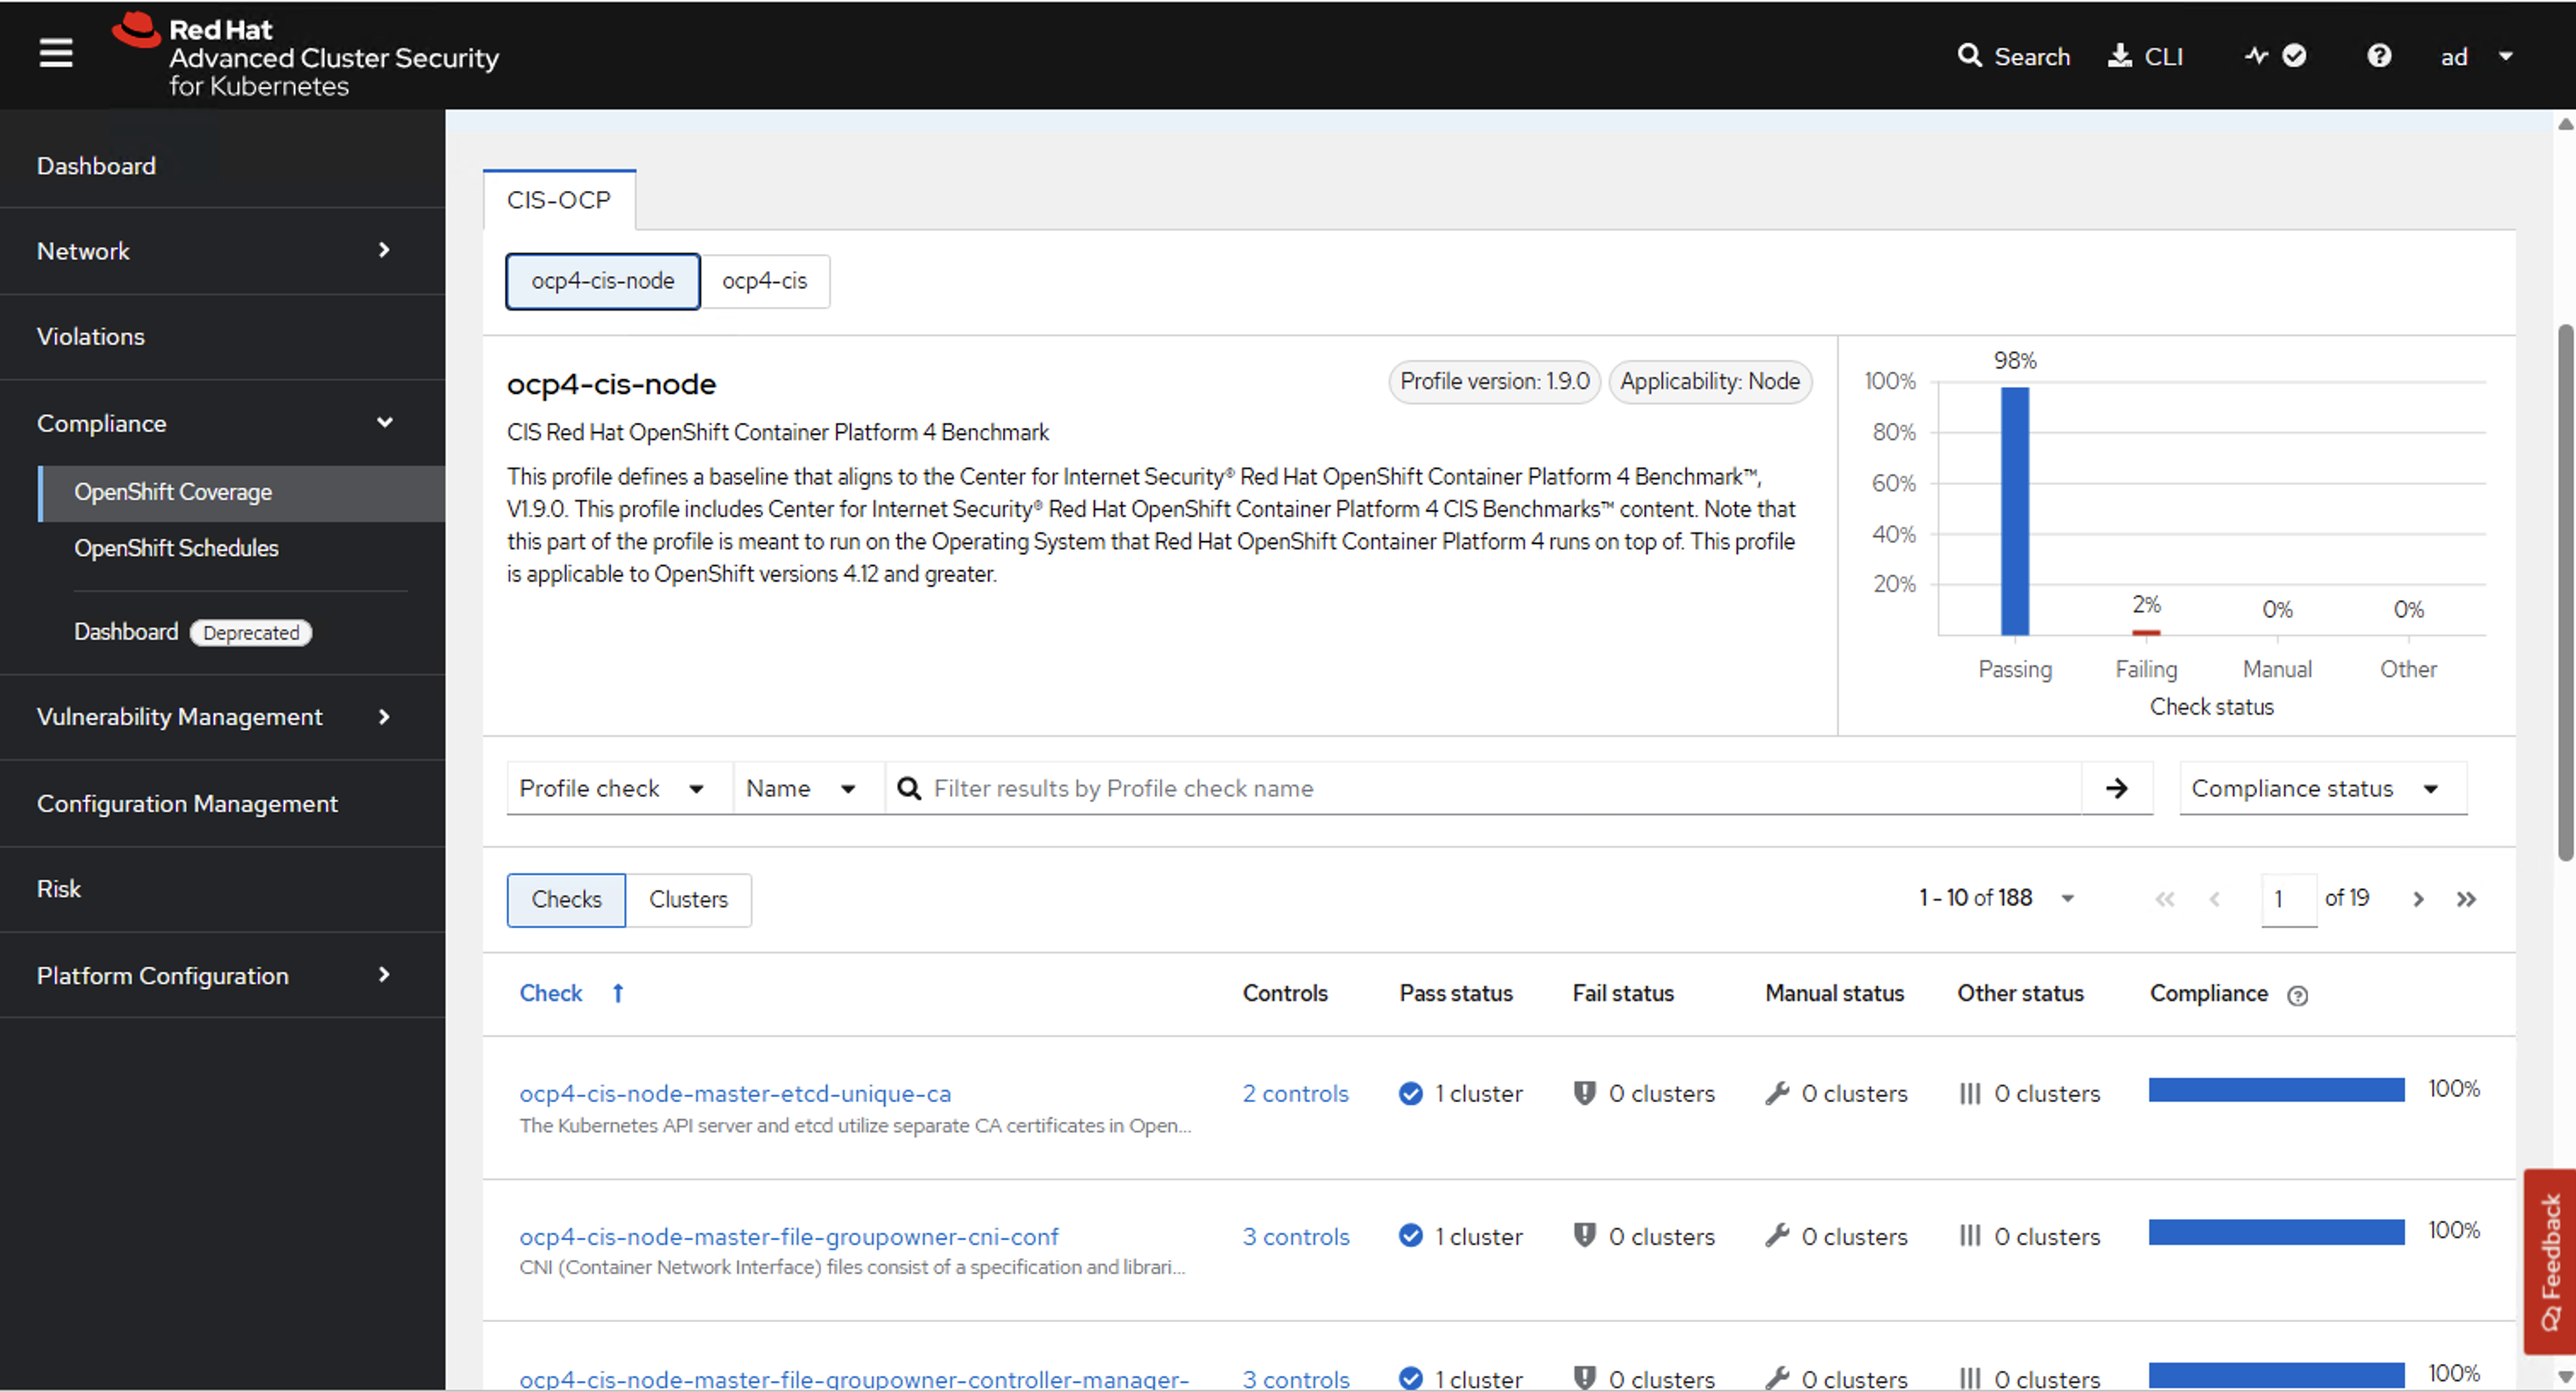
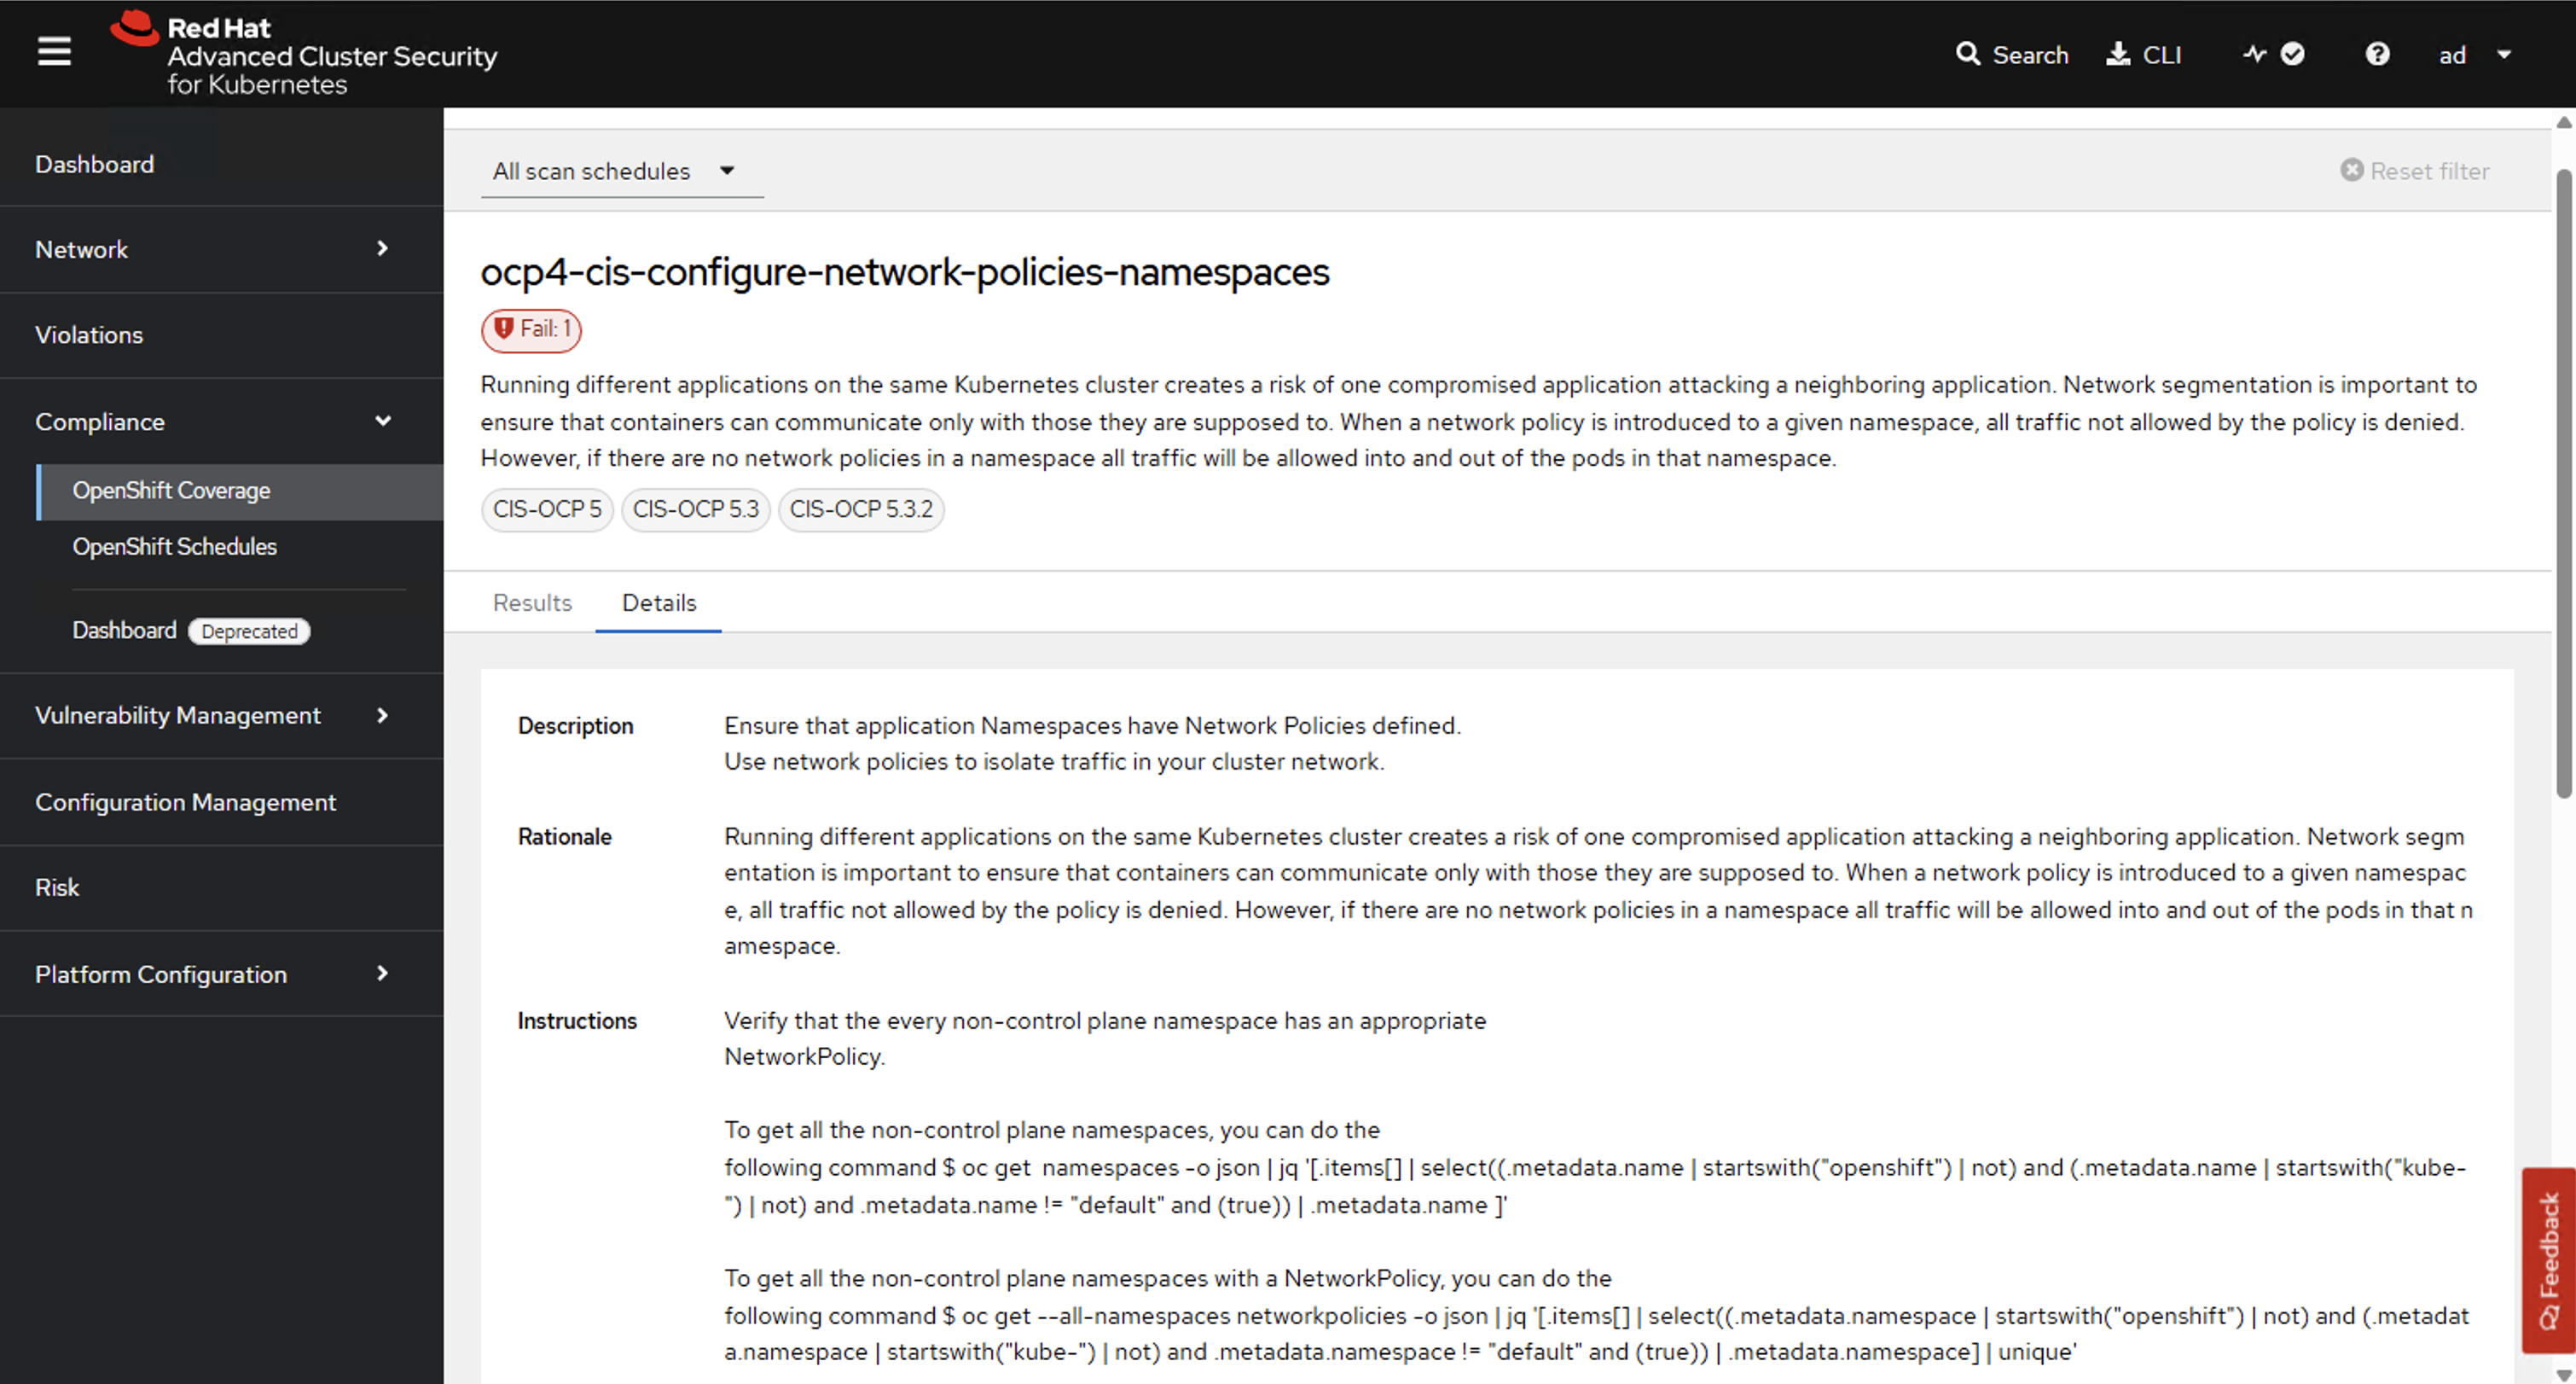
CI/CD Integration (roxctl)
The roxctl CLI integrates ACS into CI/CD pipelines to shift security left — catch issues before deployment.
roxctl image check— evaluate image against all deploy-time policiesroxctl image scan— scan image for CVEs and return results as JSONroxctl deployment check— validate deployment YAML against policies- Exit code non-zero on policy violation — fails the pipeline
Policy as Code (SecurityPolicy CRD)
ACS policies can be managed declaratively with the SecurityPolicy custom resource on the Central cluster — store policies in Git, apply via ArgoCD, and keep security rules under the same GitOps review flow as application manifests.
apiVersion: config.stackrox.io/v1alpha1 kind: SecurityPolicy metadata: name: no-latest-tag namespace: stackrox # must be on the Central cluster spec: policyName: "Image uses :latest tag" description: "Forbid mutable :latest tags in production" severity: HIGH_SEVERITY categories: - DevOps Best Practices lifecycleStages: - BUILD - DEPLOY scope: - cluster: production policySections: - sectionName: Image tag policyGroups: - fieldName: Image Tag values: - value: latest
Live Example — "Image uses :latest tag" Policy as Code
A SecurityPolicy CRD deployed via GitOps creates the "Image uses :latest tag" policy in ACS. The policy is marked Externally managed (origin), meaning it’s controlled by the CRD — not editable in the UI. When a deployment uses :latest, ACS raises a deploy-time violation.
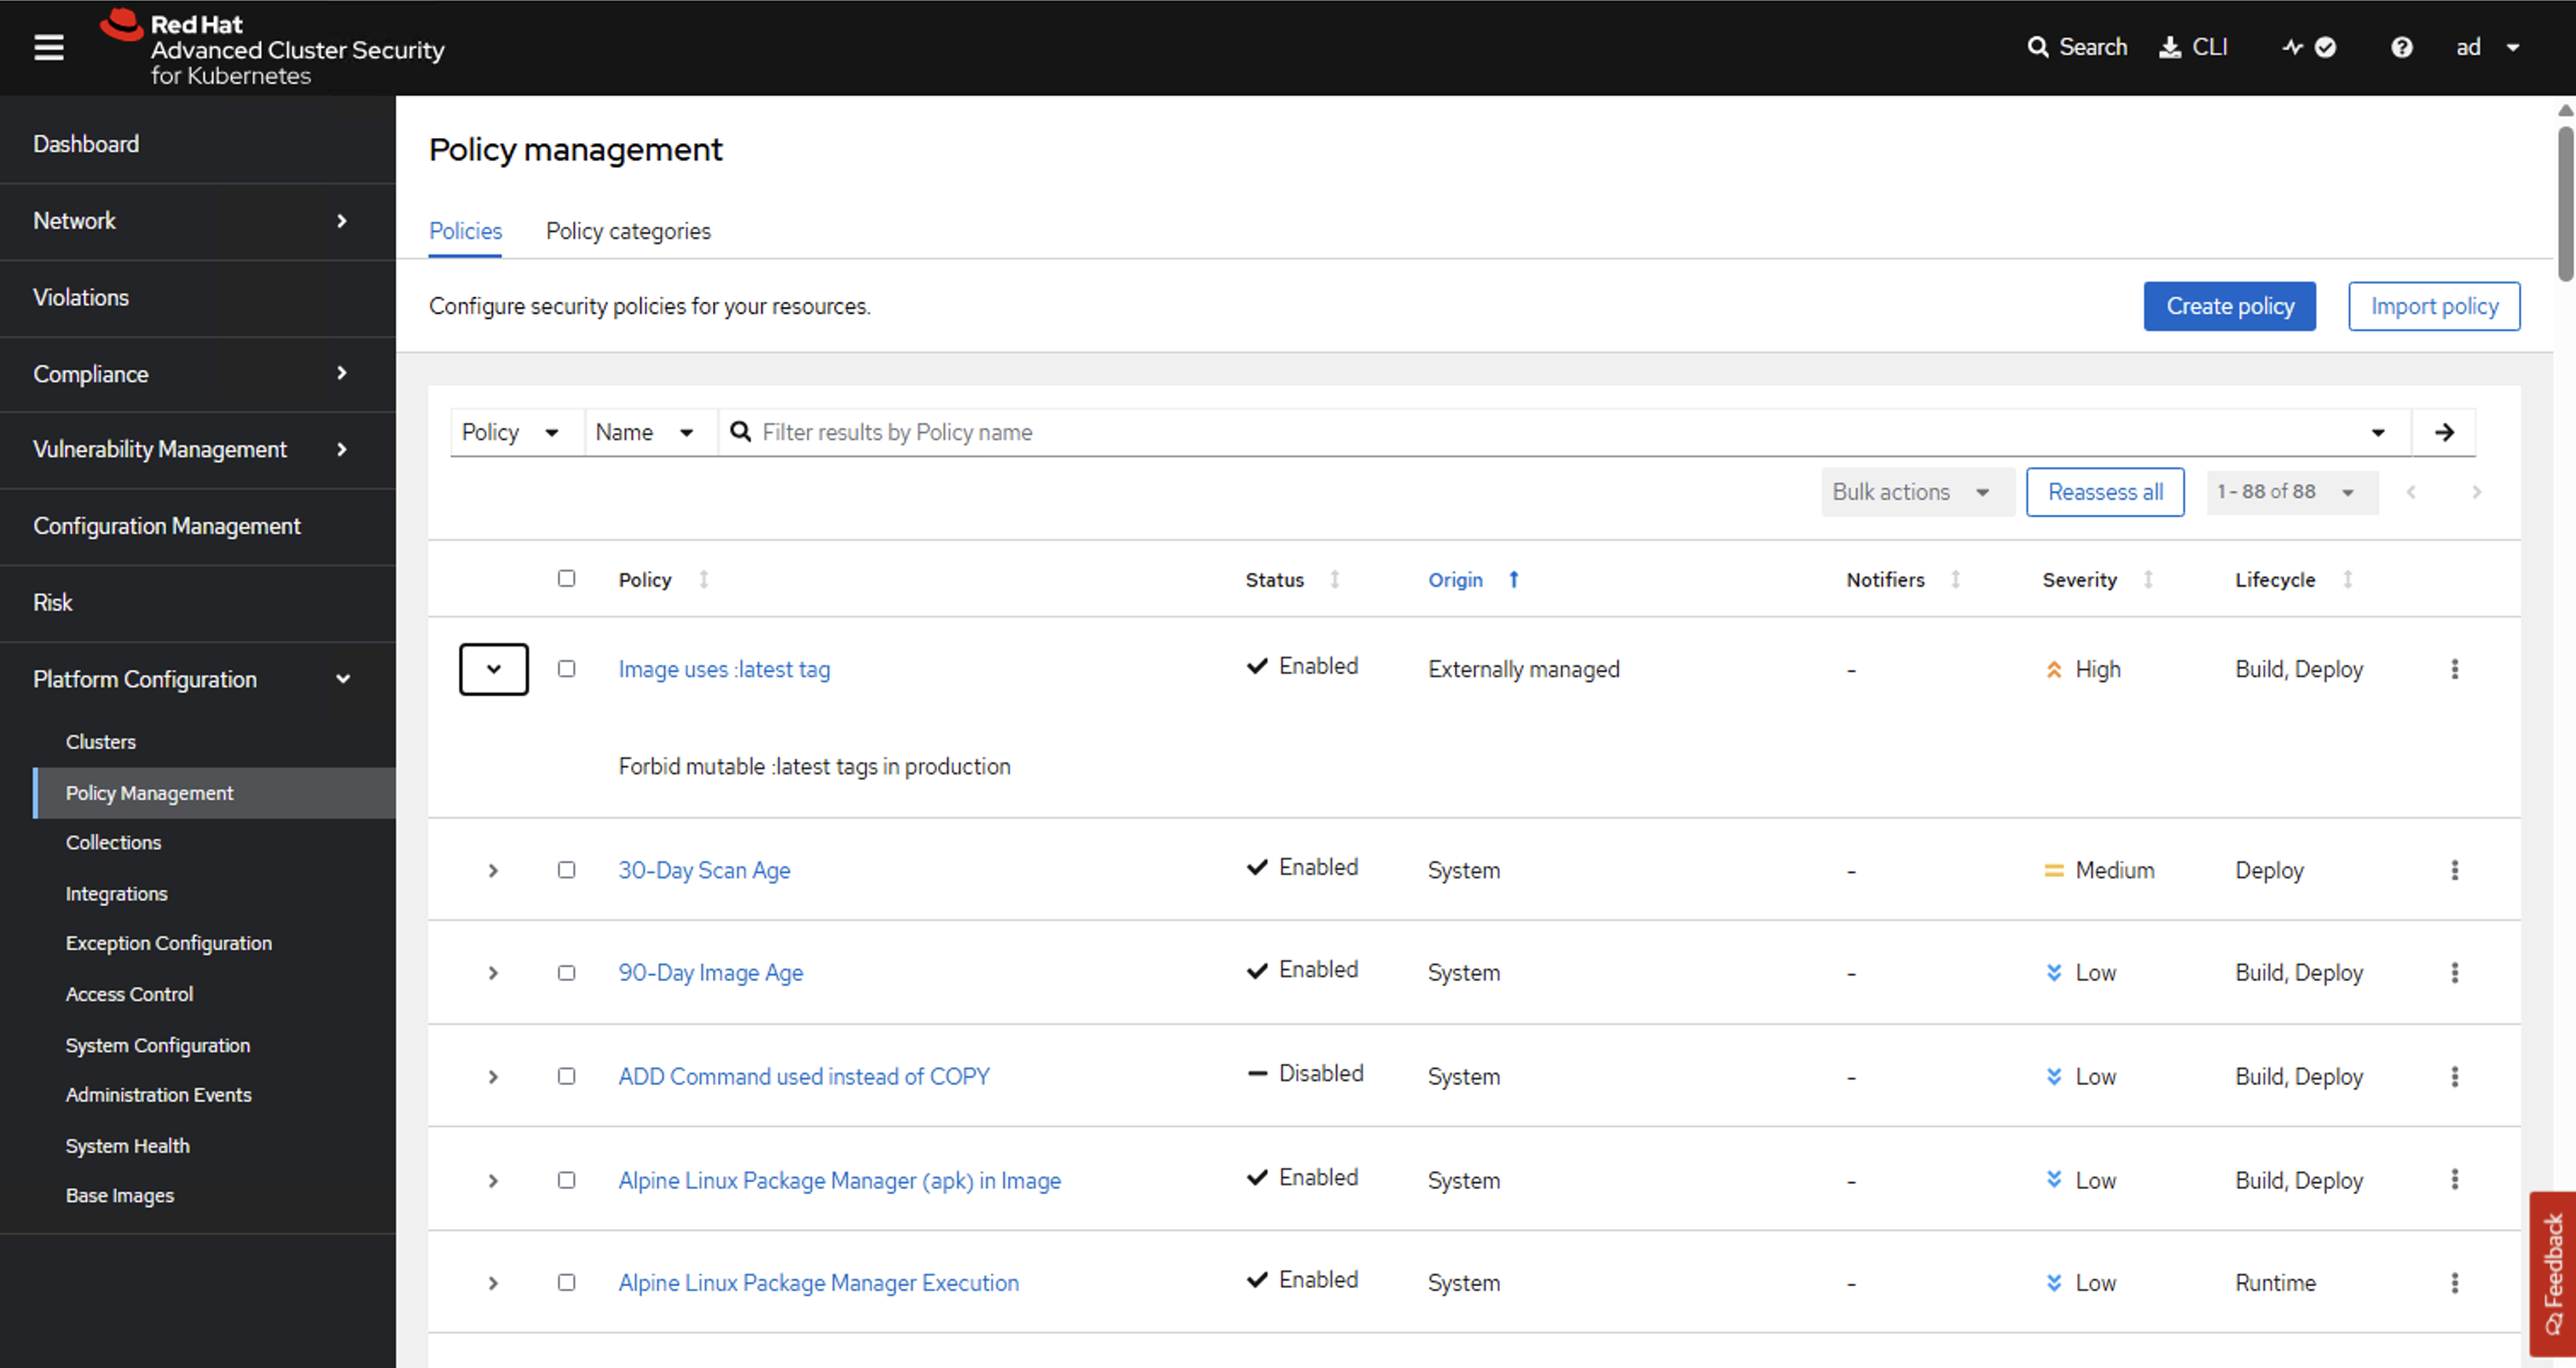
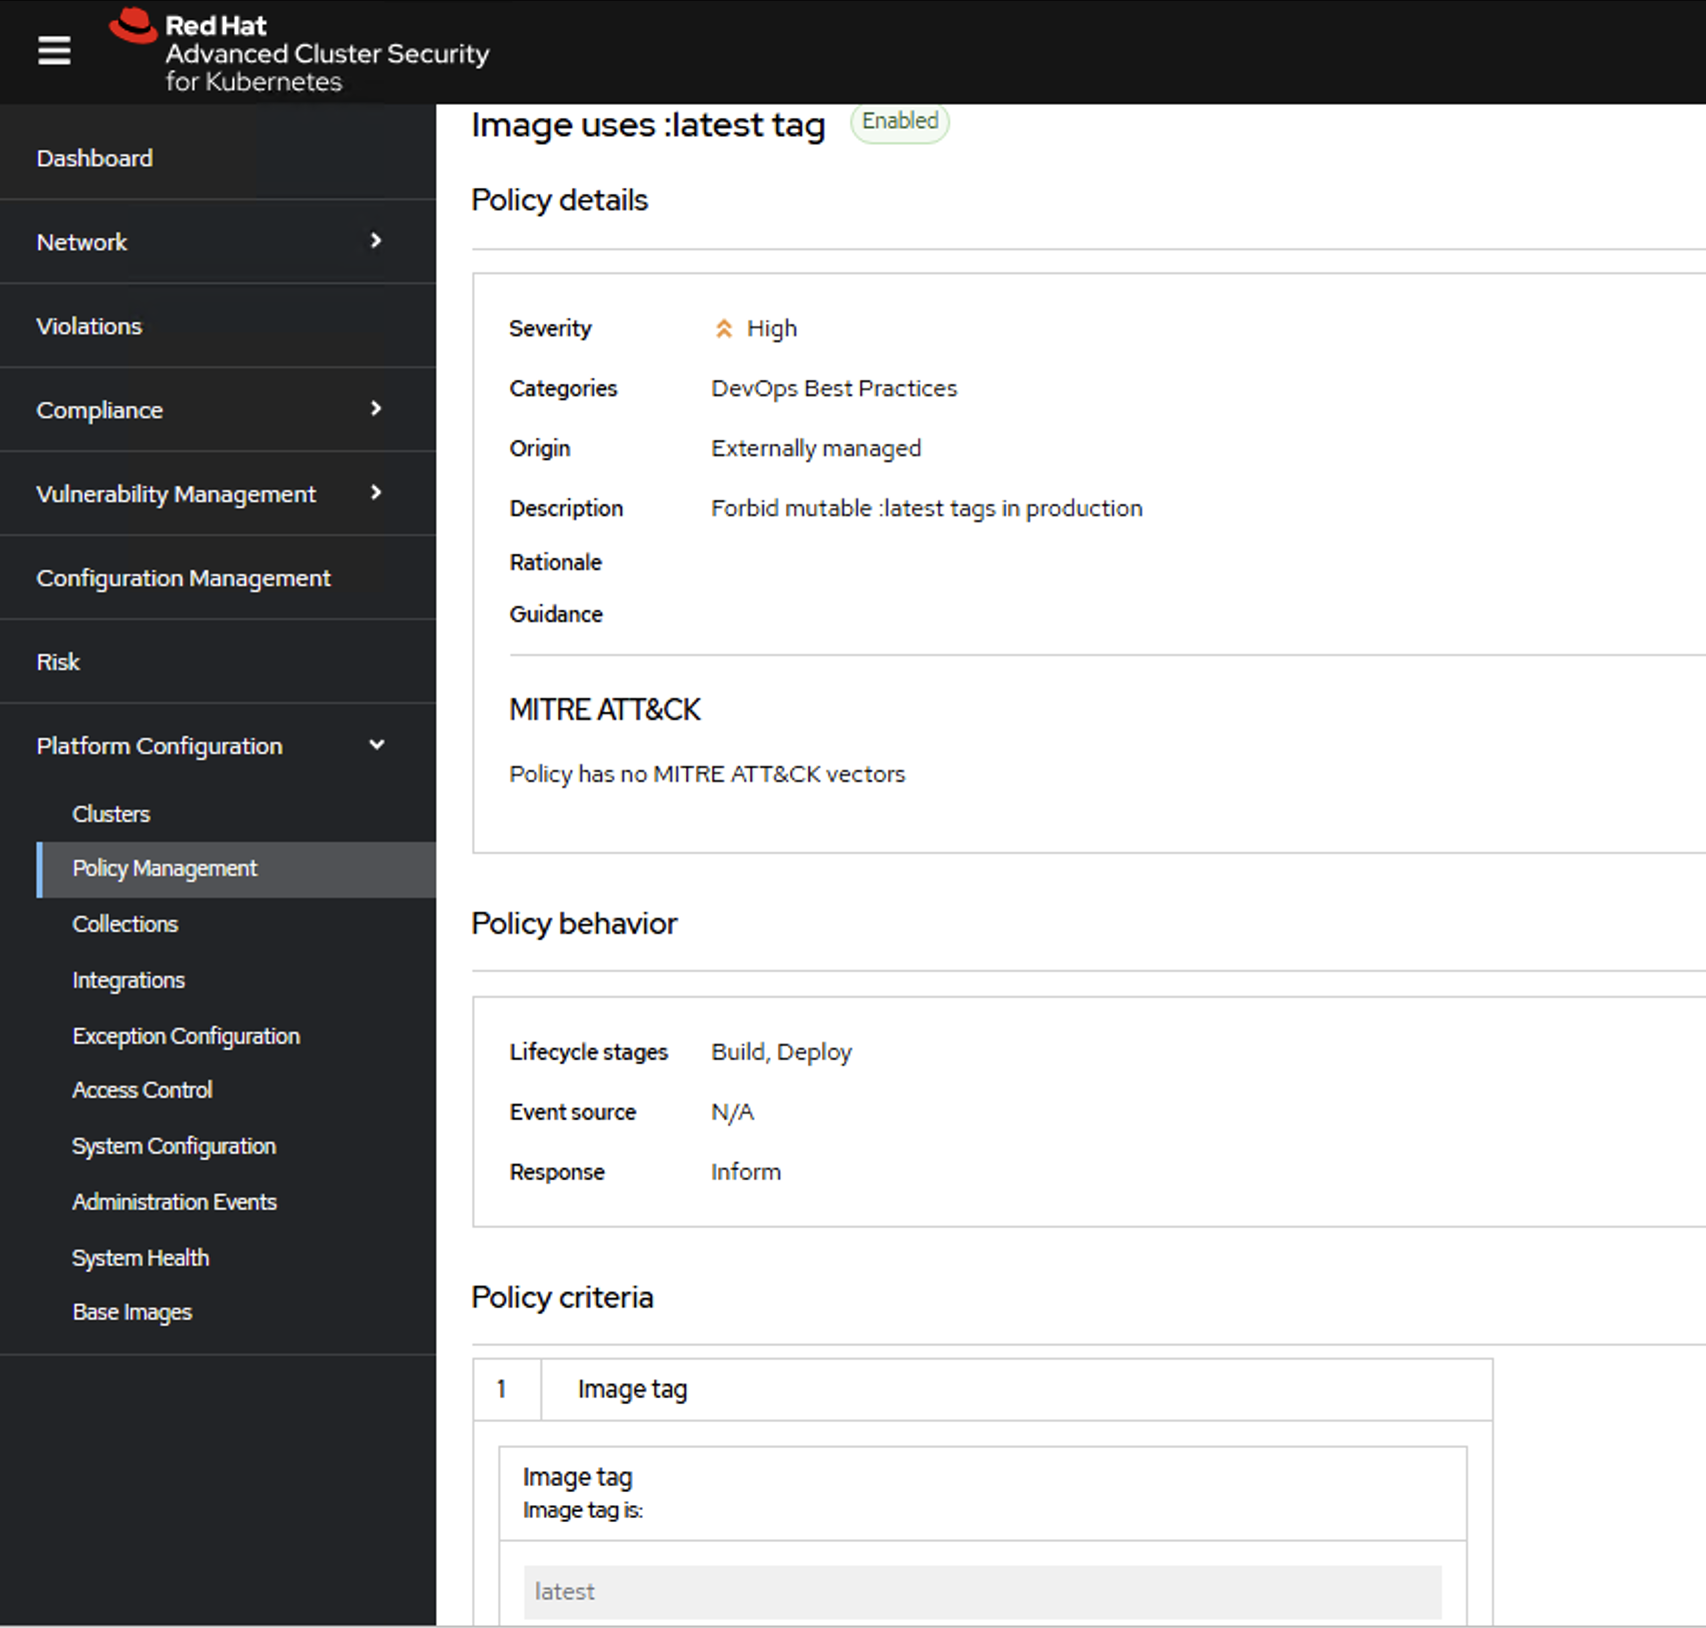
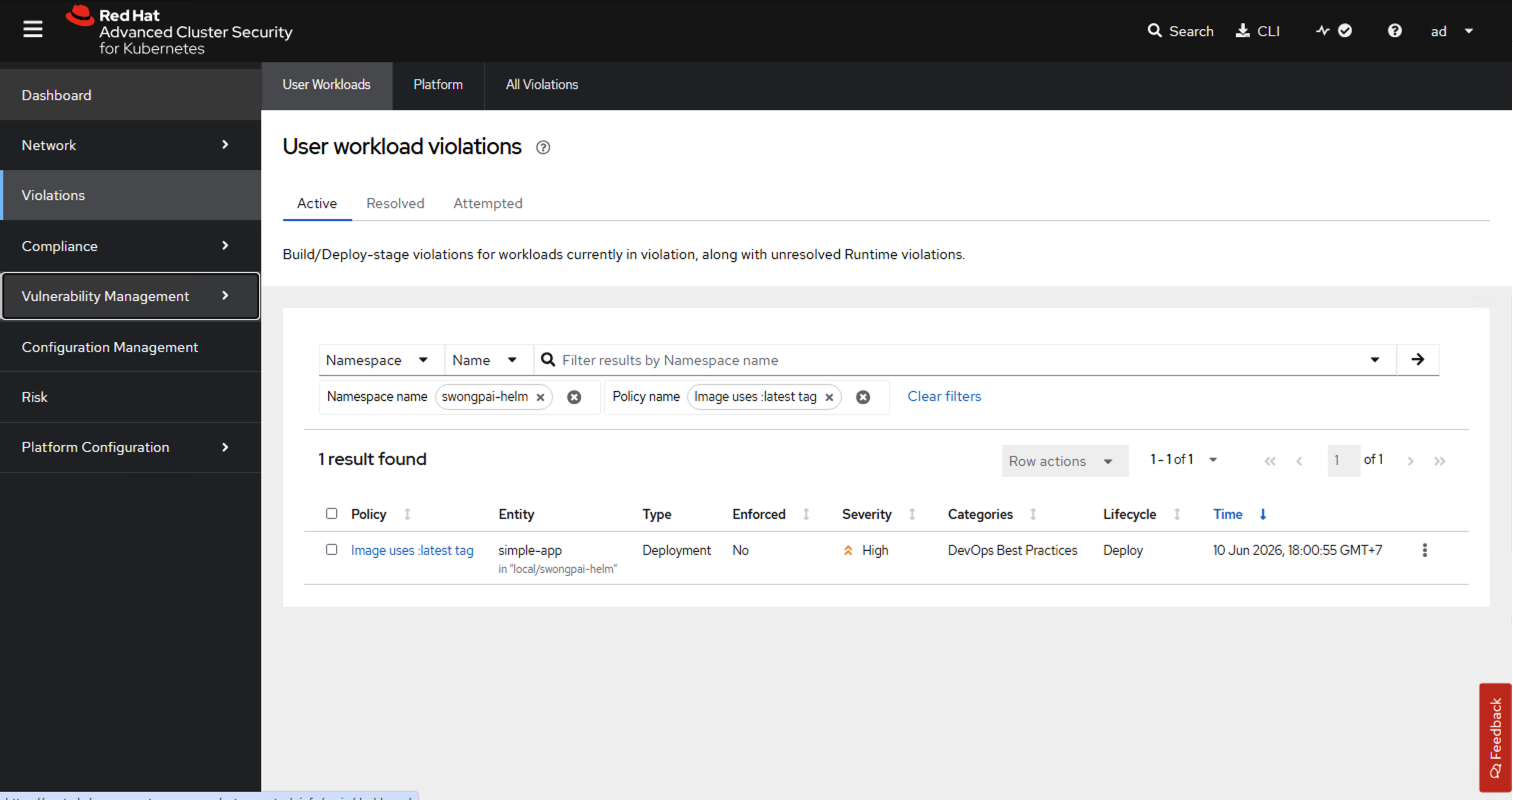
What's New in Recent ACS Releases
| Version | Highlights |
|---|---|
| 4.8 | Scanner V4 becomes the default scanner (StackRox Scanner deprecated). External IP visibility in the network graph. |
| 4.9 | Auto-locking process baselines (scope a policy to a namespace — new deployments alert from Day 1). Simplified admission controller: single ON/OFF enforcement toggle. Machine-to-machine OIDC auth for API automation. Cluster registration secret default expiry reduced to 1 hour. |
| 4.10 | VM vulnerability scanning for OpenShift Virtualization (Tech Preview). OpenShift Console security plugin — vulnerability data inside the OCP console (Tech Preview). Base-image vs application-layer CVE separation. File activity monitoring (Tech Preview). CVE fix-date policy criterion for remediation SLAs. |
ODF — OpenShift Data Foundation
Optional layered storage product powered by Ceph, providing block, file, and object services.
What is ODF?
OpenShift Data Foundation (ODF) is Red Hat's software-defined storage solution for OpenShift, built on Ceph and managed by the Rook operator. It provides block (RBD), file (CephFS), and S3-compatible object (NooBaa MCG) storage as native Kubernetes resources. ODF eliminates external storage array dependencies by running storage services directly on OpenShift nodes with local or attached disks.
Key Capabilities
ODF Architecture
Data Flow: PVC to Disk
When a pod requests persistent storage, the request flows through Kubernetes and ODF layers. The path differs by storage type: RBD for block (RWO) and CephFS for shared file (RWX). Both ultimately write to OSDs on physical disks, distributed by the CRUSH algorithm.
Storage Types Comparison
ODF exposes three distinct storage types. Choose based on access mode requirements and workload characteristics.
| Type | Protocol | Access Mode | Use Cases | Backing Service | StorageClass |
|---|---|---|---|---|---|
| RBD (Block) | Kernel RBD | RWO, RWOP, RWX (Block) | Databases (PostgreSQL, MySQL), VMs, general-purpose | Ceph RADOS Block Device | ocs-storagecluster-ceph-rbd |
| CephFS (File) | POSIX filesystem | RWX, RWO | Shared config, CMS uploads, ML training data, CI artifacts | Ceph MDS + OSDs | ocs-storagecluster-cephfs |
| NooBaa MCG (Object) | S3 API | N/A (API) | Backups (OADP), log archives (Loki), ML datasets, multi-cloud tiering | NooBaa + backing stores | openshift-storage.noobaa.io |
ocs-storagecluster-ceph-rbd-virtualization — an RBD StorageClass tuned for VM disks (RWX block mode for live migration). Use it as the default StorageClass for VMs instead of the regular RBD class.
Deploying ODF on OpenShift
ODF is deployed via the ODF Operator from OperatorHub. The operator installs the Rook-Ceph operator, NooBaa operator, and CSI drivers. Internal mode uses local disks on labeled nodes; external mode connects to a pre-existing Ceph cluster. A third option, provider mode, lets one dedicated ODF cluster serve storage to multiple consumer OpenShift clusters.
Deployment Steps
| # | Step | Detail |
|---|---|---|
| 1 | Label storage nodes | oc label node <name> cluster.ocs.openshift.io/openshift-storage="" — minimum 3 nodes |
| 2 | Install ODF Operator | OperatorHub → Red Hat OpenShift Data Foundation → Install (creates openshift-storage namespace) |
| 3 | Create StorageCluster | Console → Installed Operators → ODF → Create StorageCluster → select internal-attached devices (the StorageSystem CRD was removed in ODF 4.19 — StorageCluster is created directly) |
| 4 | Verify StorageClasses | oc get sc — confirm ocs-storagecluster-ceph-rbd, ocs-storagecluster-cephfs, openshift-storage.noobaa.io |
| 5 | Create first PVC | Use new StorageClasses in PVC manifests or set ocs-storagecluster-ceph-rbd as default StorageClass |
StorageCluster CR
apiVersion: ocs.openshift.io/v1 kind: StorageCluster metadata: name: ocs-storagecluster namespace: openshift-storage spec: manageNodes: false monDataDirHostPath: /var/lib/rook storageDeviceSets: - name: ocs-deviceset count: 1 # devices per node dataPVCTemplate: spec: accessModes: - ReadWriteOnce resources: requests: storage: 512Gi # size per OSD storageClassName: localblock volumeMode: Block placement: {} portable: true replica: 3 # 3-way replication multiCloudGateway: reconcileStrategy: standalone
Example PVCs
# RBD block volume (RWO) — databases, general storage apiVersion: v1 kind: PersistentVolumeClaim metadata: name: my-app-data namespace: my-app spec: accessModes: - ReadWriteOnce resources: requests: storage: 10Gi storageClassName: ocs-storagecluster-ceph-rbd --- # CephFS shared volume (RWX) — shared across pods/nodes apiVersion: v1 kind: PersistentVolumeClaim metadata: name: shared-uploads namespace: my-app spec: accessModes: - ReadWriteMany resources: requests: storage: 50Gi storageClassName: ocs-storagecluster-cephfs
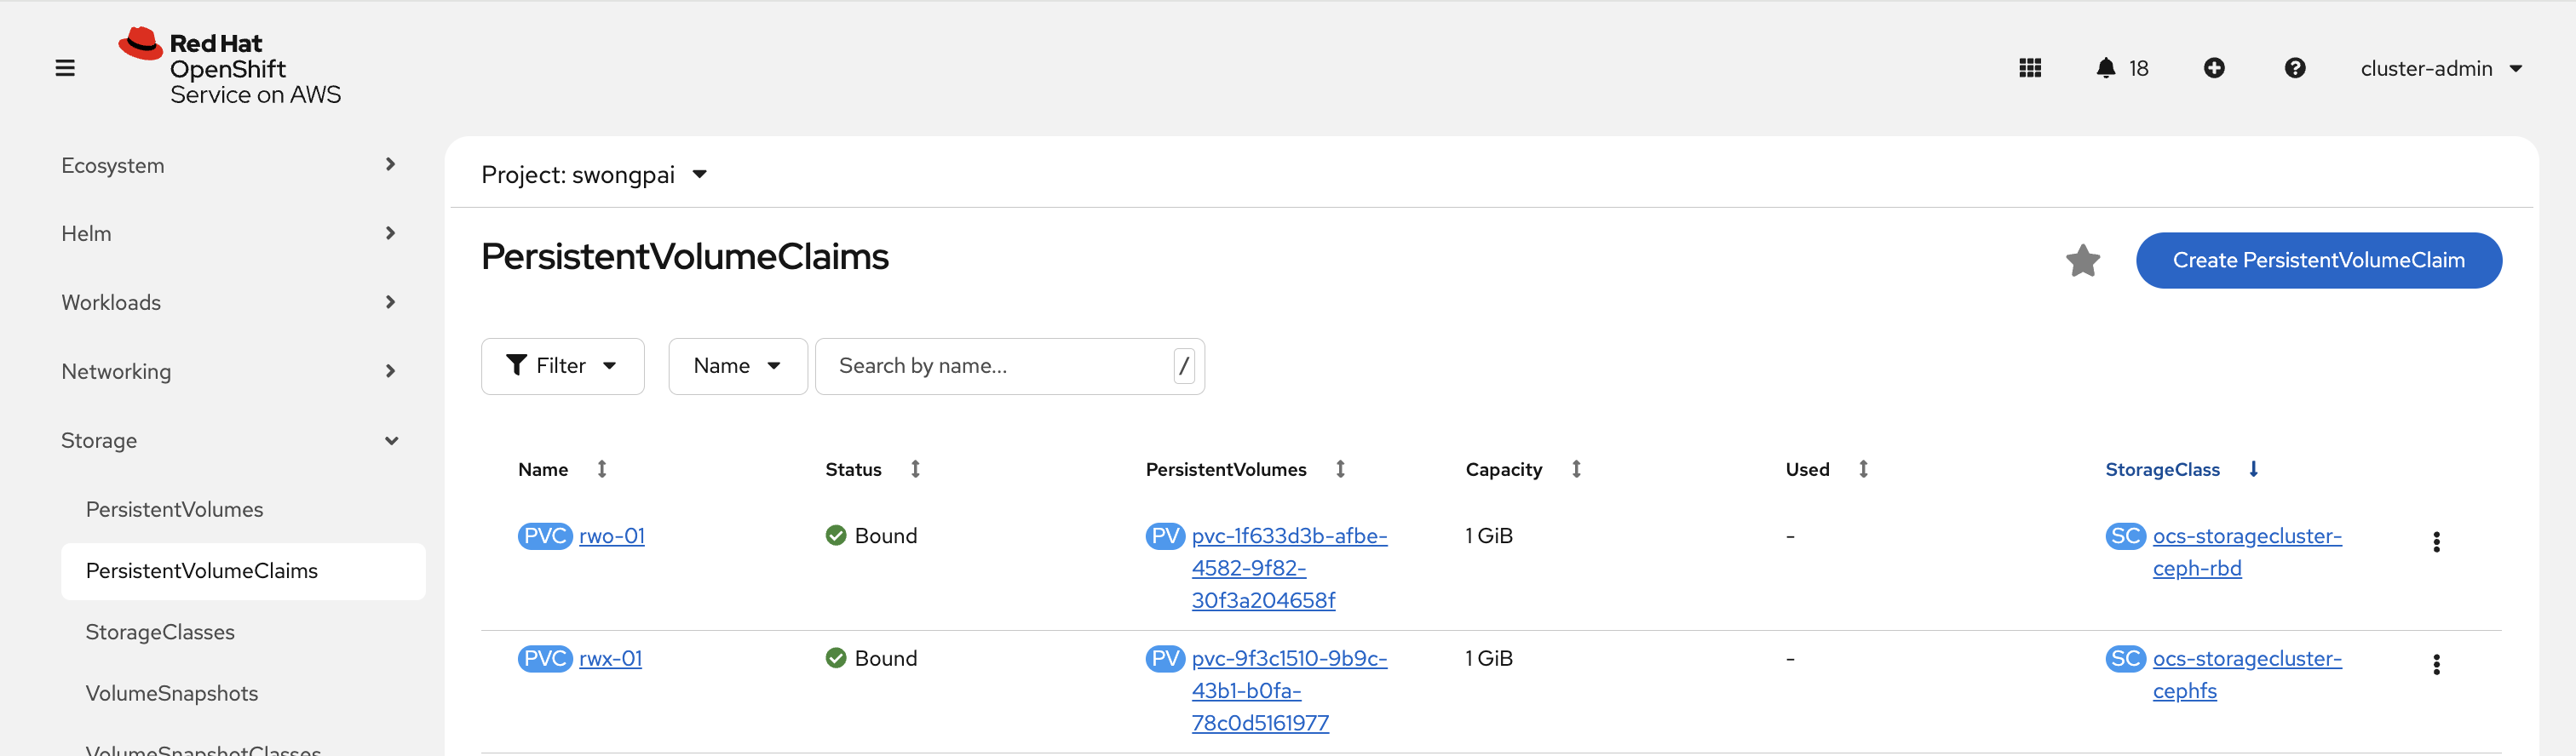
ocs-storagecluster-ceph-rbd as the default StorageClass for most workloads. Reserve CephFS for workloads that genuinely need RWX shared access. Monitor cluster health via the ODF dashboard in the OpenShift console or ceph status from the Rook toolbox pod.
Key Concepts Deep Dive
CRUSH Algorithm & Failure Domains
CRUSH (Controlled Replication Under Scalable Hashing) is Ceph's data placement algorithm. Instead of centralized lookup tables, CRUSH computes where data should be stored algorithmically based on the cluster topology. This enables Ceph to scale without metadata bottlenecks.
- Failure domains — CRUSH distributes replicas across fault boundaries: host (default), rack, zone, or region. No two replicas of the same object land in the same failure domain.
- CRUSH map — Defines the storage hierarchy: root → datacenter → rack → host → OSD. ODF auto-generates this from node topology labels.
- CRUSH rules — Bind pools to specific device classes (SSD vs HDD) and failure domain levels. ODF creates default rules for replicated and erasure-coded pools.
- Rebalancing — When nodes/OSDs are added or removed, CRUSH recomputes placement. Only the minimum necessary data migrates (no full reshuffle).
Replication & Erasure Coding
ODF supports two data protection strategies. Replication (default) writes N full copies across failure domains. Erasure coding splits data into data + parity chunks for better space efficiency at higher CPU cost.
- 3-way replication (default) — Every object stored 3 times across 3 failure domains. Data survives loss of 2 replicas; cluster tolerates loss of 1 failure domain while remaining fully available. ~33% storage efficiency. Best for performance-sensitive workloads.
- Erasure coding (EC) — Splits data into k data chunks + m parity chunks (e.g., 4+2). Tolerates loss of m chunks. ~67% efficiency (4+2). Higher CPU overhead; best for large, cold, or archival data.
- Pool-level setting — Each Ceph pool is either replicated or erasure-coded. RBD pools are typically replicated (latency-sensitive). CephFS data pools can use EC for bulk storage.
- Minimum cluster size — 3 failure domains (hosts) for replication, k+m failure domains for EC. ODF internal mode requires minimum 3 nodes.
Snapshots & Clones
ODF supports CSI VolumeSnapshots and clones for both RBD and CephFS volumes. Snapshots are point-in-time, copy-on-write captures. Clones create instant read-write copies from snapshots.
- VolumeSnapshot — Create via
VolumeSnapshotCR referencing a PVC. UsesVolumeSnapshotClass(one per storage type). Copy-on-write means only changed blocks consume additional space. - Clone from snapshot — Create a new PVC with
dataSourcereferencing aVolumeSnapshot. Instant provisioning; new PVC is a full read-write copy. - PVC-to-PVC clone — Direct clone without intermediate snapshot. The CSI driver handles it transparently.
- Backup integration — OADP (OpenShift API for Data Protection) uses CSI snapshots for Velero-based backup/restore workflows.
NooBaa Multi-Cloud Gateway (MCG)
NooBaa provides an S3-compatible object storage API on OpenShift. It aggregates multiple backing stores behind a single S3 endpoint, with data placement policies for tiering, mirroring, and spreading.
- BackingStore — CRD defining a storage target: ODF (Ceph RGW), AWS S3 bucket, Azure Blob container, GCP bucket, or PV-based store. Multiple BackingStores can coexist.
- BucketClass — Defines data placement policy: spread (stripe across stores), mirror (replicate to all stores), or tier (hot/cold placement). Applied per-bucket.
- ObjectBucketClaim (OBC) — Kubernetes-native way to provision S3 buckets. Creates a ConfigMap (endpoint, bucket name) and Secret (access key, secret key) in the claiming namespace.
- Use cases — OADP backup target, ACM observability (Thanos), Loki log storage, ML datasets, and application object storage without external S3 dependency.
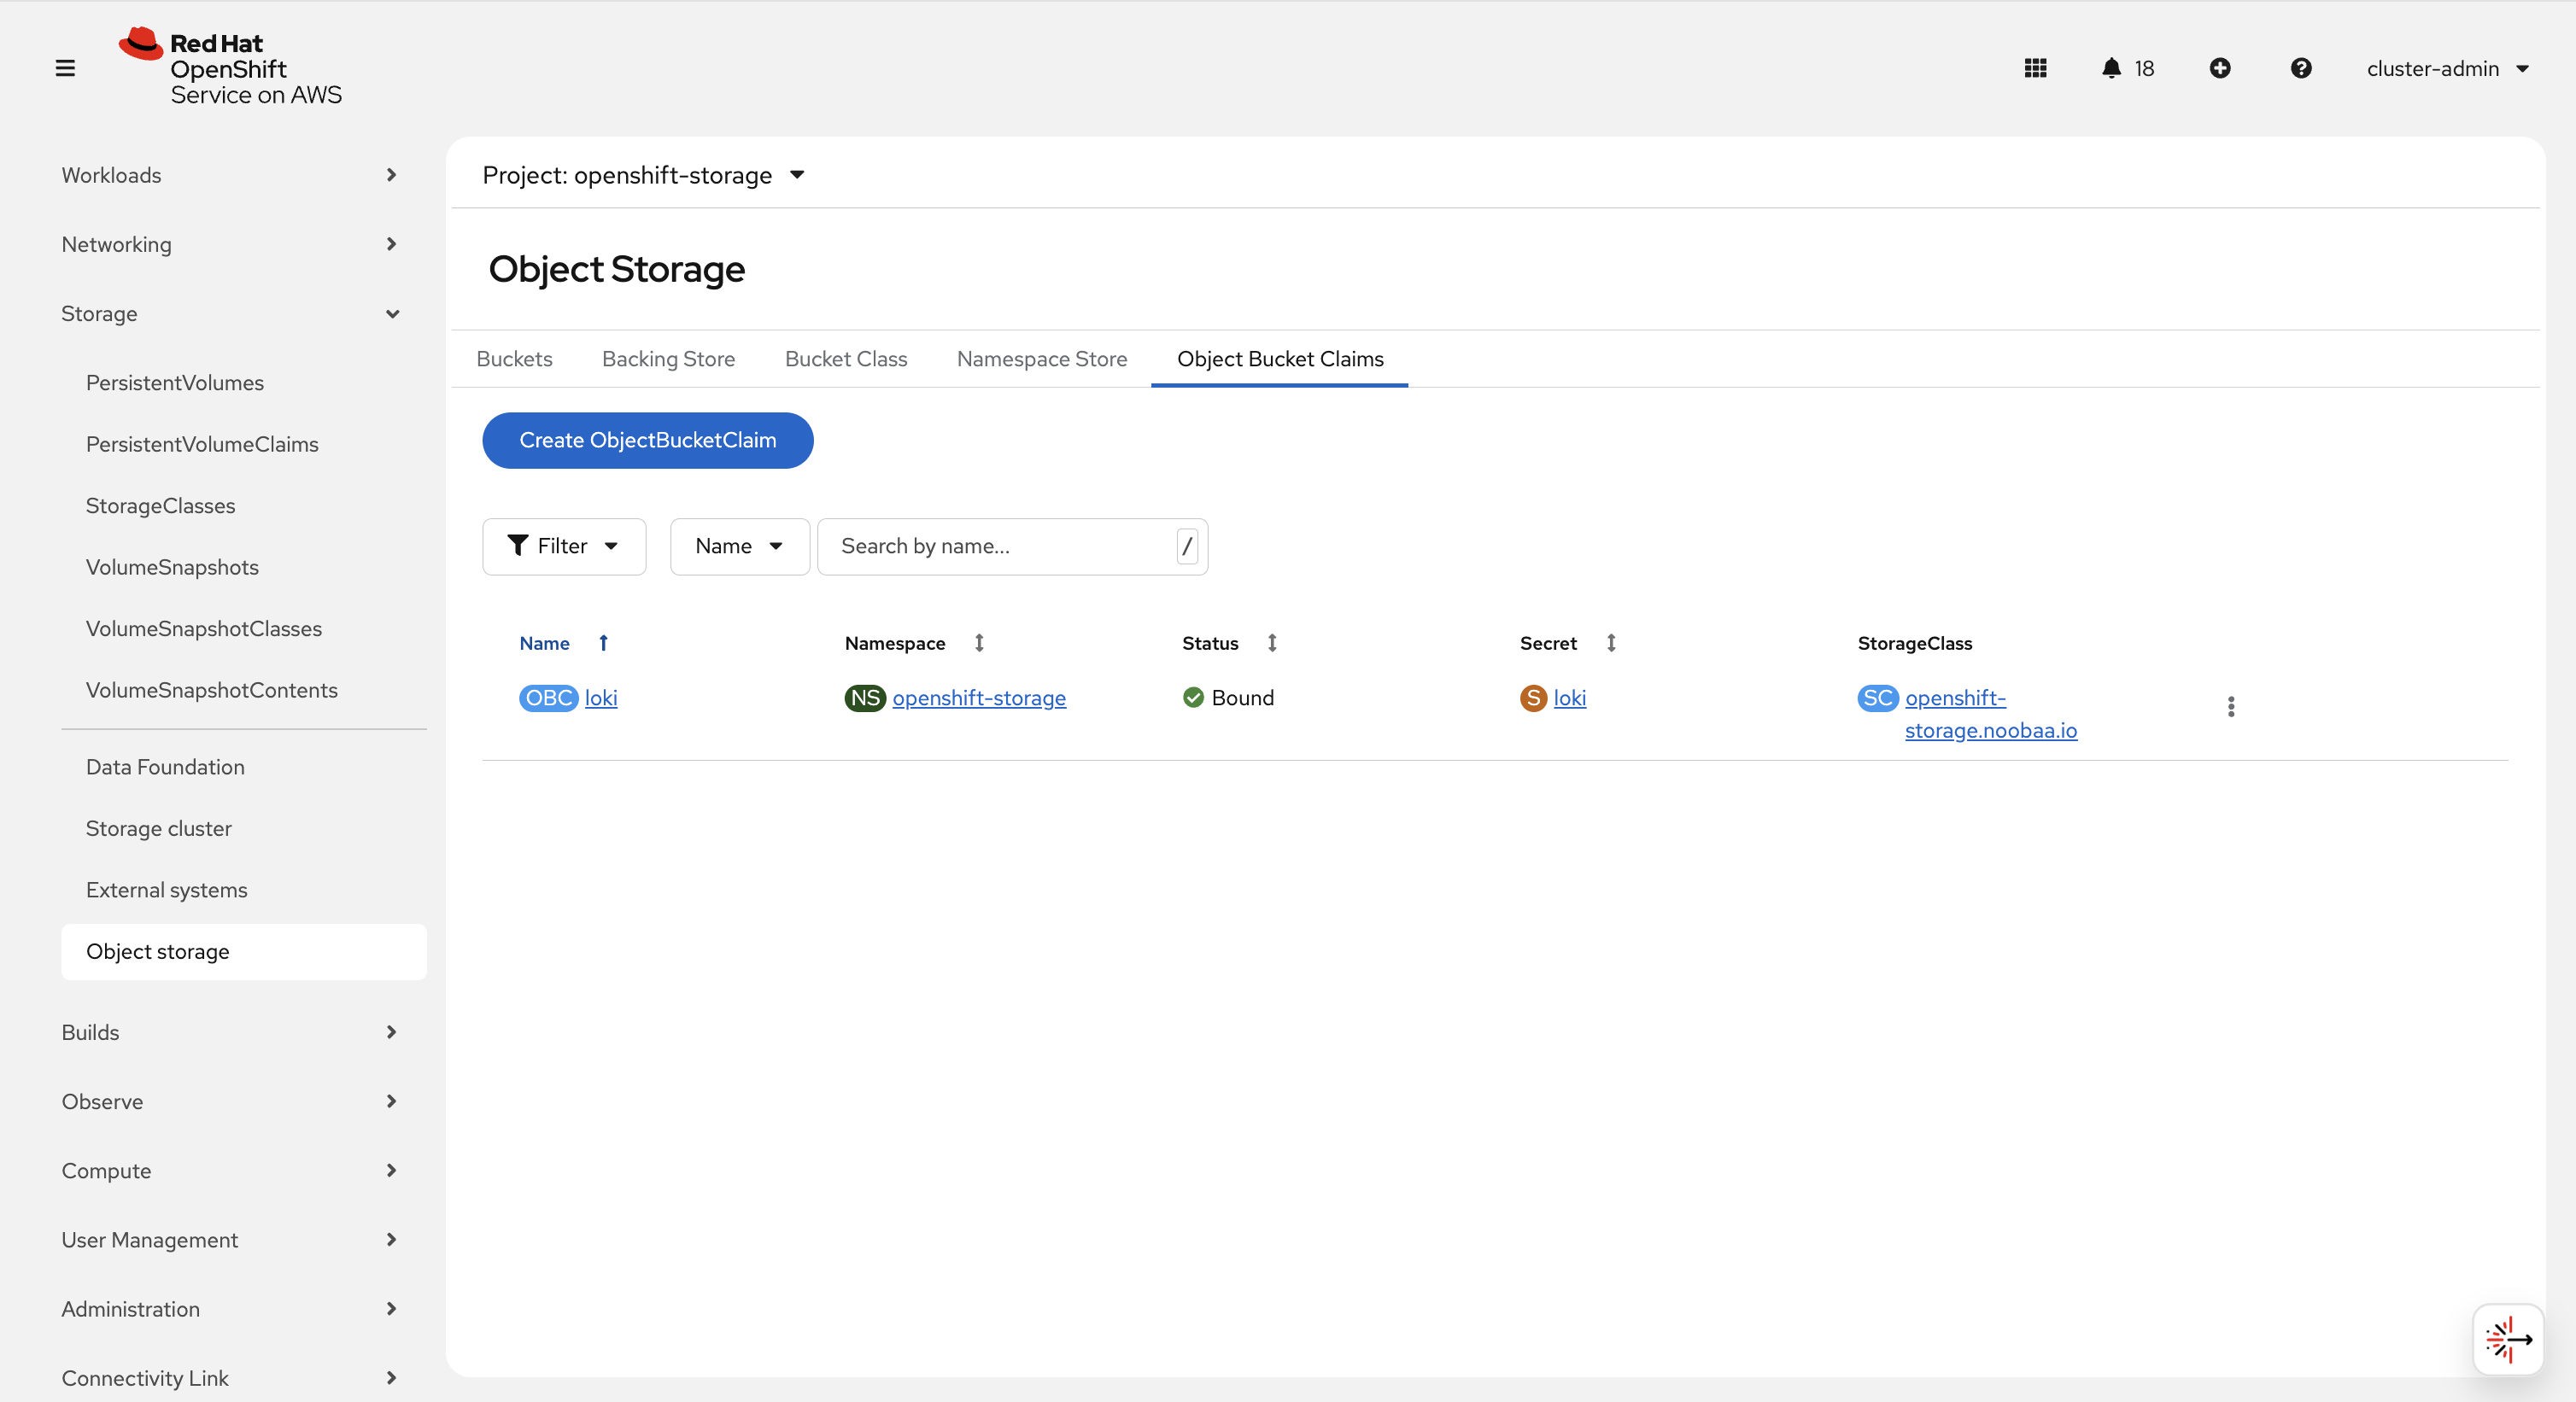
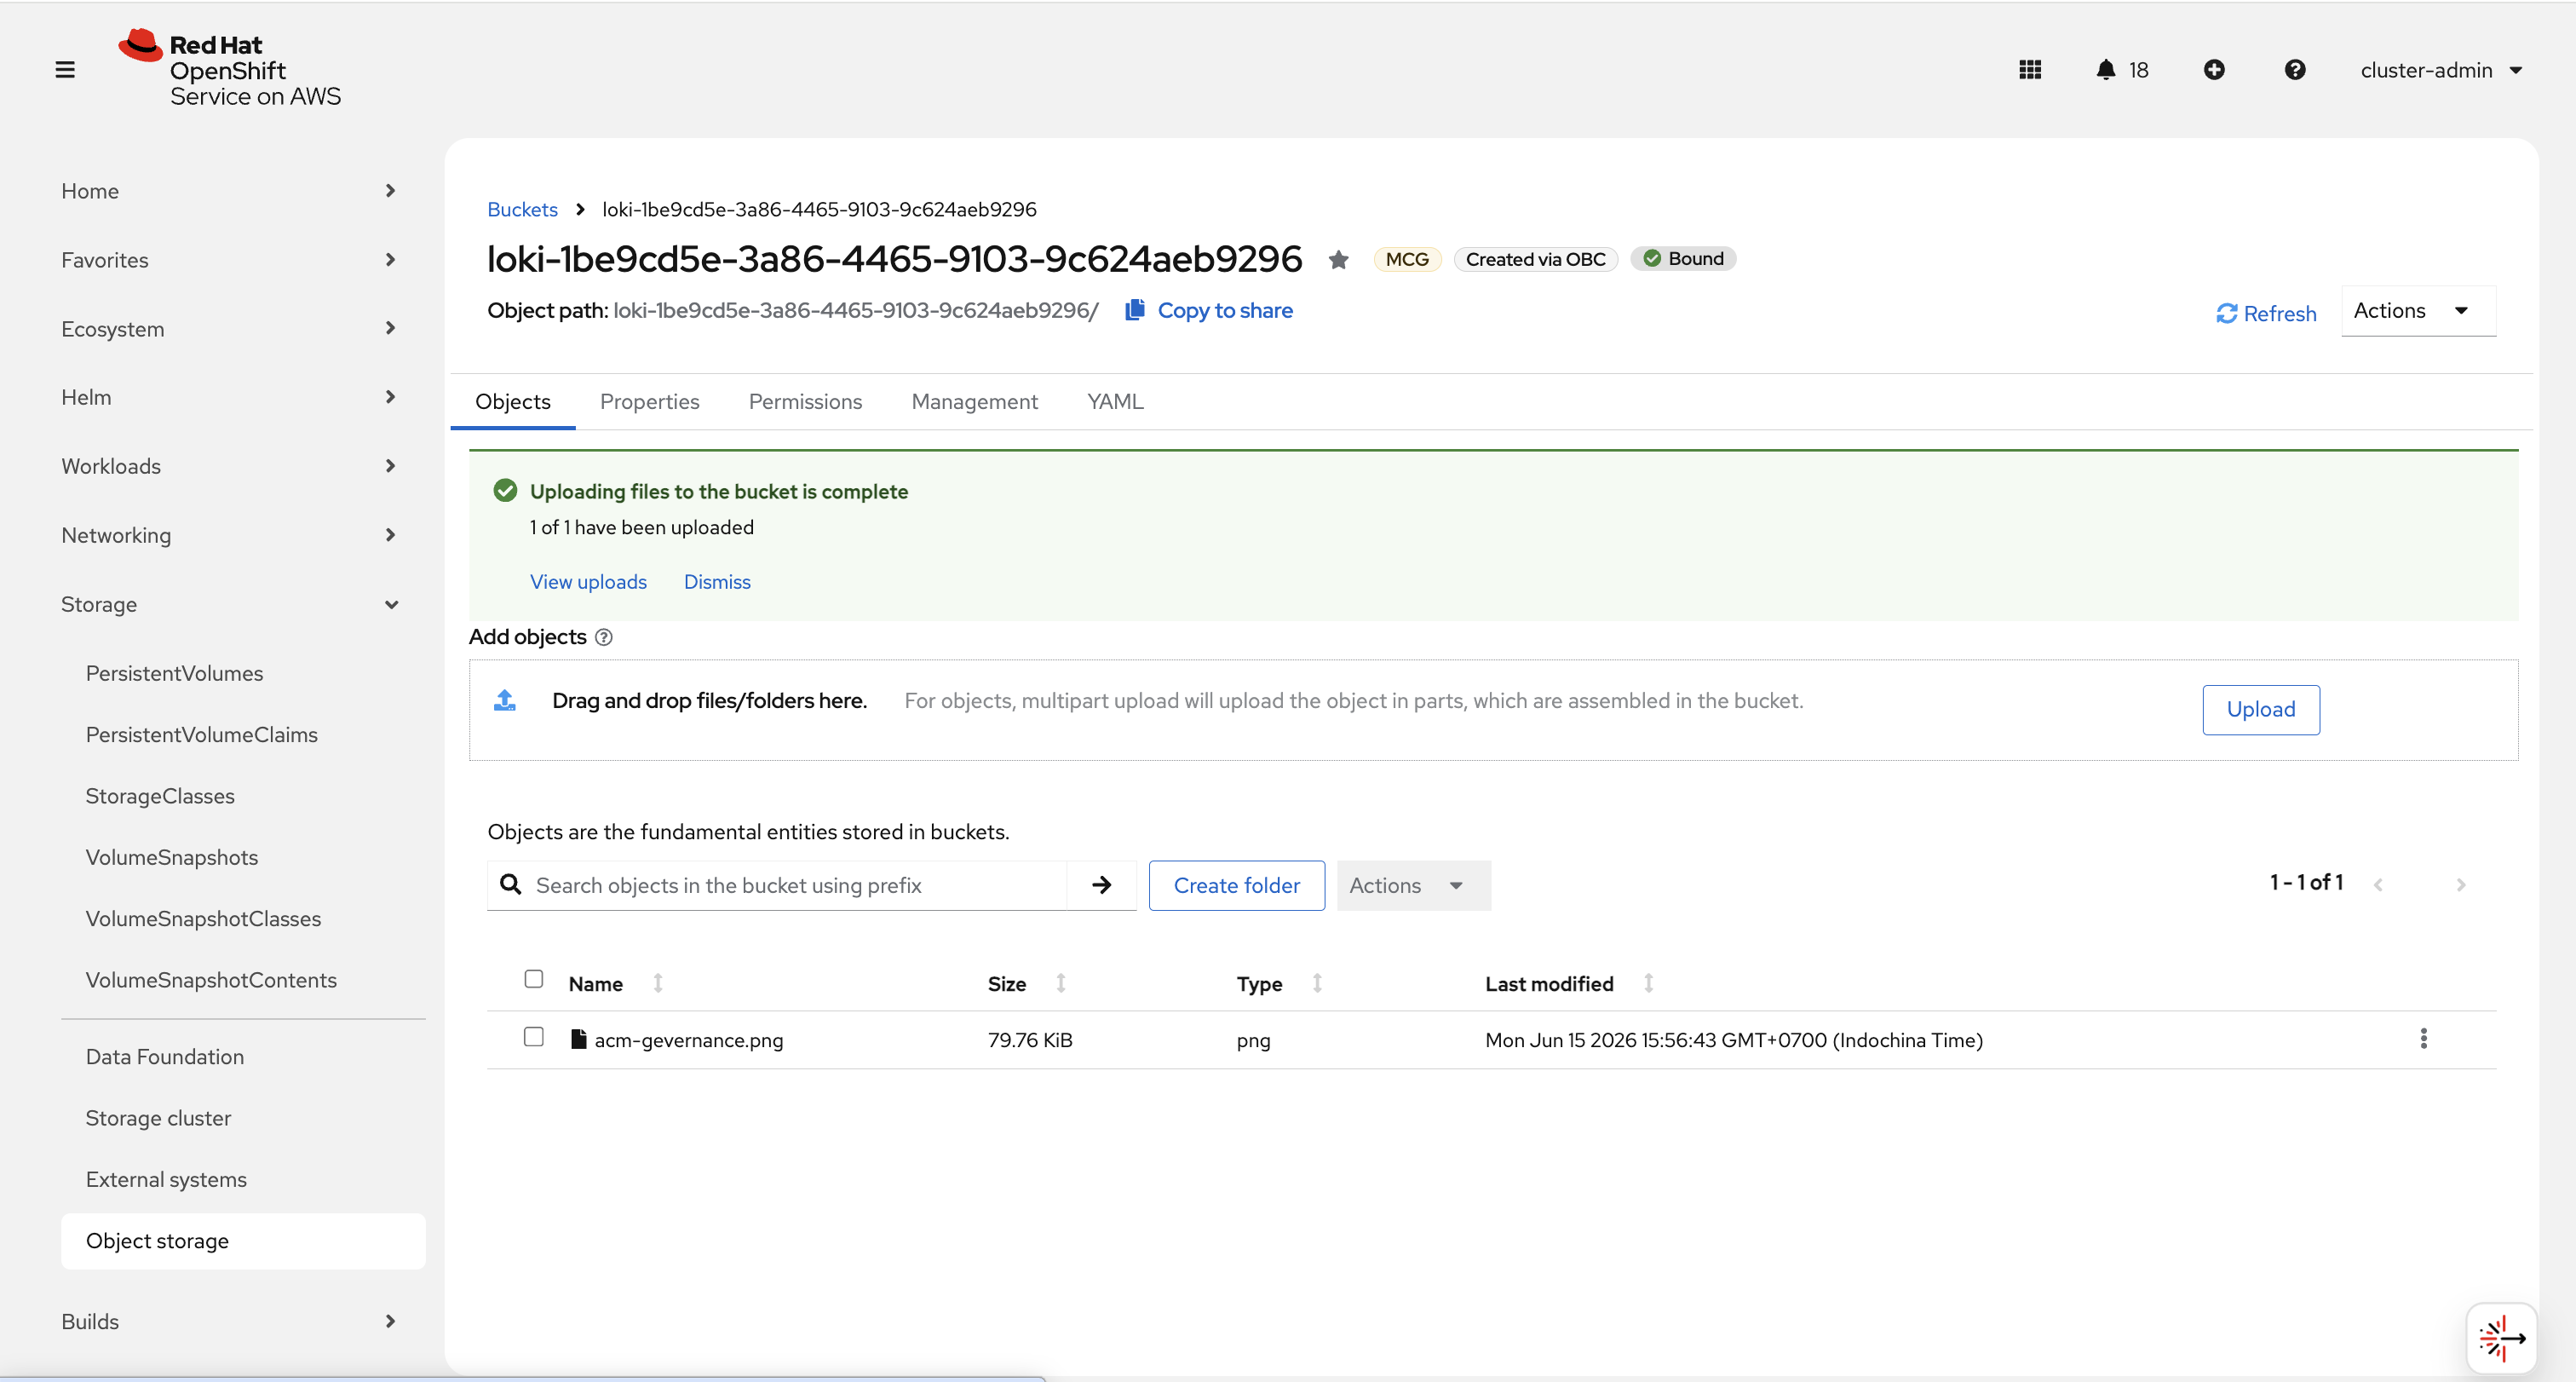
Disaster Recovery: Metro-DR vs Regional-DR
ODF supports two DR topologies, both orchestrated with ACM and the Ramen (OpenShift DR) operators. Metro-DR stretches a single Ceph cluster synchronously across two sites (RPO zero, distance-limited). Regional-DR asynchronously replicates between two independent ODF clusters (minutes of RPO, unlimited distance). Since ODF 4.20, DR-protected VMs can fail over individually rather than only as a whole namespace.
What's New in Recent ODF Releases
| Version | Highlights |
|---|---|
| 4.19 | StorageSystem CRD removed — StorageCluster is created directly; simpler deployment flow. |
| 4.20 | Per-VM failover/failback for DR-protected VMs (no longer all-or-nothing per namespace). Multus network support extended to IPv6. Pool-level near-full/full alerts with actionable messages. DR recipes with exec hooks for more workload types. Encryption annotations auto-added when KMS is missing. |
Quay — Enterprise Container Registry
Optional enterprise registry product for securing, scanning, and distributing container images at scale.
What is Red Hat Quay?
Red Hat Quay is an enterprise container image registry that provides secure storage, vulnerability scanning, and global distribution of container images. It supports OCI and Docker image formats, integrates deeply with OpenShift, and offers governance features for multi-team environments.
image-registry.openshift-image-registry.svc) for basic internal image storage. Quay is an enterprise-grade registry for cross-cluster, multi-team, production image management with security scanning, geo-replication, and access governance. Use the internal registry for dev/CI builds; use Quay for production image distribution.
Key Features
Quay Architecture
Quay consists of multiple microservice components deployed as pods on OpenShift, managed by the Quay Operator via a single QuayRegistry custom resource.
Image Flow — Push to Pull
From developer workstation to running pod, every image passes through Quay’s security pipeline.
Deploying Quay on OpenShift
Quay is deployed via the Quay Operator from OperatorHub. Install the operator, then create a QuayRegistry custom resource. The operator manages all components (Clair, PostgreSQL, Redis, object storage) automatically.
Deployment Steps
| # | Step | Detail |
|---|---|---|
| 1 | Install Quay Operator | OperatorHub → Red Hat Quay → Install (all namespaces or dedicated) |
| 2 | Install ODF Operator | Required for MCG object storage backend |
| 3 | Create ObjectBucketClaim | MCG provisions an S3-compatible bucket for image blobs |
| 4 | Create QuayRegistry CR | Operator deploys all Quay components automatically |
| 5 | Access Quay console | Route auto-created at quay-<namespace>.apps.<cluster> |
MCG Integration — Object Storage for Quay
Quay stores image layers and blobs in S3-compatible object storage. When running on OpenShift with ODF, Multicloud Object Gateway (MCG) powered by NooBaa provides this storage natively — no external S3 service needed.
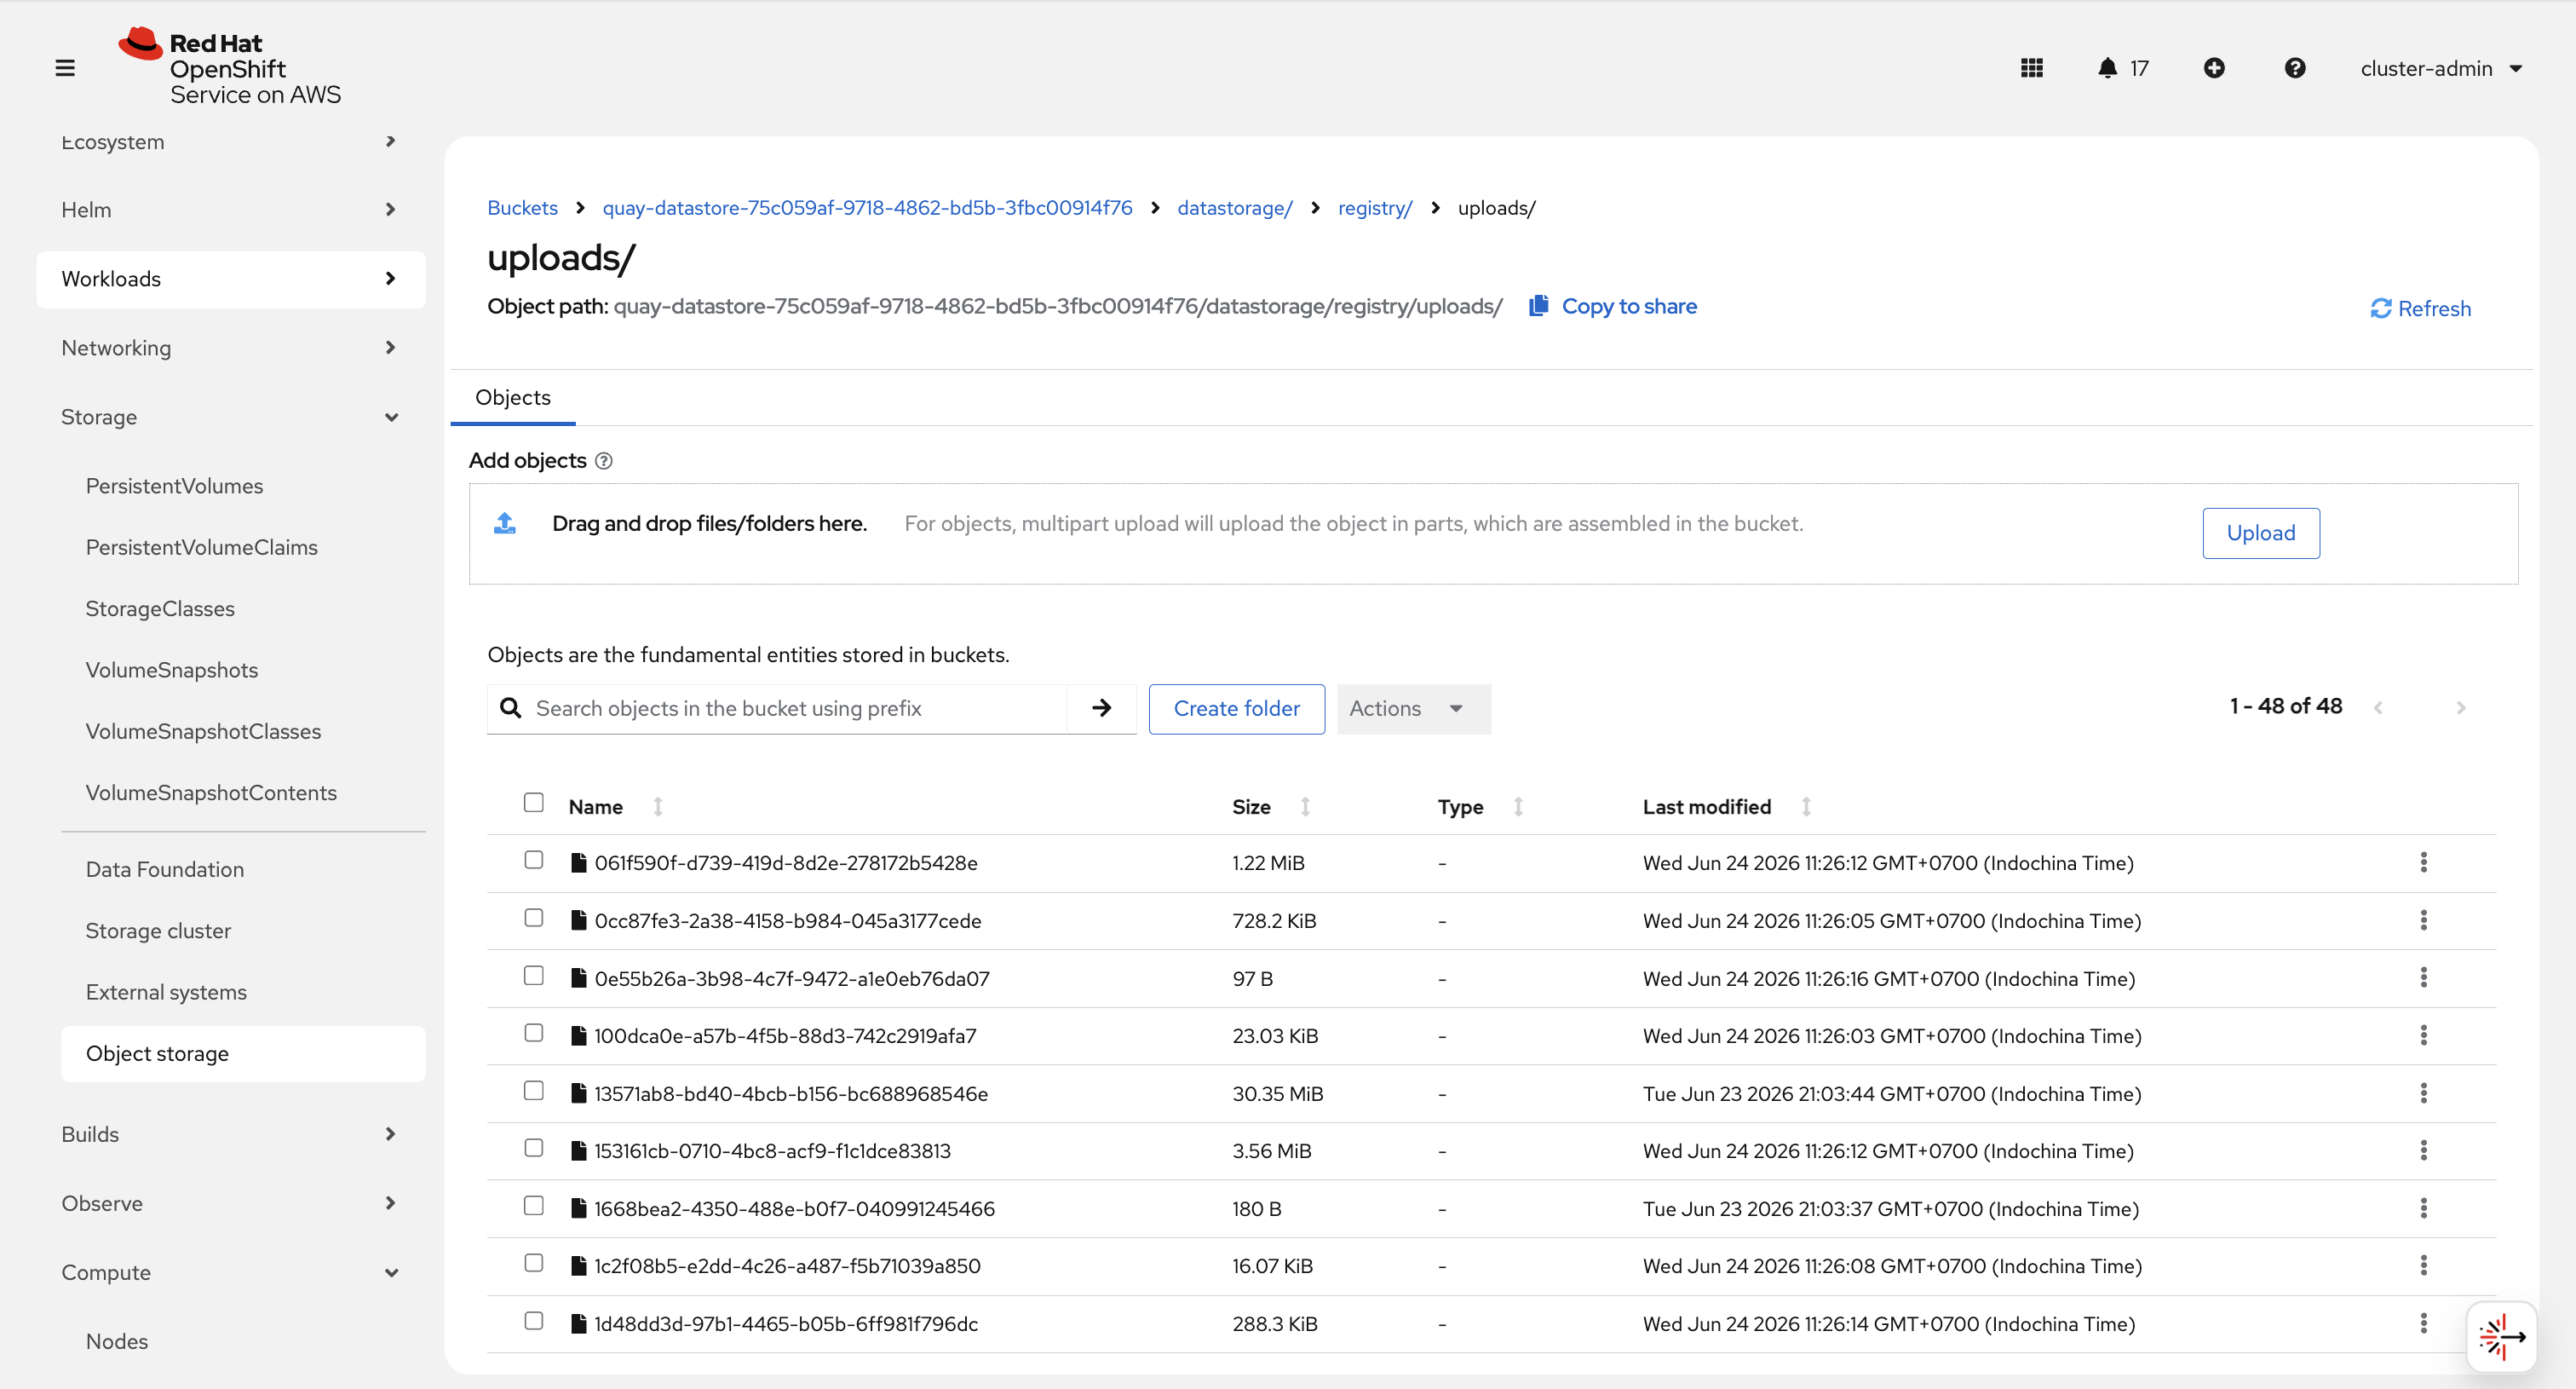
QuayRegistry CR
apiVersion: quay.redhat.com/v1 kind: QuayRegistry metadata: name: central namespace: quay-enterprise spec: configBundleSecret: quay-config-bundle components: - kind: clair managed: true - kind: clairpostgres managed: true - kind: postgres managed: true - kind: redis managed: true - kind: objectstorage managed: true # uses ODF/MCG via ObjectBucketClaim - kind: route managed: true - kind: horizontalpodautoscaler managed: true - kind: mirror managed: true - kind: monitoring managed: true - kind: tls managed: true
ObjectBucketClaim for MCG
apiVersion: objectbucket.io/v1alpha1 kind: ObjectBucketClaim metadata: name: quay-bucket namespace: quay-enterprise spec: generateBucketName: quay-bucket storageClassName: openshift-storage.noobaa.io additionalConfig: bucketclass: noobaa-default-bucket-class --- # After OBC is bound, a Secret and ConfigMap are created: # Secret: quay-bucket (AWS_ACCESS_KEY_ID, AWS_SECRET_ACCESS_KEY) # ConfigMap: quay-bucket (BUCKET_NAME, BUCKET_HOST, BUCKET_PORT)
managed: true for all components to let the operator handle lifecycle. Use ODF/MCG for object storage to keep everything on-cluster. For air-gapped environments, deploy a mirror registry alongside Quay and configure repository mirroring to sync images from external registries on a schedule.
Key Features Deep Dive
Clair Security Scanning
Clair V4 (indexer/matcher architecture) automatically scans every image pushed to Quay against continuously updated vulnerability databases. Scans happen asynchronously — results appear in the Quay UI under each image tag. Supports indexing OCI and Docker v2 manifest formats.
| Capability | Detail |
|---|---|
| Scan trigger | Automatic on push; can re-scan existing images via API |
| Databases | NVD, Red Hat OVAL v2, OSV.dev, Ubuntu Tracker, Alpine SecDB, Debian Tracker |
| Output | CVE list with severity, fixed-in version, CVSS score |
| Integration | Notifications on new CVEs found in previously scanned images |
Robot Accounts
Robot accounts are service-level credentials scoped to specific repositories or organizations. They replace shared human credentials in CI/CD pipelines and automated deployments.
- Organization robots — access all repos in the org (admin sets per-repo permissions)
- Repository robots — scoped to a single repo, least-privilege
- Generate Kubernetes pull secrets directly from Quay UI for use as
imagePullSecrets
Repository Mirroring
Mirror external registries into Quay on a schedule. Essential for disconnected / air-gapped environments common in telco and government deployments.
- Mirror from Docker Hub, Red Hat registries, or any OCI registry
- Filter by tag pattern (regex) to mirror only needed tags
- Scheduled sync (hourly, daily, weekly)
- Mirrored repos are read-only in Quay — source of truth is upstream
Live Example — Mirroring from quay.io to Internal Quay
Mirror an upstream image (quay.io/rh_ee_swongpai/fast-localtime-check) into an internal Quay instance as repository swongpai/timesync. Set up a Robot Account for pull credentials, configure the mirror with a tag filter and sync schedule, trigger a sync, then watch the mirrored tag appear with a Clair scan.
Geo-Replication
Replicate image data across multiple storage backends in different geographic regions. All Quay instances share a single metadata database but store blobs locally for low-latency pulls.
- Single global namespace —
quay.example.com/org/repo:tagworks from any region - Each region stores its own copy of image layers
- Pulls served from nearest storage backend
- Requires shared PostgreSQL and shared Redis across all regions (or external managed equivalents)
Quota Management & Auto-Pruning
Control storage consumption per organization and repository to prevent unbounded growth.
- Set warning threshold and reject threshold per org
- Pushes rejected when quota exceeded
- Track consumption via Quay UI or API
- Auto-pruning policies — org- or repo-level rules that delete tags automatically by tag count (keep newest N) or tag age (delete older than X days); multiple policies with regex tag-pattern filters can coexist
- Combine with tag expiration (per-tag TTL) for full lifecycle control
What's New in Recent Quay Releases
| Version | Highlights |
|---|---|
| 3.13–3.14 | Enhanced auto-pruning: tag-pattern (regex) filters and multiple policies per org/repo. |
| 3.15 | Image pull statistics (FEATURE_IMAGE_PULL_STATS) — see how often and when tags are pulled. Superuser panel in the v2 UI. |
| 3.16 | v2 React-based UI becomes the default UI. |
Day-2 Operations
Upgrading, monitoring, and maintaining your OpenShift cluster over its lifetime.
Cluster Upgrade Flow
Control Plane Only Updates (formerly EUS-to-EUS)
Extended Update Support (EUS) releases are selected even-numbered minor versions with an extended support phase. A Control Plane Only update minimizes compute-node reboots between consecutive EUS releases by pausing all non-control-plane MachineConfigPools while the cluster completes two explicit minor-version updates: 4.y → 4.y+1 → 4.y+2.
The odd-numbered release is not bypassed: the cluster must reach it successfully before starting the target EUS update. Paused compute nodes remain on their earlier machine configuration until the target control plane is healthy and compatible layered Operators have been reviewed. Unpausing pools then applies the accumulated configuration, often with one compute-node reboot.
Update Channels
| Channel | Contents | Use |
|---|---|---|
stable-4.x | Thoroughly tested releases; delayed availability | Production clusters requiring maximum stability |
fast-4.x | All GA releases as soon as they pass CI | Non-production or early adopter environments |
candidate-4.x | Release candidates; may contain bugs | Pre-release testing only |
eus-4.x | Recommended updates and paths for an EUS target | Conventional EUS updates and eligible Control Plane Only paths |
Control Plane Only Update Outline: 4.20 → 4.22
# 0. Confirm 4.20 is healthy, fully updated, and offers the expected graph edges oc get clusterversion,clusteroperators oc get mcp oc adm upgrade # 1. Select the target EUS channel oc adm upgrade channel eus-4.22 # 2. Pause EVERY non-control-plane MCP (worker and any custom pools) oc patch mcp/worker --type merge -p '{"spec":{"paused":true}}' # Repeat for custom pools, for example: oc patch mcp/infra ... # 3. Update explicitly to a RECOMMENDED 4.21.z shown by "oc adm upgrade" oc adm upgrade --to=<recommended-4.21.z> # Wait until ClusterVersion and ClusterOperators are healthy at 4.21.z. # Review/update installed OLM Operators before the next minor update. # 4. Update explicitly to a RECOMMENDED 4.22.z shown by "oc adm upgrade" oc adm upgrade --to=<recommended-4.22.z> oc get clusterversion,clusteroperators # 5. When the 4.22 control plane is healthy, unpause pools one at a time oc patch mcp/worker --type merge -p '{"spec":{"paused":false}}' oc get mcp --watch
oc adm upgrade, read all conditional-update risks, back up etcd, verify Operator compatibility at both minor versions, and follow the official Control Plane Only update procedure. Do not leave pools paused: queued certificates, security fixes, and host configuration do not reach those nodes until the pools resume.
MachineConfig & MachineConfigPool
A MachineConfig (machineconfiguration.openshift.io/v1) is a declarative, Ignition-based specification for node OS configuration: files, systemd units, kernel arguments, container-runtime settings, and registry config. A MachineConfigPool (MCP) groups nodes by label (e.g. master, worker, or custom pools like infra) and the Machine Config Operator (MCO) merges all matching MachineConfigs into a single rendered MachineConfig, then rolls it out node-by-node respecting maxUnavailable.
This is the same cordon → drain → apply → reboot → uncordon sequence shown in the Cluster Upgrade Flow diagram above. Every cluster upgrade produces new MachineConfigs, and every MachineConfig change triggers the MCO rolling update.
Example MachineConfig (kernel argument)
apiVersion: machineconfiguration.openshift.io/v1 kind: MachineConfig metadata: labels: machineconfiguration.openshift.io/role: worker name: 99-worker-kargs-nosmt spec: kernelArguments: - nosmt # disable hyper-threading - audit=0 # disable kernel audit (example)
Example MachineConfigPool
apiVersion: machineconfiguration.openshift.io/v1 kind: MachineConfigPool metadata: name: infra spec: machineConfigSelector: matchExpressions: - key: machineconfiguration.openshift.io/role operator: In values: [worker, infra] nodeSelector: matchLabels: node-role.kubernetes.io/infra: "" maxUnavailable: 1 paused: false
etcd Backup
etcd is the key-value store that holds ALL cluster state — every resource, secret, config, and status. Regular backups are critical.
- Backup regularly to a secure location outside the cluster
- Run from any master node with a running etcd pod
- Backup during non-peak hours to minimize performance impact
- Do NOT backup before the first certificate rotation (24h after install)
# etcd backup command (run on any master node) sudo /usr/local/bin/cluster-backup.sh /home/core/assets/backup
etcd Restore Steps
Restoring etcd is a destructive operation that rolls the cluster back to the backup state. All changes after the backup are lost.
- Stop etcd on all control plane nodes
- Stop kube-apiserver on all control plane nodes
- Move etcd data directory to a backup location
- Run the recovery script on the recovery host with the backup snapshot
- Restart kubelet on all control plane nodes
- Turn off quorum guard to allow single-member bootstrap
- Force etcd redeployment to rebuild the cluster from the restored member
- Turn quorum guard back on after all members rejoin
- Force new rollout for kube-apiserver, kube-controller-manager, and kube-scheduler
OADP — Application Backup & Restore
OADP (OpenShift API for Data Protection) is the Red Hat-supported operator that packages Velero with CSI snapshots and file-system backup (Kopia/restic). It backs up namespaced Kubernetes resources + persistent volume data to S3-compatible object storage (AWS S3, ODF MCG/NooBaa, MinIO).
Contrast with etcd backup: etcd captures the entire cluster control-plane state as a single snapshot. OADP provides selective, application-level backup and restore — choose specific namespaces, label selectors, or resource types. OADP is also used for namespace migration and cluster-to-cluster migration.
DataProtectionApplication (DPA)
apiVersion: oadp.openshift.io/v1alpha1 kind: DataProtectionApplication metadata: name: velero-dpa namespace: openshift-adp spec: configuration: velero: defaultPlugins: - openshift # OpenShift-specific resource handling - aws # S3-compatible object storage - csi # CSI VolumeSnapshot integration nodeAgent: enable: true uploaderType: kopia # file-system backup (replaces restic) backupLocations: - velero: provider: aws default: true objectStorage: bucket: oadp-backups prefix: velero config: region: us-east-1 s3ForcePathStyle: "true" # required for MCG/MinIO s3Url: https://s3.openshift-storage.svc credential: name: cloud-credentials key: cloud
Backup & Restore CRs
apiVersion: velero.io/v1 kind: Backup metadata: name: myapp-backup namespace: openshift-adp spec: includedNamespaces: - myapp-prod storageLocation: velero-dpa-1 ttl: 720h # retain for 30 days defaultVolumesToFsBackup: false # use CSI snapshots by default
apiVersion: velero.io/v1 kind: Restore metadata: name: myapp-restore namespace: openshift-adp spec: backupName: myapp-backup includedNamespaces: - myapp-prod restorePVs: true
Essential Day-2 Commands
# Check cluster version and upgrade status oc get clusterversion oc adm upgrade # Check all cluster operators oc get co # Check node status and drain oc get nodes oc adm drain <node> --ignore-daemonsets --delete-emptydir-data # Check certificate expiry oc -n openshift-kube-apiserver-operator get secret kube-apiserver-to-kubelet-signer -o jsonpath='{.metadata.annotations.auth\.openshift\.io/certificate-not-after}' # etcd backup oc debug node/<master-node> -- chroot /host /usr/local/bin/cluster-backup.sh /home/core/backup
must-gather & Insights
oc adm must-gather collects cluster-wide diagnostic data — logs, resource definitions, events, and operator status — into a local tarball for Red Hat support case attachment. It supports targeted collection via --image for specific components (ODF, networking, OADP, etc.). For individual resources, oc adm inspect exports a single resource or namespace. At the node level, sosreport (via oc debug node) collects OS-level diagnostics.
The Insights Operator runs continuously, sending anonymized cluster telemetry to console.redhat.com. It surfaces proactive risk recommendations, security advisories, and upgrade readiness checks directly in the OpenShift web console. This data is part of the broader Telemetry system and can be disabled in disconnected environments.
Diagnostic Tools Comparison
| Tool | What It Collects | When to Use |
|---|---|---|
oc adm must-gather | Cluster-wide: operator logs, CRDs, events, node status, image info. Extensible via --image for ODF, SR-IOV, Logging, etc. | Opening a Red Hat support case; broad cluster diagnostics |
oc adm inspect | Single resource or namespace: YAML definitions, events, related objects | Quick inspection of a specific resource (e.g. a failing ClusterOperator) |
sosreport (via debug node) | OS-level: system logs, hardware info, kernel config, network state, storage | Node-level issues: kernel panics, storage failures, network driver problems |
| Insights Operator | Anonymized telemetry: cluster version, operator health, configuration risks, CVE exposure | Proactive — runs automatically; check console.redhat.com for recommendations |
Common Diagnostic Commands
# Collect full cluster diagnostics (default must-gather) oc adm must-gather # Targeted must-gather for ODF oc adm must-gather --image=registry.redhat.io/odf4/ocs-must-gather-rhel9:latest # Targeted must-gather for networking oc adm must-gather --image=registry.redhat.io/openshift4/network-tools-rhel8:latest # Inspect a specific ClusterOperator oc adm inspect clusteroperator/kube-apiserver # Inspect an entire namespace oc adm inspect ns/openshift-monitoring # Node-level sosreport via debug pod oc debug node/<node-name> chroot /host sosreport --batch --tmp-dir /host/var/tmp # Check Insights status oc get clusteroperator insights oc get insightsoperator cluster -o yaml
--dest-dir to control output location.
Compliance Operator
The Compliance Operator enables automated compliance scanning and remediation against security benchmarks (CIS, NIST, PCI-DSS).
Network Observability
OpenShift Virtualization
Layered Operator and entitled capability for running virtual machines alongside containers on the same cluster.
KubeVirt Architecture
OpenShift Virtualization is Red Hat's productized distribution of the upstream KubeVirt project. It extends the Kubernetes API with VM-shaped CRDs and wraps QEMU/KVM inside ordinary pods, so a VM is scheduled, monitored, and governed exactly like any other workload.
virtctl CLI plugin (installed alongside the operator) wraps common VM operations — virtctl start/stop/restart, virtctl console (serial console), virtctl vnc, and virtctl migrate. Under the hood it manipulates the same VirtualMachine/VMI CRDs.
apiVersion: kubevirt.io/v1 kind: VirtualMachine metadata: name: fedora-vm namespace: my-vms spec: running: true template: metadata: labels: kubevirt.io/domain: fedora-vm spec: domain: cpu: cores: 2 resources: requests: memory: 4Gi devices: disks: - name: rootdisk disk: bus: virtio - name: cloudinitdisk disk: bus: virtio interfaces: - name: default masquerade: {} # default pod network binding networks: - name: default pod: {} volumes: - name: rootdisk dataVolume: name: fedora-vm-rootdisk - name: cloudinitdisk cloudInitNoCloud: userData: | #cloud-config user: fedora password: changeme chpasswd: { expire: False } dataVolumeTemplates: - metadata: name: fedora-vm-rootdisk spec: source: registry: url: "docker://quay.io/containerdisks/fedora:39" storage: accessModes: [ReadWriteOnce] resources: requests: storage: 30Gi
You rarely author a VirtualMachineInstance (VMI) directly — virt-controller creates one automatically from the VM's template whenever spec.running becomes true, the same way a Deployment creates ReplicaSets/Pods. It disappears when the VM stops.
# oc get vmi fedora-vm -n my-vms -o yaml (excerpt) apiVersion: kubevirt.io/v1 kind: VirtualMachineInstance metadata: name: fedora-vm ownerReferences: - kind: VirtualMachine name: fedora-vm status: phase: Running nodeName: worker-1 interfaces: - ipAddress: 10.128.2.55 interfaceName: eth0
Live Migration
Live migration moves a running VM from one node to another with (typically) sub-second downtime — no reboot, no dropped connections. virt-handler on the source and destination nodes coordinate the copy while virt-controller tracks overall progress via a VirtualMachineInstanceMigration object.
ReadWriteMany (RWX) StorageClass so both the source and destination nodes can mount it simultaneously — e.g. ODF's ocs-storagecluster-ceph-rbd-virtualization. With RWO-only storage, the VM can still be evicted and restarted elsewhere, but that causes downtime (evictionStrategy: None vs LiveMigrate).
# Trigger a live migration virtctl migrate fedora-vm -n my-vms # ...or apply the CR directly apiVersion: kubevirt.io/v1 kind: VirtualMachineInstanceMigration metadata: name: migrate-fedora-vm namespace: my-vms spec: vmiName: fedora-vm
VM Networking & Storage
VMs reuse the same cluster networking and storage stack as containers — there is no separate virtualization network or datastore to manage.
Networking — Interface Bindings
| Binding | Network | Use Case |
|---|---|---|
| masquerade | Default pod network (NAT) | Simplest option — outbound access via the pod network. Default for most VMs. |
| bridge | Multus secondary network (L2) | VM needs its own MAC/IP directly on the physical LAN — e.g. legacy apps expecting a routable VM IP. |
| SR-IOV | Multus + SR-IOV Network Operator | Near line-rate NIC passthrough for high packet-rate or latency-sensitive VM workloads. |
See the Networking & Routes section for the full Multus CNI plugin comparison (macvlan, bridge, SR-IOV, IPVLAN).
Storage — DataVolume & CDI
The Containerized Data Importer (CDI) populates a PVC with a VM disk image before the VM starts, tracked by a DataVolume CRD.
| Source Type | Example |
|---|---|
| registry | Container disk image, e.g. quay.io/containerdisks/fedora:39 |
| http | qcow2/raw image fetched from a URL |
| pvc (clone) | Clone an existing PVC — fast way to fan out a golden image |
| upload | virtctl image-upload streams a local file into a new DataVolume |
apiVersion: cdi.kubevirt.io/v1beta1 kind: DataVolume metadata: name: rhel9-import namespace: my-vms spec: source: http: url: "https://example.com/images/rhel9.qcow2" storage: accessModes: [ReadWriteMany] # RWX needed for live migration resources: requests: storage: 40Gi storageClassName: ocs-storagecluster-ceph-rbd-virtualization
See the Storage & CSI Drivers section for StorageClass and CSI driver fundamentals.
Migration Toolkit for Virtualization (MTV)
MTV imports VMs from an existing hypervisor (primarily VMware vSphere, also oVirt/RHV and OpenStack) into OpenShift Virtualization. It connects to the source as a Provider, and a Plan groups the VMs to migrate and the target namespace/storage/network mappings; running the Plan creates a Migration CR that CDI executes disk-by-disk.
GitOps & Pipelines
Layered Operators for declarative delivery with OpenShift GitOps (Argo CD) and CI automation with OpenShift Pipelines (Tekton).
OpenShift GitOps (ArgoCD)
OpenShift GitOps deploys ArgoCD as an operator-managed instance (namespace openshift-gitops). Git becomes the single source of truth: ArgoCD continuously compares the manifests in a repo against the live state of the cluster and reconciles any difference.
Application can manage a set of child Application objects (app-of-apps), and ApplicationSet template-generates one Application per cluster/environment from a generator (list, cluster, Git directory, etc). ACM builds on ApplicationSet + Placement to drive multi-cluster delivery from a hub — see the ACM section for the full push/pull architecture.
apiVersion: argoproj.io/v1alpha1 kind: Application metadata: name: my-app namespace: openshift-gitops spec: project: default source: repoURL: https://github.com/my-org/my-app-manifests.git targetRevision: main path: overlays/production destination: server: https://kubernetes.default.svc namespace: my-app syncPolicy: automated: prune: true # delete resources removed from Git selfHeal: true # revert manual cluster drift syncOptions: - CreateNamespace=true
OpenShift Pipelines (Tekton)
OpenShift Pipelines is a Kubernetes-native CI engine built on Tekton. Every pipeline step runs as a container in a pod — there is no separate build server to manage.
- Task — an ordered list of Steps (containers). The smallest reusable unit — e.g.
git-clone,buildah,openshift-client. - Pipeline — a DAG of Tasks with ordering (
runAfter) and shared Workspaces (PVC-backed) for passing files between Tasks. - PipelineRun / TaskRun — an execution instance. Each Task in a run becomes a TaskRun, which becomes a pod.
- Trigger —
EventListener+TriggerBinding+TriggerTemplateturn an inbound webhook (e.g. GitHub push) into a new PipelineRun.
oc get pipelinerun / oc get taskrun to watch execution, or the web console's Pipelines pages for the visual DAG.
apiVersion: tekton.dev/v1 kind: Pipeline metadata: name: build-and-deploy spec: params: - name: git-url workspaces: - name: shared-workspace tasks: - name: fetch-source taskRef: { name: git-clone } workspaces: [{ name: output, workspace: shared-workspace }] params: [{ name: url, value: $(params.git-url) }] - name: build-image runAfter: [fetch-source] taskRef: { name: buildah } workspaces: [{ name: source, workspace: shared-workspace }] - name: deploy runAfter: [build-image] taskRef: { name: openshift-client } params: [{ name: SCRIPT, value: "oc rollout restart deploy/my-app" }] --- apiVersion: tekton.dev/v1 kind: PipelineRun metadata: generateName: build-and-deploy- spec: pipelineRef: { name: build-and-deploy } params: - name: git-url value: https://github.com/my-org/my-app.git workspaces: - name: shared-workspace volumeClaimTemplate: spec: accessModes: [ReadWriteOnce] resources: { requests: { storage: 1Gi } }
Helm vs Operator vs GitOps — When to Use Which
| Approach | What It Is | Best For |
|---|---|---|
| Helm | Templated YAML packaged as a chart; installed/upgraded imperatively (helm install/upgrade) or via ArgoCD as a source type. | Parameterized app packaging & reuse across environments. No ongoing reconciliation by itself. |
| Operator (OLM) | A controller + CRDs that encode operational knowledge for one application (upgrades, backups, failover). See Operators & OLM. | Stateful, complex apps that need day-2 lifecycle automation beyond "apply YAML" — databases, message queues, the platform itself. |
| GitOps (ArgoCD) | Continuous reconciliation of a Git repo's declared state against the live cluster, with drift detection and self-heal. | The delivery mechanism for everything above — deploying Helm charts, Operator subscriptions, or plain manifests, across any number of clusters, with a full audit trail. |
Application deploys it (as a Helm source), and Operators manage any stateful dependencies the app needs. GitOps is the delivery layer that ties Helm charts, Operator subscriptions, and raw manifests together under one reconciliation loop.
⚠️ Unofficial Document — This content is not affiliated with, endorsed by, or officially associated with Red Hat, Inc. or IBM. It is created for educational and reference purposes only. OpenShift, Red Hat, and related trademarks are the property of Red Hat, Inc.